Make felt gingerbread ornaments with me and JOANN!
/ | Leave a Comment
I’m a bit late to blog about this, but this is happening 1 more time tomorrow, December 18, at 6pm ET. In collaboration with Joann & Creativebug, I’ll be teaching a free online class on how to make super cute felt gingerbread ornaments! Click here to RSVP and sign up!
You probably already have most of the supplies at home, and it’s very easy to substitute various trims and buttons. I do love these little DIY peppermint buttons, though. I kind of want to put them on everything!
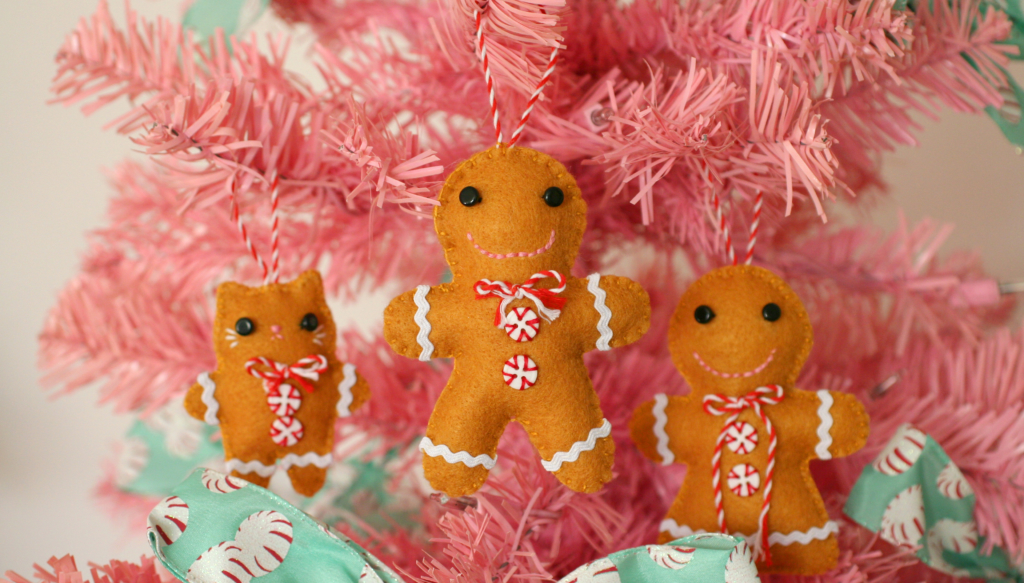
You also have so much freedom to design whatever shapes of felt cookies you want! That little kitty cat cookie was a last-minute addition but has been getting so much love on Instagram. You still have time to hand-sew a bunch for your own tree or for gifts!

Here is a materials list for the class. Don’t forget to RSVP so that you can the link to the free class.
- 1 sheet of brown or tan felt
- ¼ inch baby rick rack in white
- 12 inches of twine, string, thin ribbon, or yarn
- 2 x 3/8 inch white buttons – these buttons must have 4 holes
- 2 x ¼ inch black buttons for eyes
- Black embroidery floss or sewing thread
- Red embroidery floss
- Brown or tan embroidery floss to match your felt
- Pink embroidery floss
- Small amount of polyester stuffing
Tools
- Cereal box, cardboard, cardstock, or regular paper
- Ruler
- Pen or pencil
- Fabric marking tool
- Paper scissors
Audrey II Halloween Tree from Little Shop of Horrors
/ | 29 Comments on Audrey II Halloween Tree from Little Shop of Horrors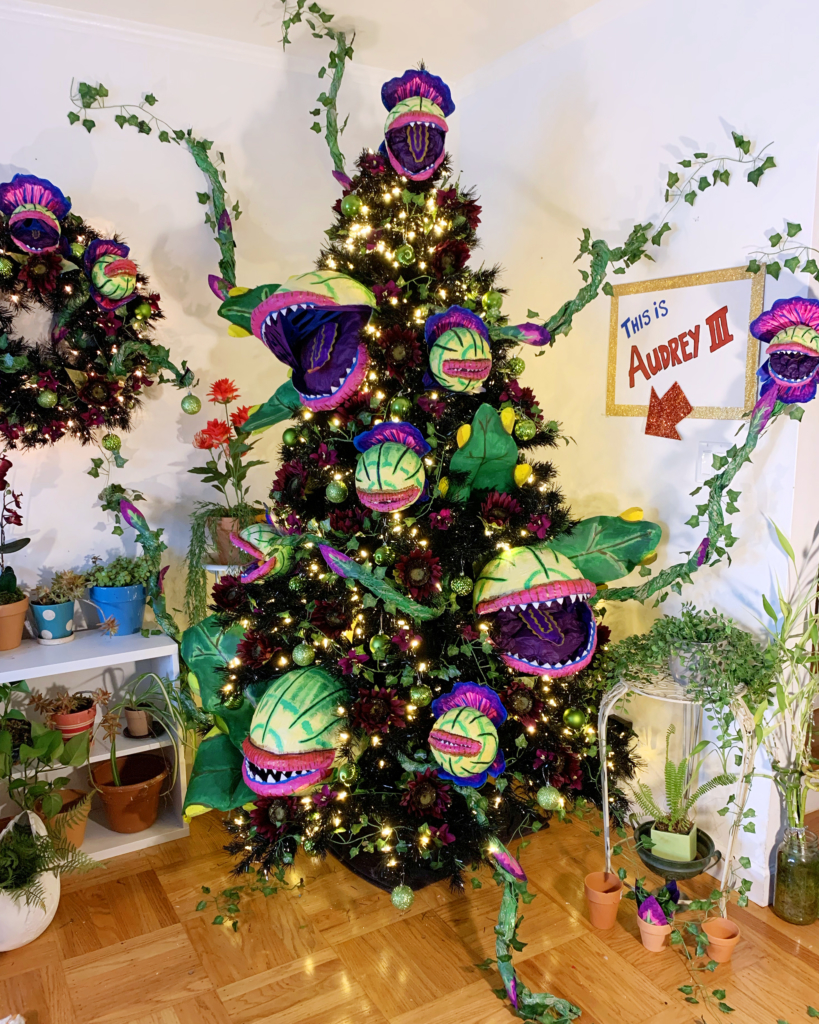

“Excuse me, but I couldn’t help but notice that strange and interesting plant in the window!”
Treetopia invited me to join their “13 Haunting Tales” Halloween tree campaign, and even though I had just completed my edible ornaments tree, I loved the idea of decorating my 7.5 foot Tuxedo Black in the theme of a favorite/classic Halloween character.
Continue readingMonster-Themed Halloween Tree with Edible Ornaments
/ | 4 Comments on Monster-Themed Halloween Tree with Edible Ornaments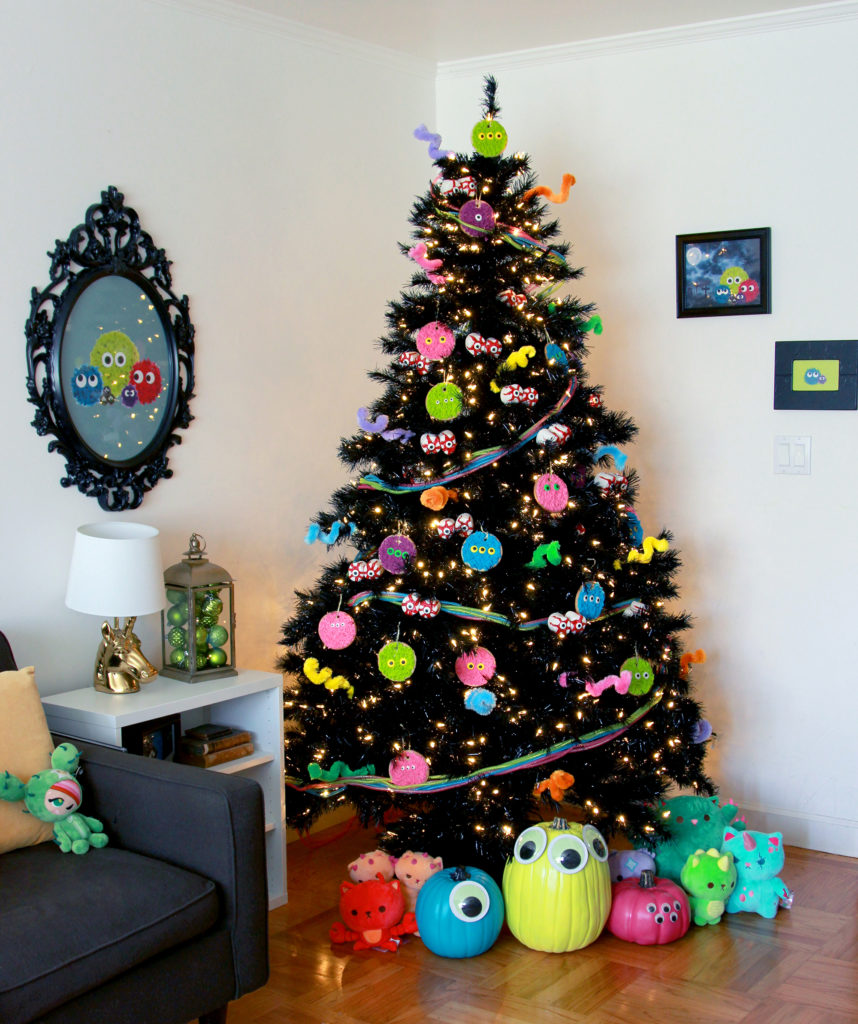

You can have a lot of fun decorating a Halloween tree! I went with a colorful monster theme for mine, PLUS most of my ornaments are EDIBLE. Treetopia graciously gave me a pre-lit Tuxedo Black faux Christmas tree. This one is 7.5 feet tall which made me realize my living room ceiling is not that high :P. But the black color is a very nice blank canvas for all of your spooky Halloween scenes.
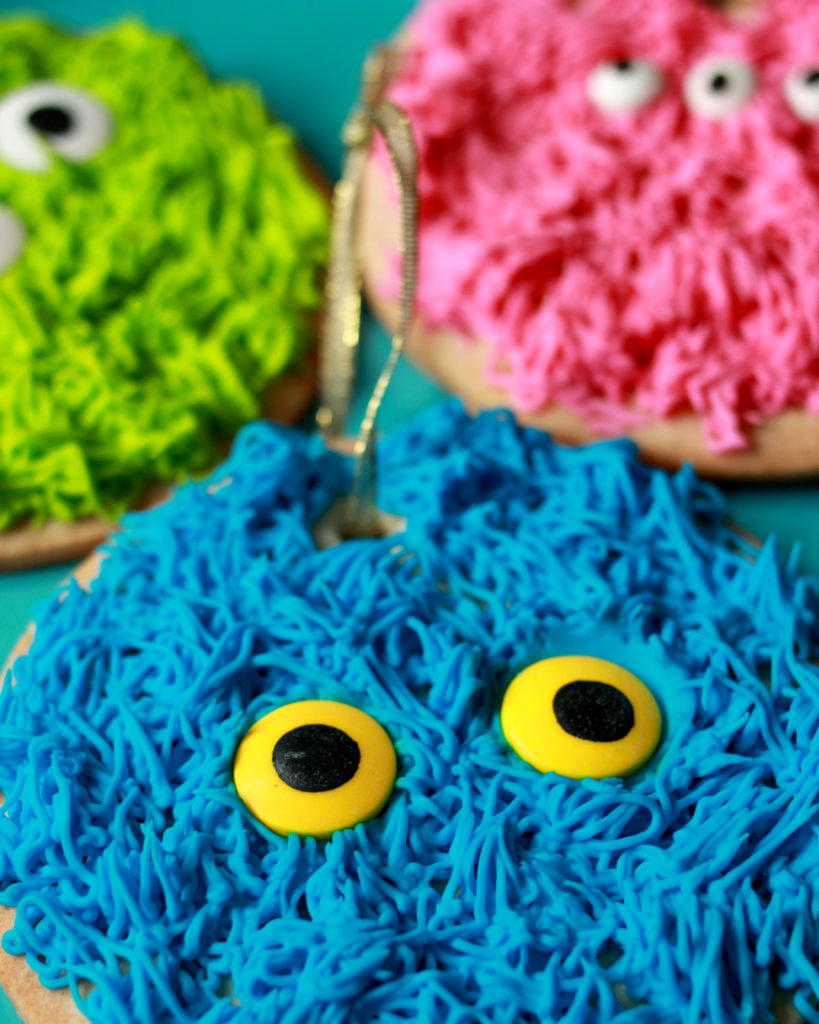
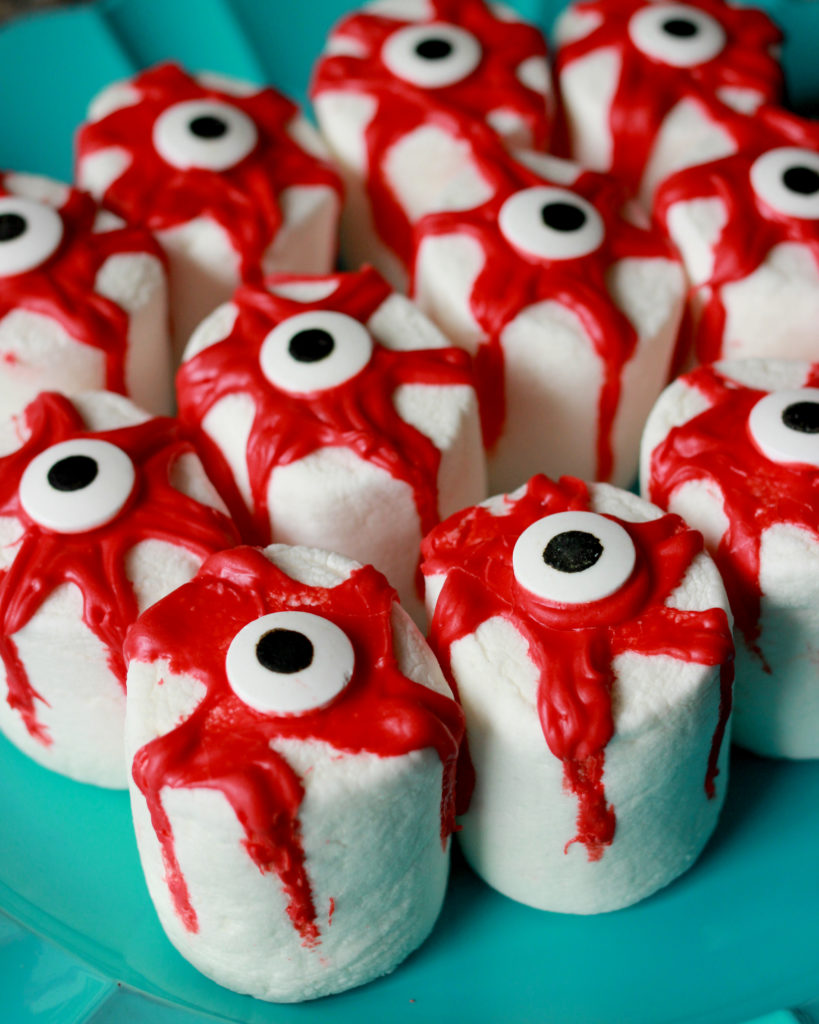
I baked colorful monster sugar cookies and I also put together some gigantic marshmallow bloody eyeballs. I gotta tell you that the house smelled really good!
Continue readingSucre Fleuf! A crocheted bakery at Sweet Tooth Hotel
/ | 29 Comments on Sucre Fleuf! A crocheted bakery at Sweet Tooth Hotel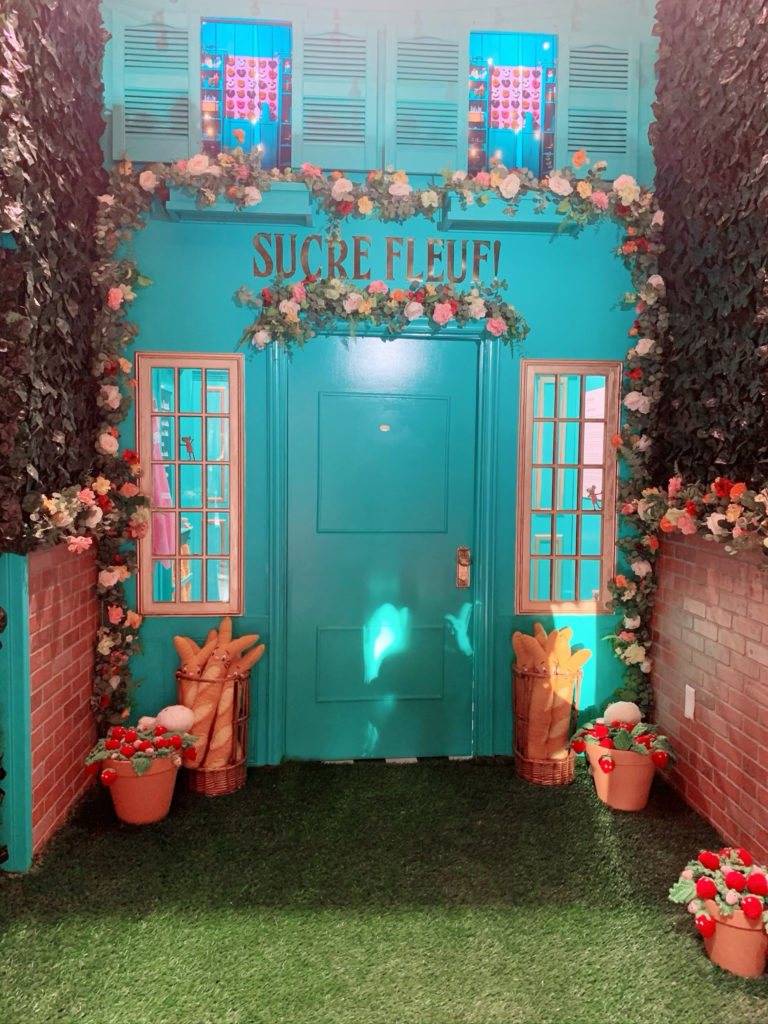
I know that I’ve been a terrible blogger and haven’t written here since December, but I spent Nov 2019 – June 2020 developing and working on my first crochet installation. I also left my job in social media and now work full time helping a company create video content for artists and makers. But let me tell you all about the installation “Sucre Fleuf!” now on exhibition at Sweet Tooth Hotel in Dallas, TX as part of a group fiber art show called Intangible.
This is the first year that the Craft Yarn Council has offered an artist in residency for a handful of amazing female fiber artists to unleash their dreams and creativity in yarn. I’m so honored to be part of this!
As I mentioned, we have all been working on our spaces since late 2019. We then met up in Dallas in March for a week to install our pieces, get to know each other, and check out each other’s works in progress. In the show, you’ll find crocheting, knitting, tufting, weaving, latch-hooking, all manner of art in yarn form! It is truly a one-of-a-kind experience.
I’ll share photos of the other artists spaces later (check out Sweet Tooth’s Instagram), but for now, I thought I’d let you know what I worked on for 8-9 months. I know you will ask if the patterns will be available, and yes, that is my next project. I want to try self-publishing a little book of crochet patterns filled with bread, cakes, and pastries. Right now my patterns are in a really rough form with not-so-great photography. It’s really re-making the projects and taking photos that makes pattern-writing a whole time-consuming production!
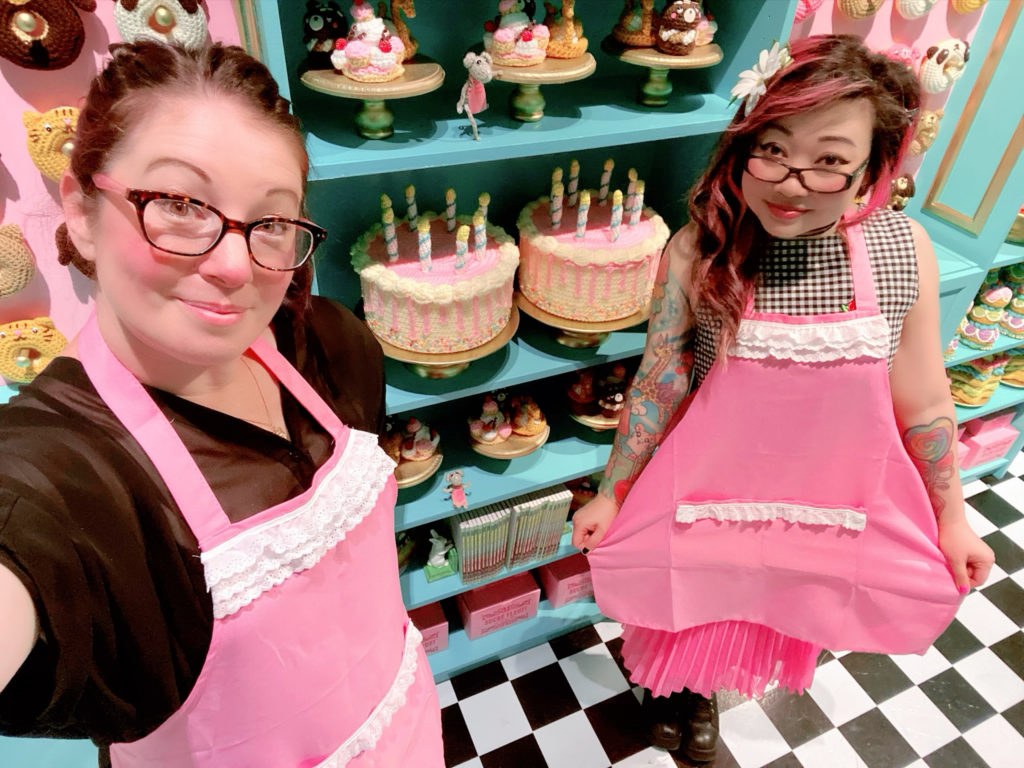
Here’s a little video walk-through I made on my phone when Manda and I visited the show in June. Due to Covid 19, we were very careful, and were only in Dallas for less than 24 hours before coming home. I felt very lucky she was able to travel with me. It made the trip much less scary!
When I was first asked to participate, I kept thinking that I had to work BIG, on a large scale. However, since I live in California and the show is in Dallas, the idea of shipping something very large also seemed daunting. I sketched a few different proposals for the gallery, and ultimately I realized that my creative wheelhouse is in scarves and amigurumi, and then the idea for Sucre Fleuf! was born. “Sucre” means sugar and “Fleuf” is a a word I sort of made-up that sounds French-ish and refers to the fluff of the stuffing I use and the fluff of a delicious cake. It’s also a bit of a riff on “Sacre Bleu!”
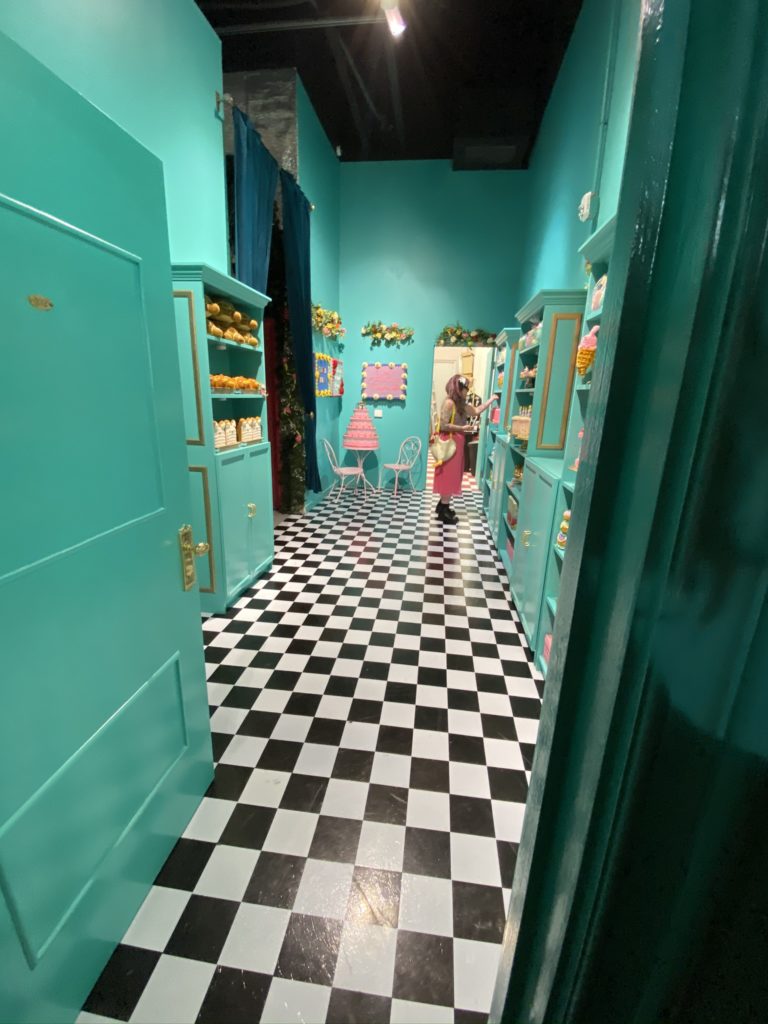
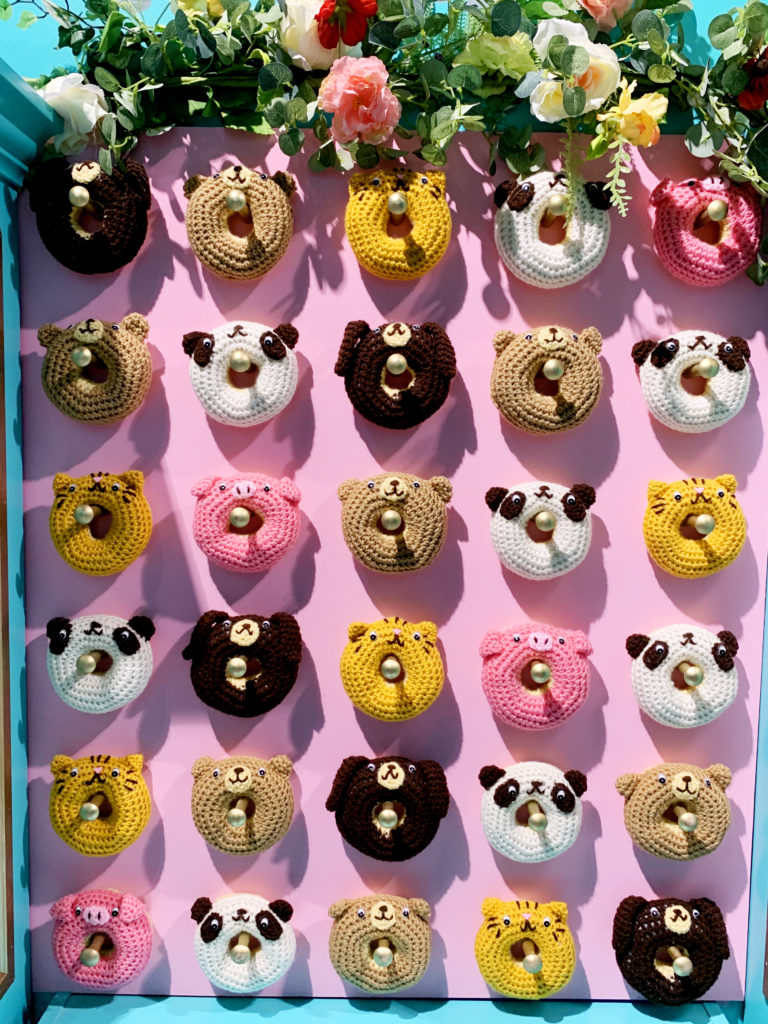
It was quite an experience to sketch something out in Photoshop and to see it come to life in reality. Everyone at Sweet Tooth was so helpful. It was their team that actually built out the whole space and painted everything. I just had to come in and arrange all the crocheted pieces. I watched someone put together the pegs on the donut wall and that already seemed like complete magic to me!
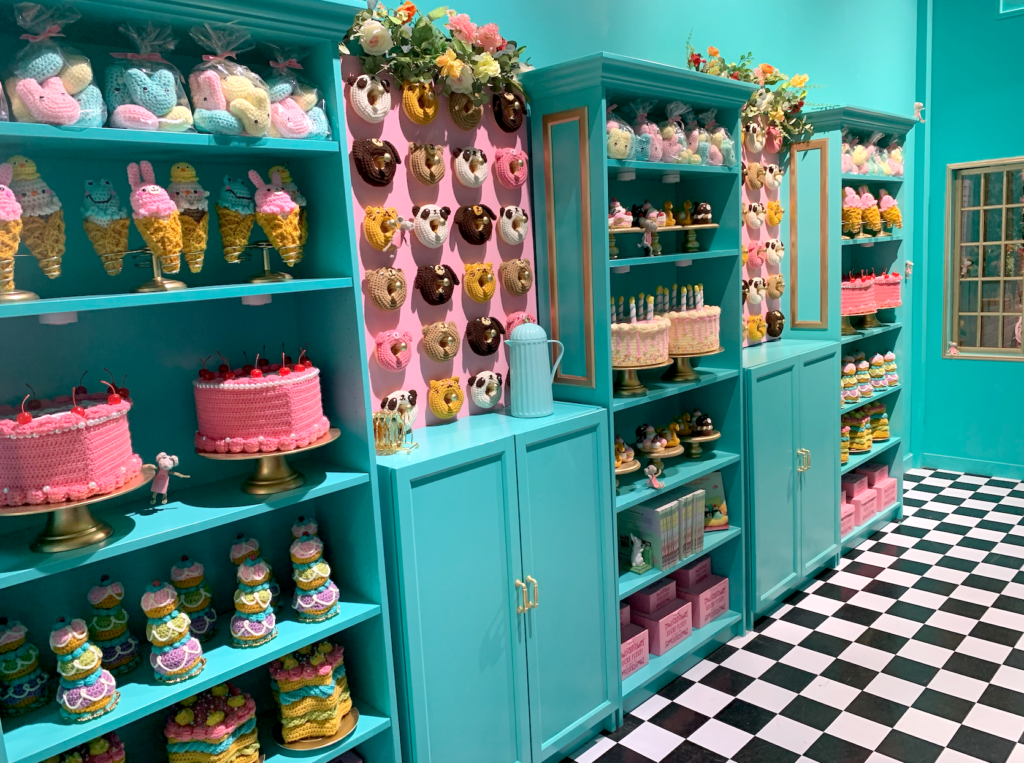
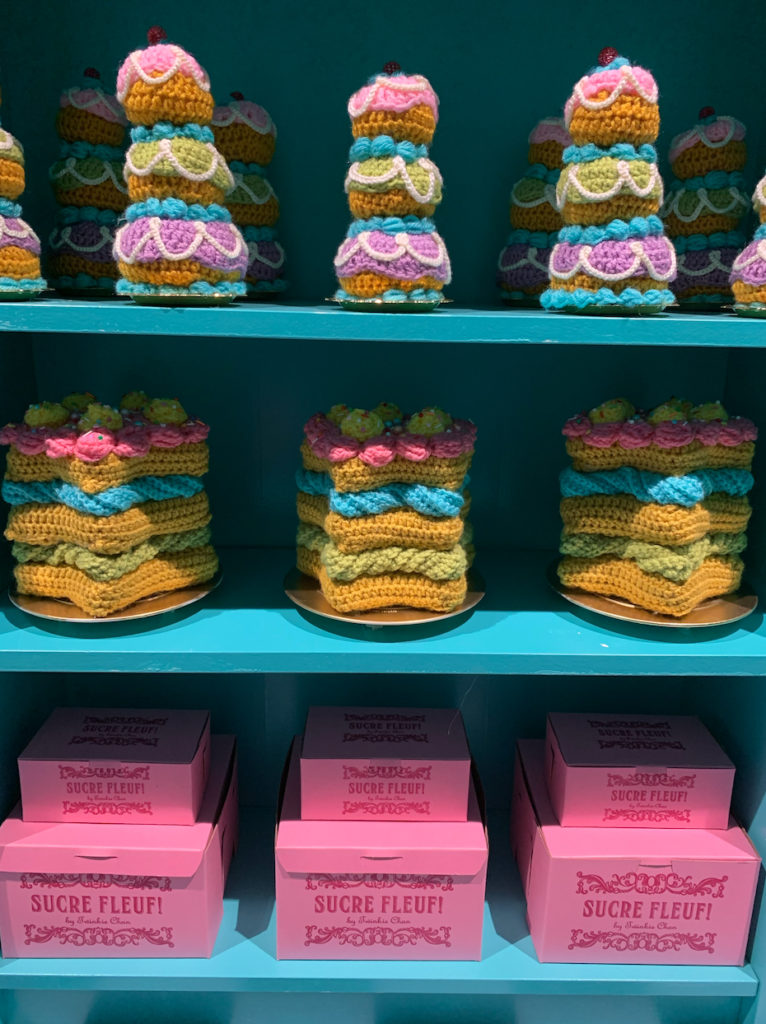
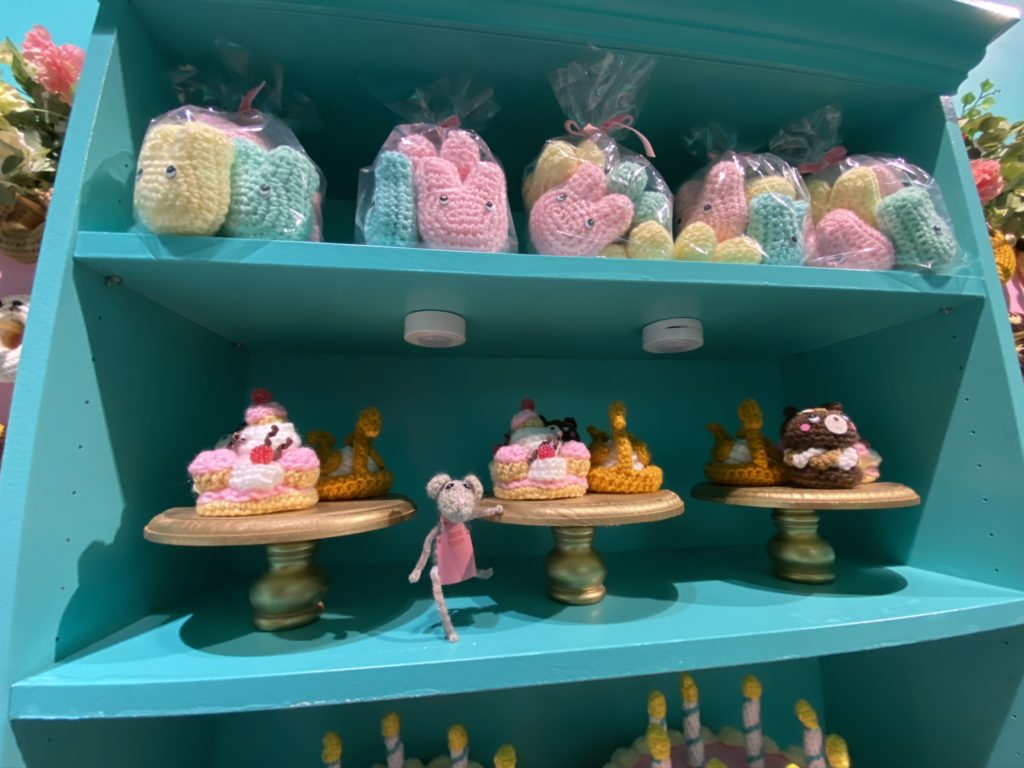
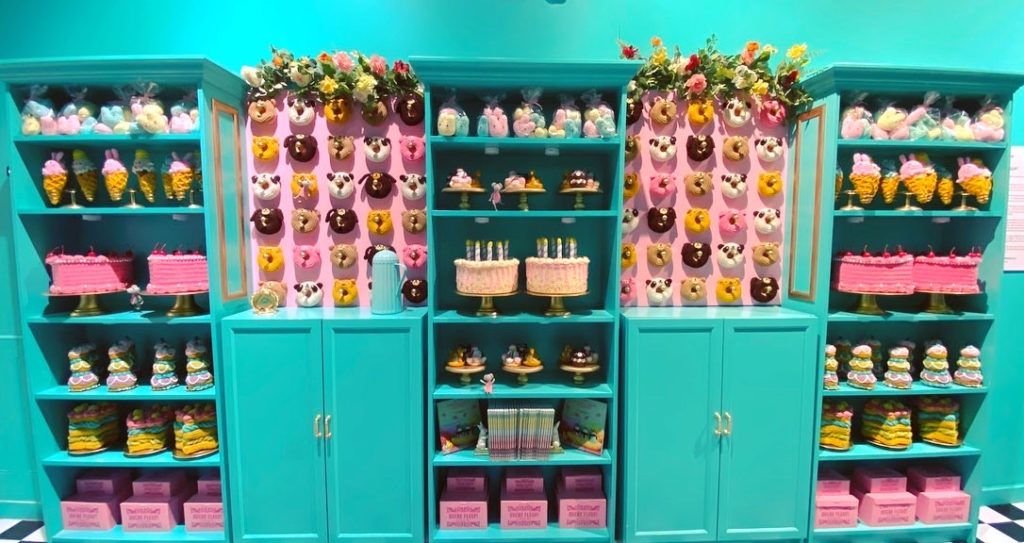
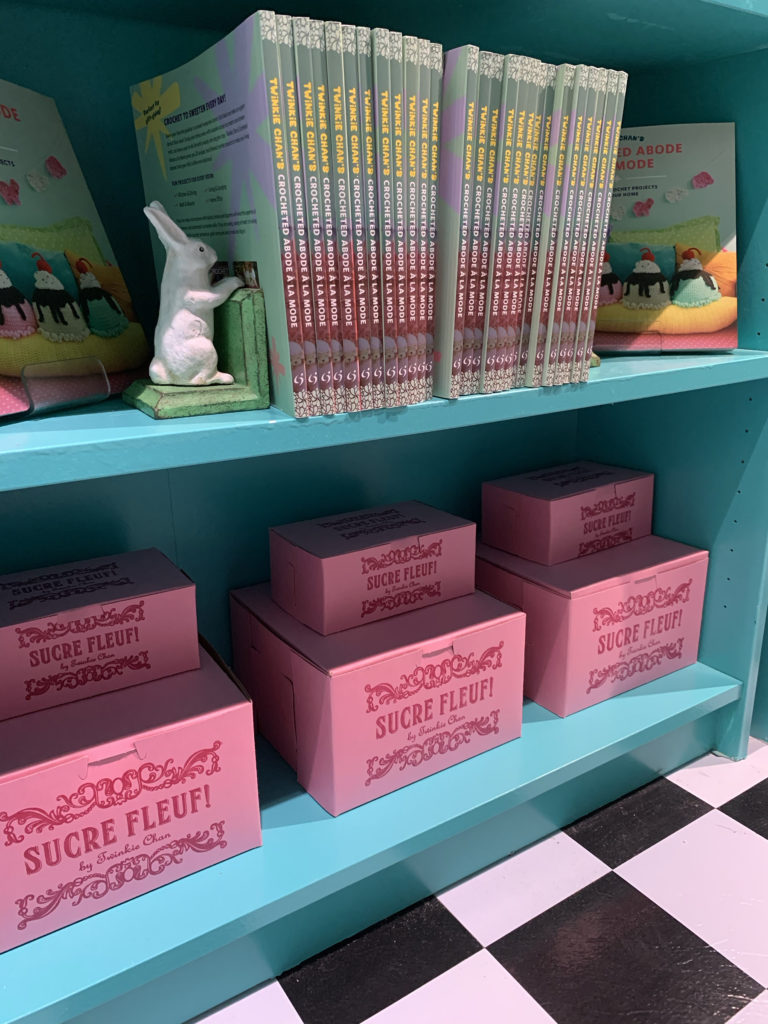
This is the patisserie side of the bakery, filled with super cute sweets. Bags of pastel marshmallow bunnies, assorted ice cream cone friends, big heart cakes and birthday cakes, cream puff rosters, star-shaped cakes, and little pastries like tiny bear cakes, swan cream puffs, and raspberry St. Honores. Oh yeah, and two donut walls!
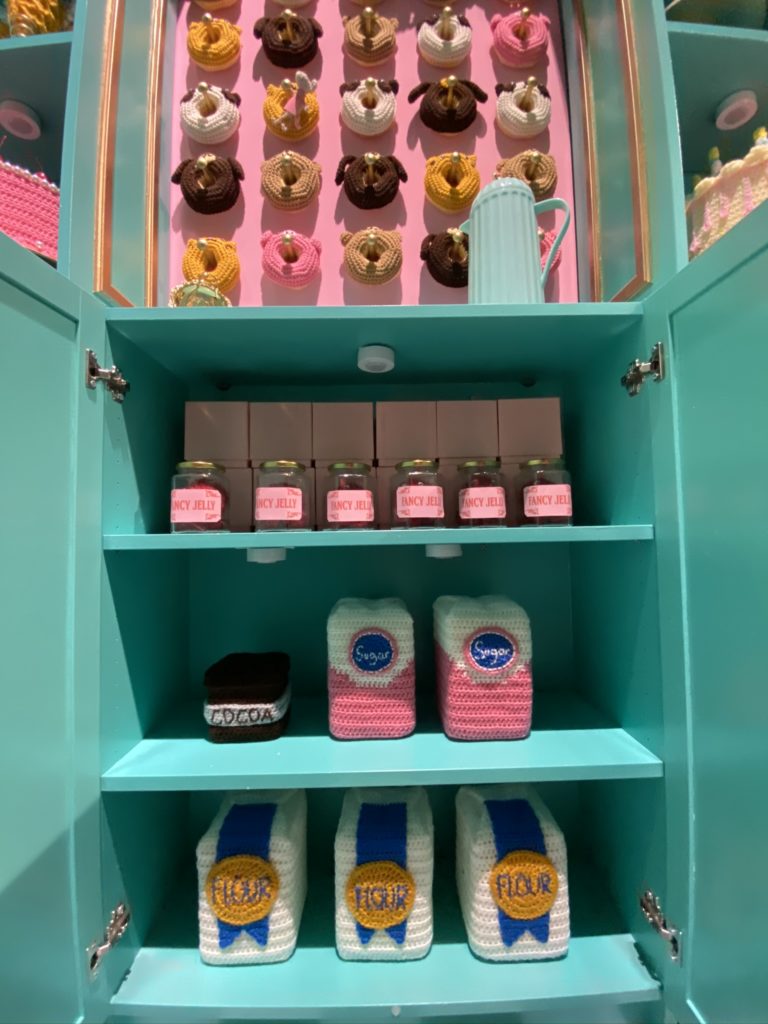
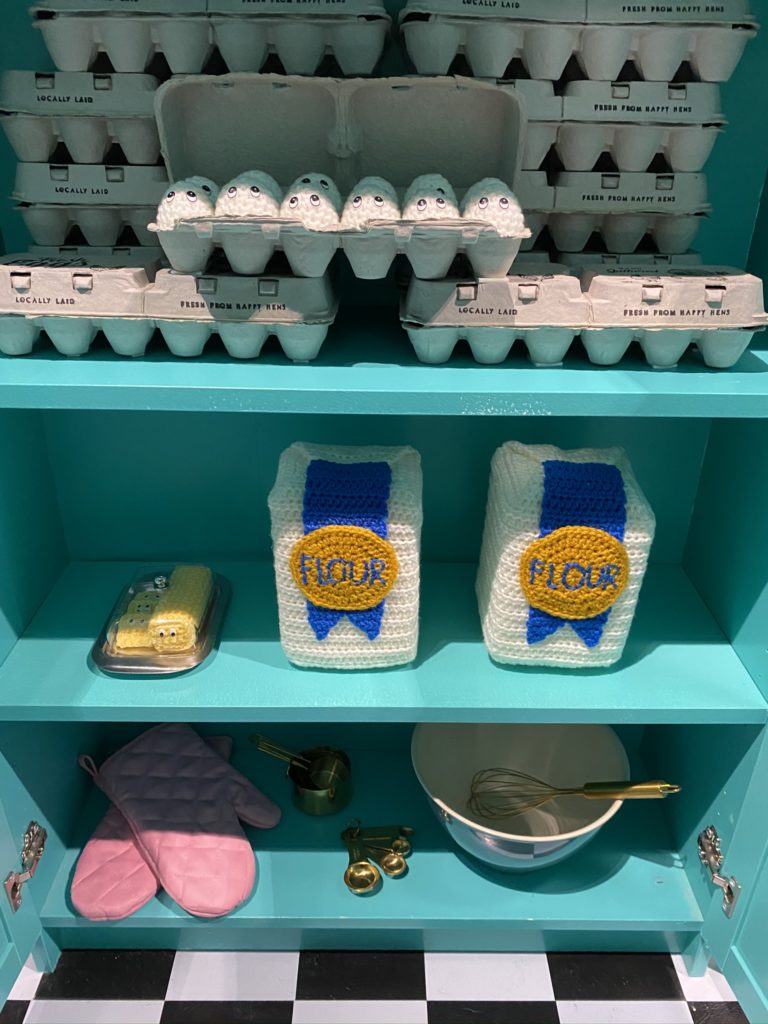
Inside the cabinets you’ll find fancy jellies and baking supplies. I love these squishy bags of flour and sugar! And I need to make more little pats of butter!
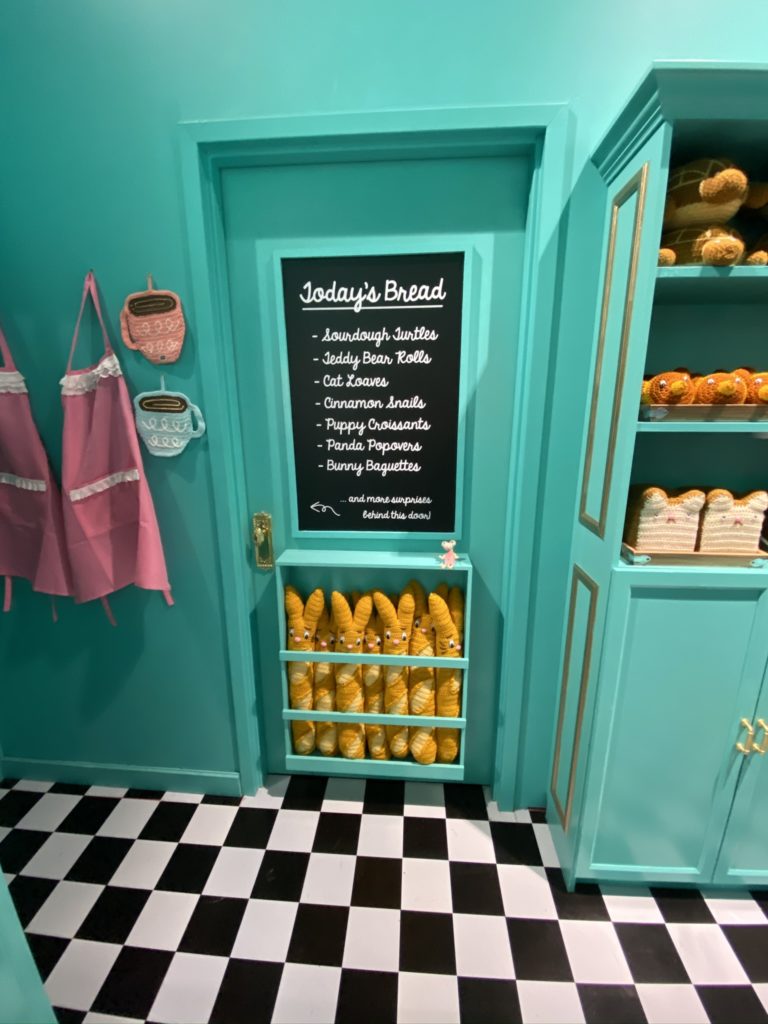
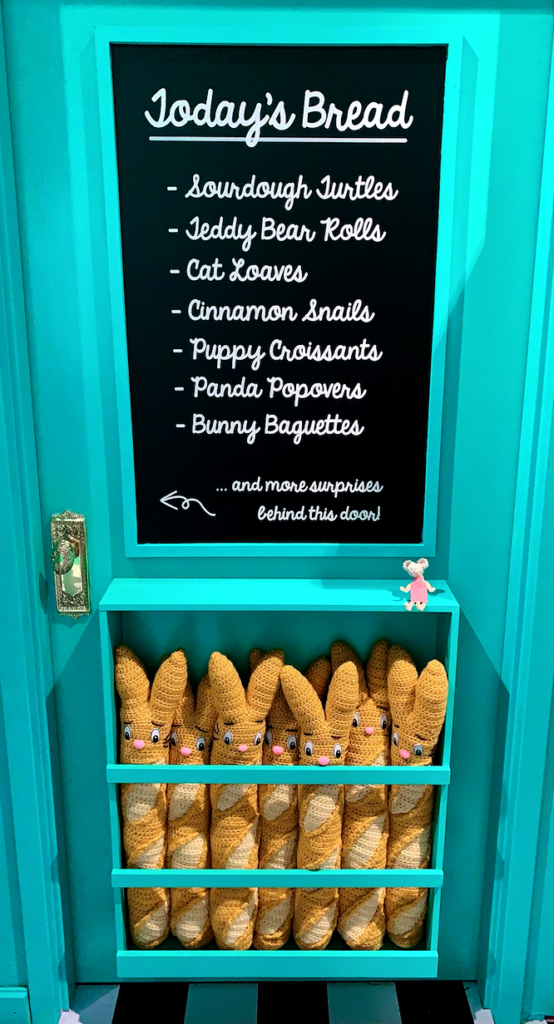
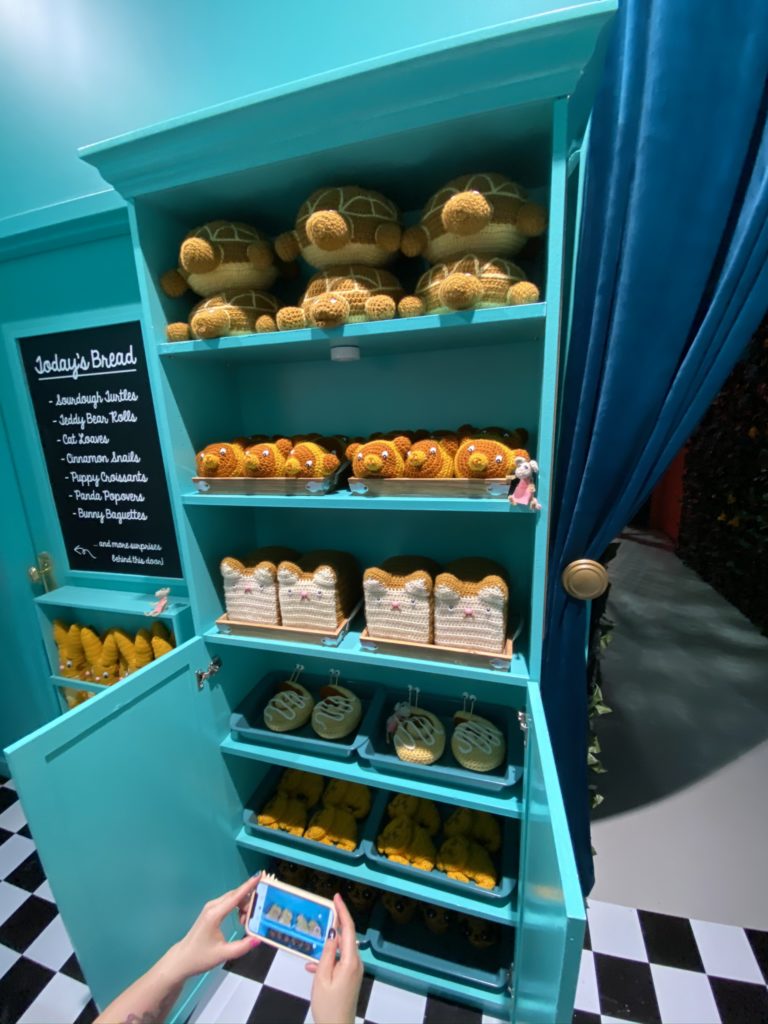
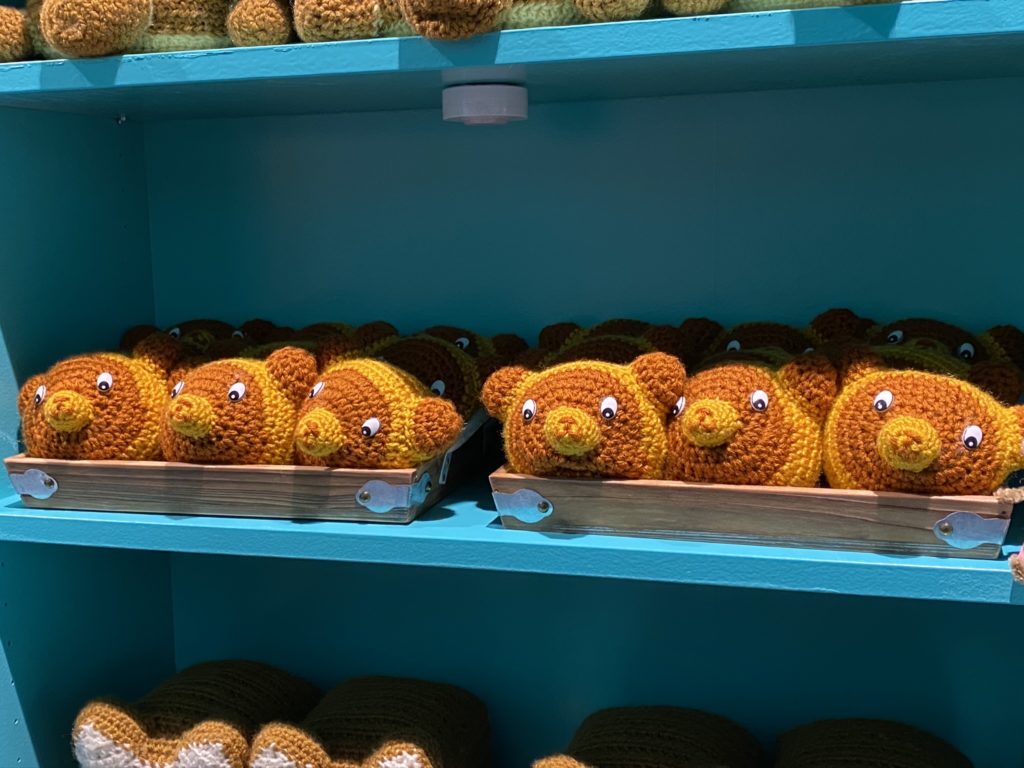
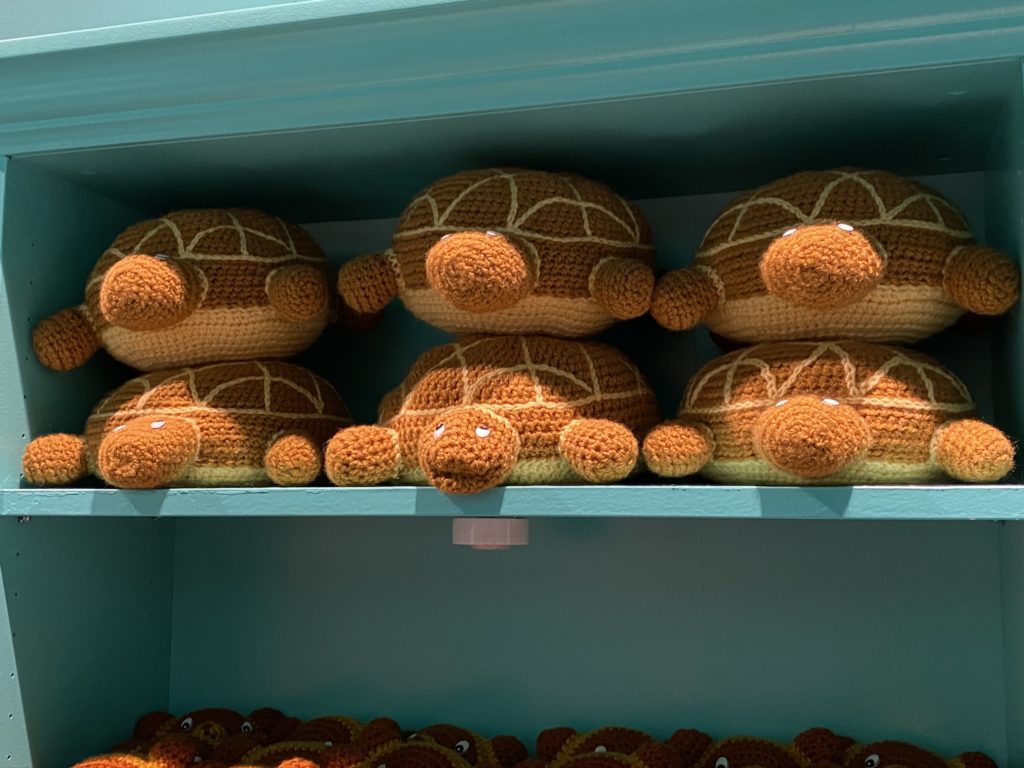
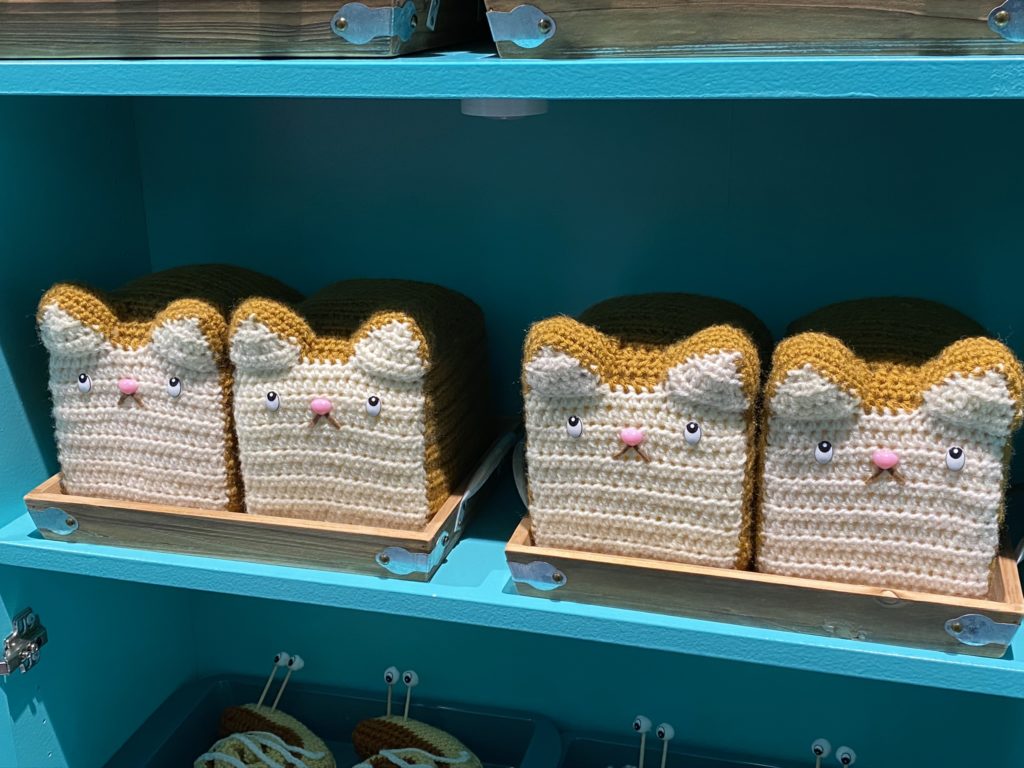
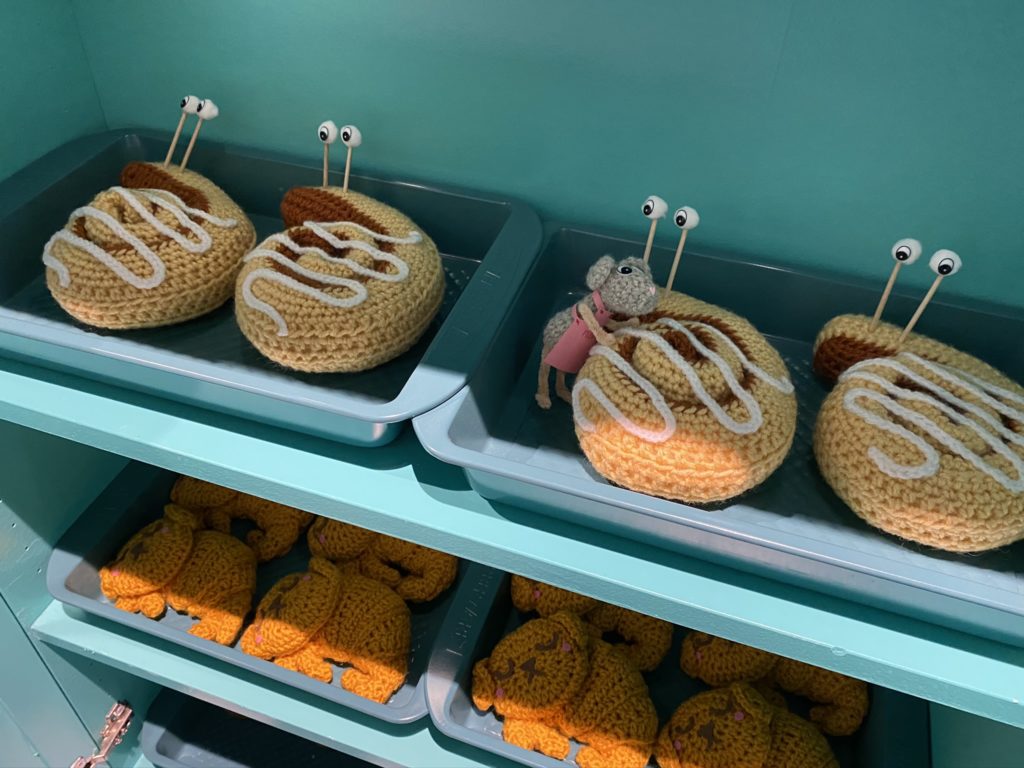
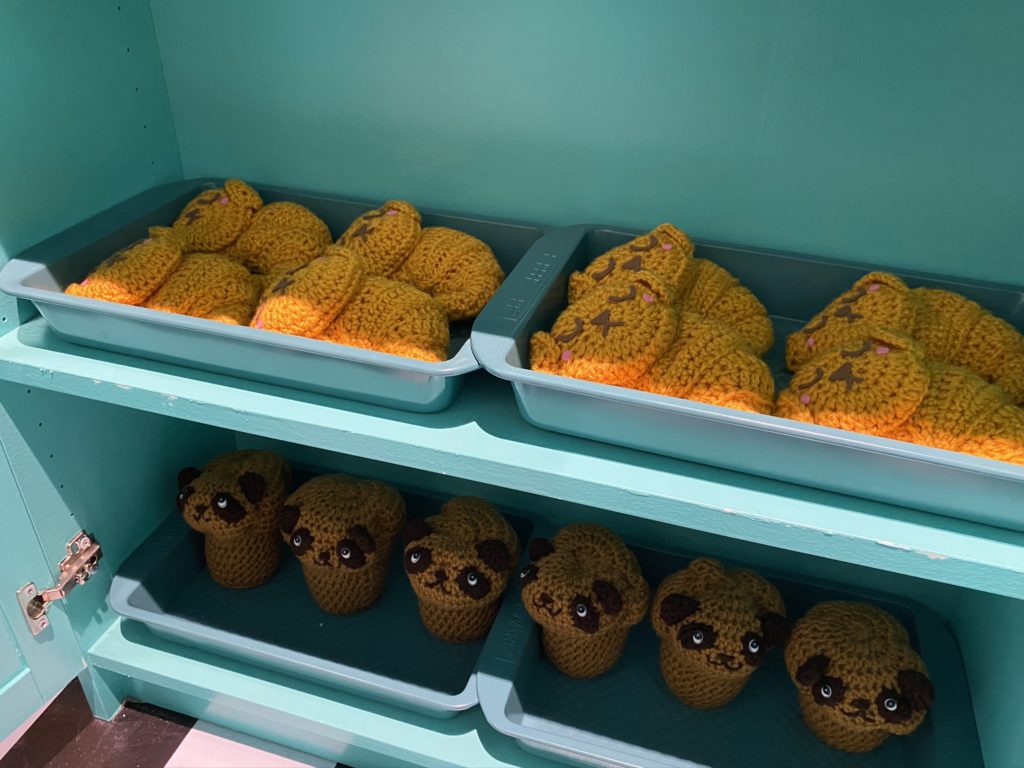
The other side of the bakery is the boulangerie, where you’ll find bunny baguettes, sourdough turtles, cat loaves, and teddy bear bread rolls. In the cabinet are sleepy pup croissants, cinnamon snails, and panda popovers.
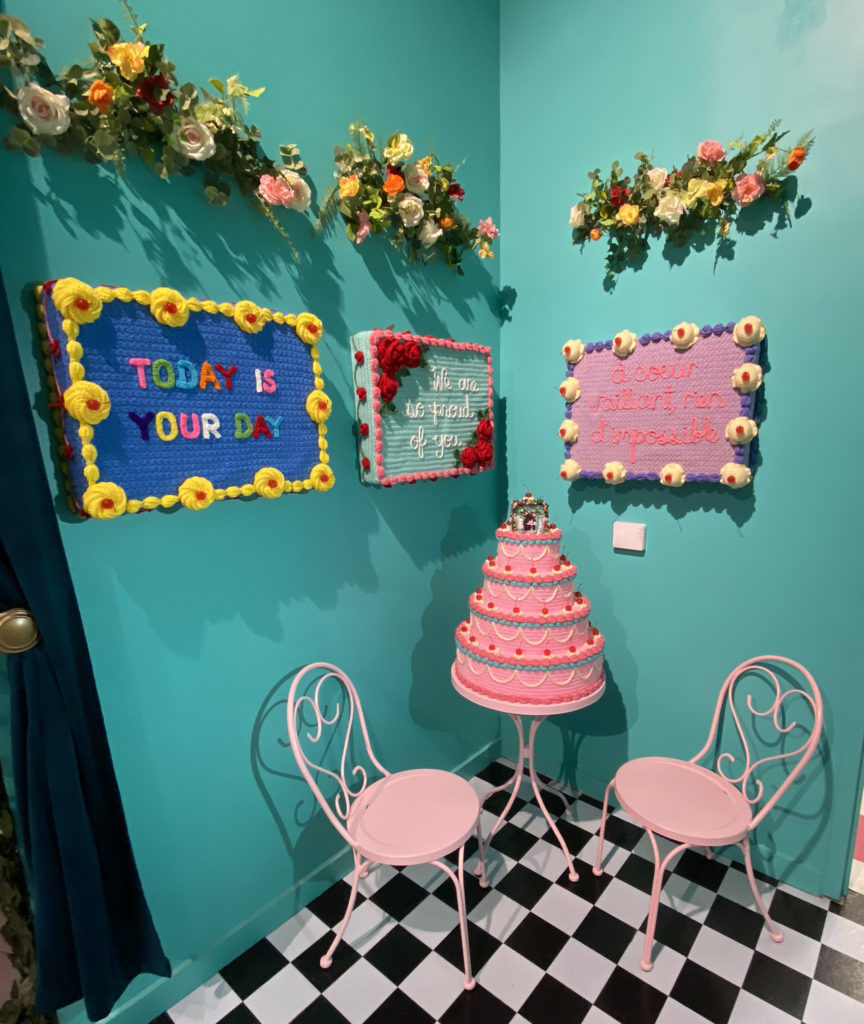
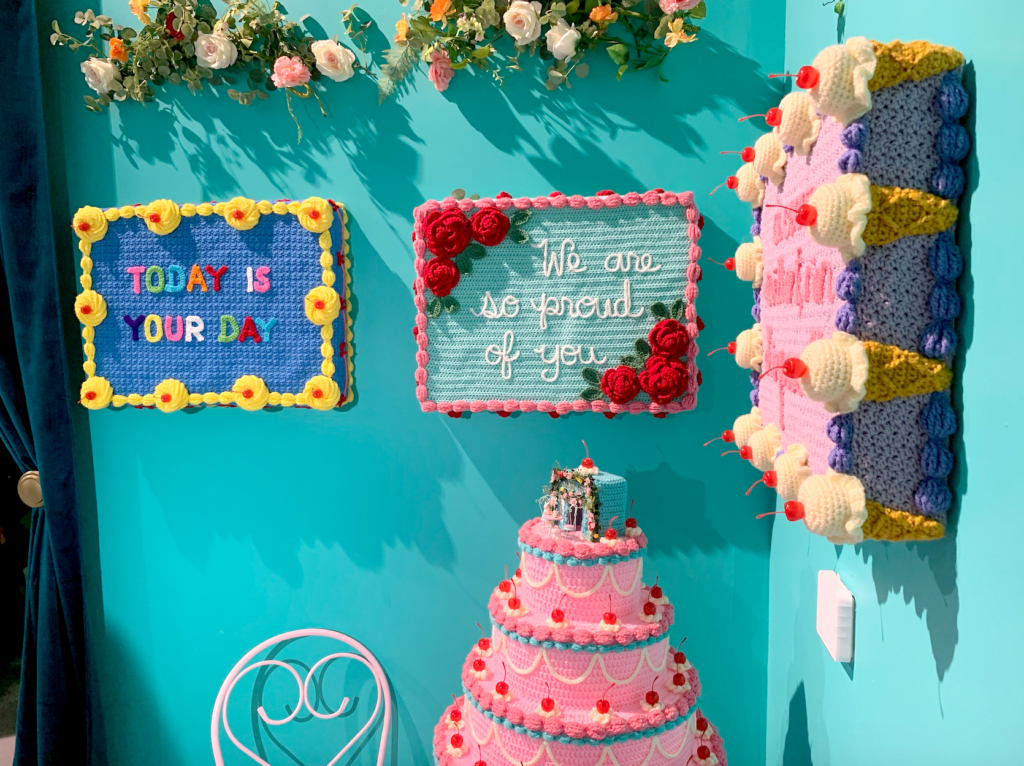
On the back wall are the big cakes! There is a big wedding-style tiered cake covered in whipped cream blobs, juicy cherries, and topped with a mini version of the bakery itself. I’m not sure how many people will look inside the tiny cake-topper bakery, but I also printed out an image of the patisserie wall inside of it for people who love detail.
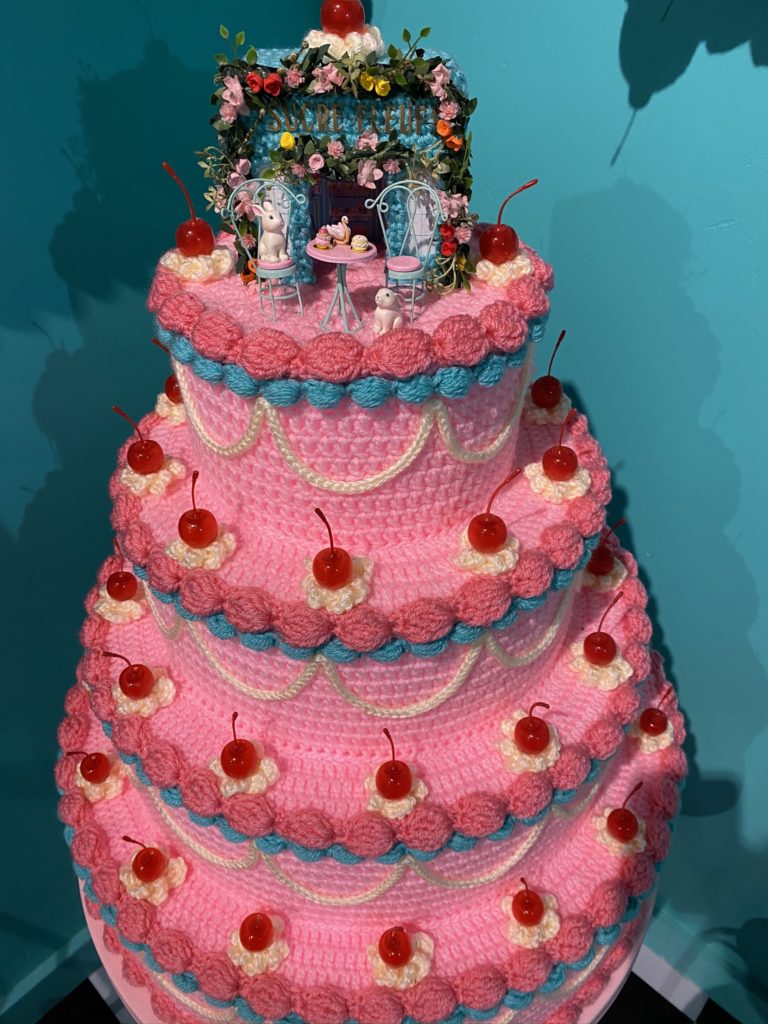
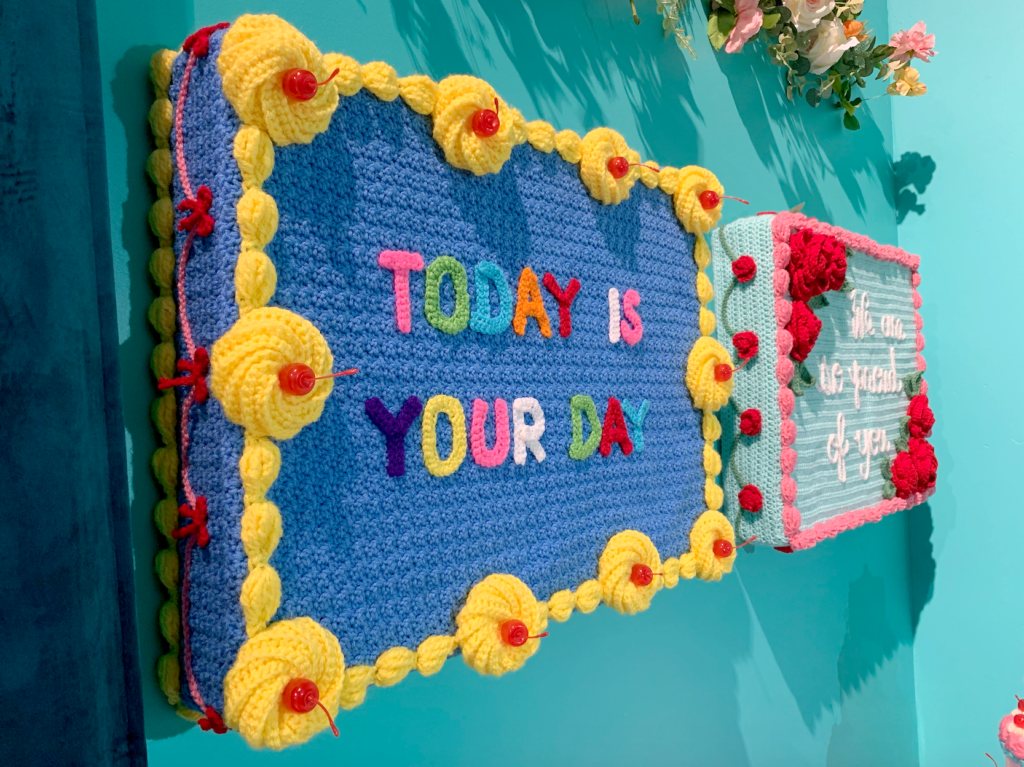
The big sheet cakes on the wall are meant to remind everyone that every day can be a day to celebrate.

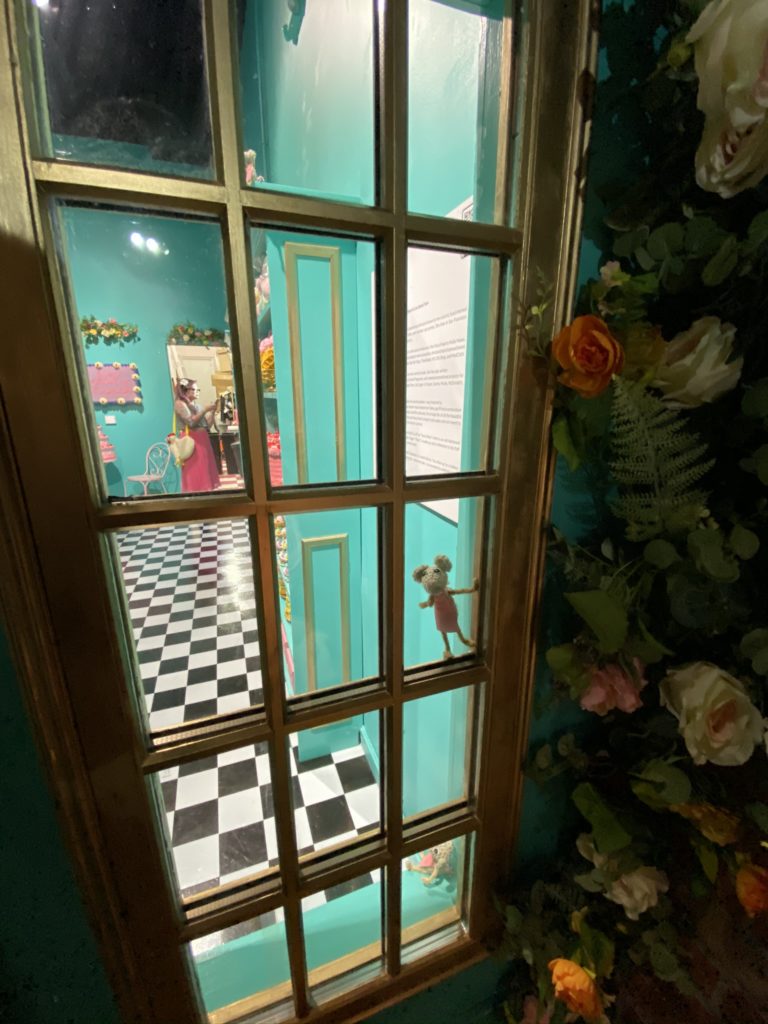
Sucre Fleuf! represents all of my favorite things. I imagined Wes Anderson opening a cute bakery in Japan. This was also 100% a team effort. Jencey, the owner of Sweet Tooth Hotel was awesome to work with and extremely collaborative. In places I wanted to play conservatively, she encouraged me to go all-out. It was also her idea to put tv screens in the bakery windows and shoot footage of me walking across – so creative!
I spent most of my time designing samples, writing all new patterns, sending yarn to my helpers, and then finishing pieces as they came back to me. For 95% of the projects, I still wanted to work final touches myself. I wanted to sew the ears, or roll the snails, or assemble the ice cream friends or swan cream puffs, and I glued on a gazillion eyeballs with the help of my mom. Manda also helped sew decorations onto the heart cakes and helped me find a way to strengthen the structure of the ice cream cones. My turnaround times were always very tight, and I could NOT have done any of this without my old crochet friends and making some new ones.
Rita – ritabakez – sourdough turtles
Gretchen Wu – kitty loaves, swan cream puffs, parts of the raspberry St. Honore
Lizi Bronzon – lizilovescake – bunny baguettes, teddy bear bread rolls, garden bunnies
Amanda M. – strawberries and leaves
Thread.Winners – marshmallow bunnies
Trisha Vicari– marshmallow bunnies
Sara Tibbs – rands crafts – heart cakes and birthday cakes
Kat “PK” Delurgio – Namaste Stitches – cream puff towers, tiny bear cakes, star cakes, jelly fish, cinnamon snails
Wendy Chavalia – Crochet in the Falls by Wendy – cream puff towers, mice
Erin Manke – EMankeCrochet – ice cream cone friends
Emy Kind – Rosemary’s Baby MEK – candles for bday cakes, pup croissants, donuts, decorations for sheet cakes
Me – all designs (except for the waffle cones, pattern purchased and used with permission from Copacetic Crochet), wedding cake, sheet cake, garden caterpillars
Also thanks so much to the Craft Yarn Council for including me in this amazing project. And to everyone who has visited the show so far and posted photos. I wish everyone could experience it!! I will try to make time to write another blog post about the other amazing installations in this show. Mine was just the beginning hallway!
Mini Santa Hat – Free Crochet Pattern
/ | 10 Comments on Mini Santa Hat – Free Crochet Pattern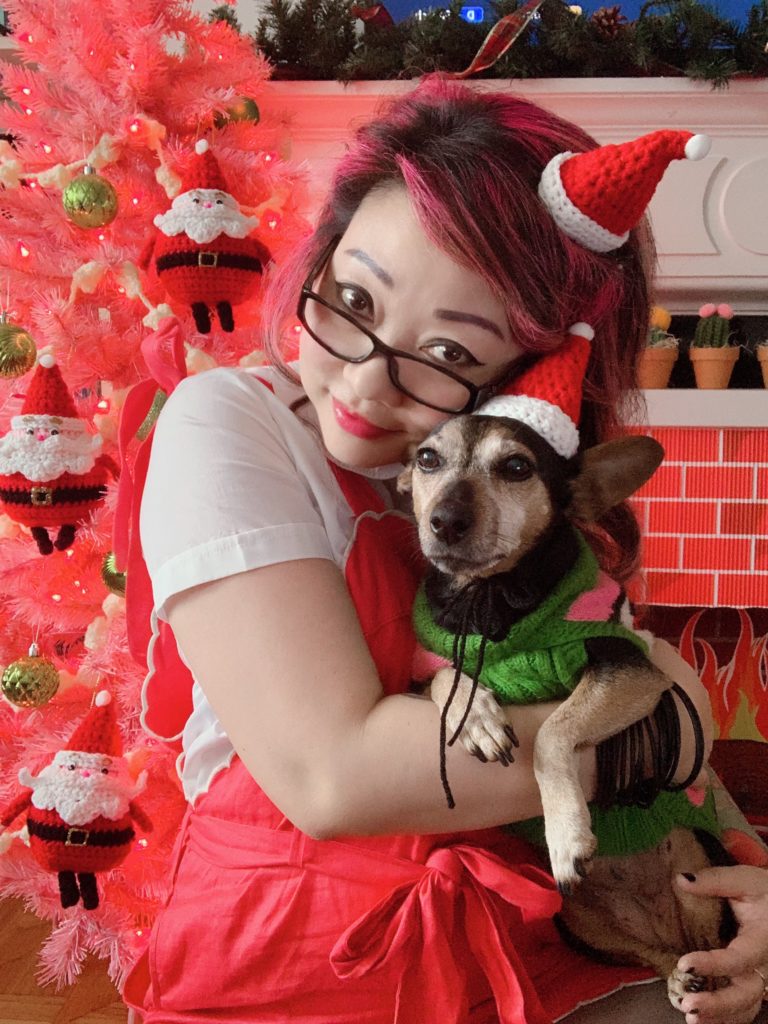
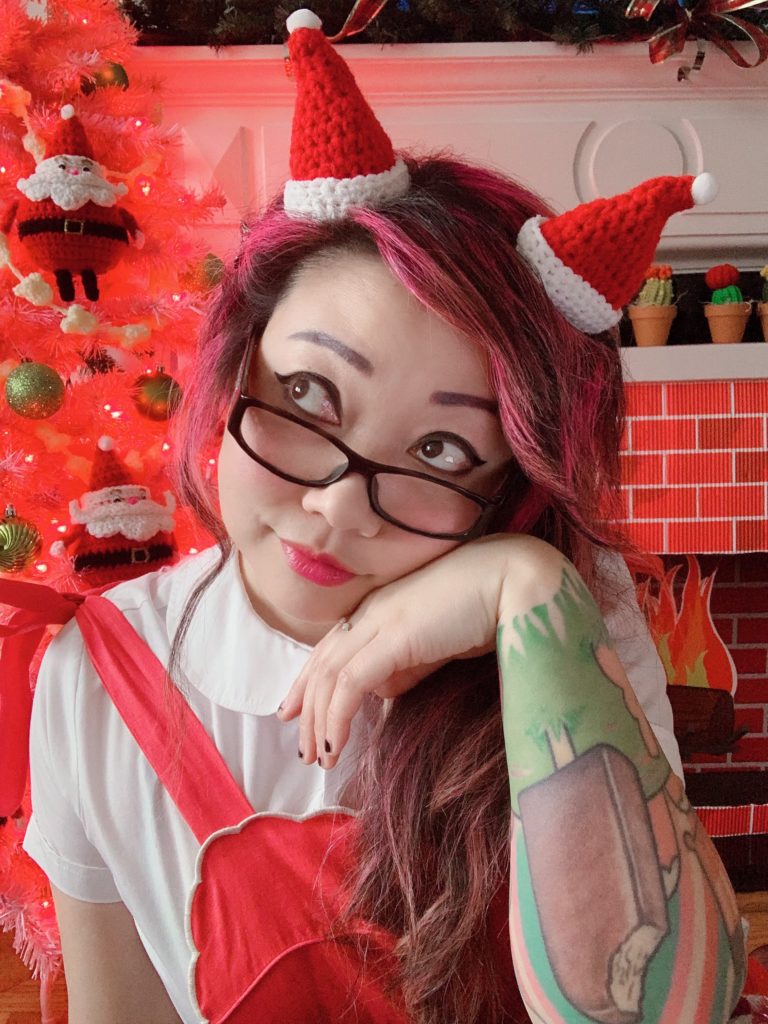
Bunny was feeling very poorly last week and went into the ER again. I was afraid this would be our last Christmas together, so I made us two tiny Santa hats for a photo. She had been wanting to just be in her bed all day with zero energy. I felt bad even bothering her for this, but it only took a few minutes so I hope she doesn’t hate me forever.
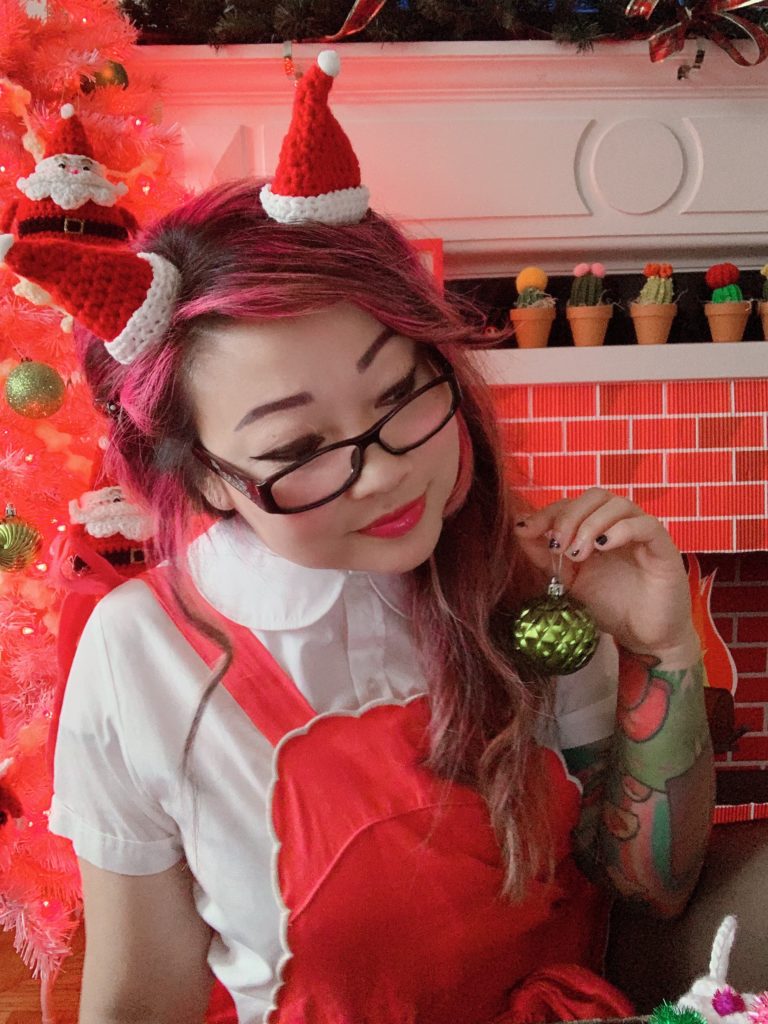
I ended up pinning both of them to my head after letting her go back to sleep. You could attach them to hair clips or a head band, but I think just using bobby pins makes them really versatile. Now I can thread a loop through them and put them on my Christmas tree or a wreath! We have some on our mantel garland right now.
For Bunny, I strung black yarn on each side of the hat and tied a bow under her chin. I picked black to match her fur so the tie would be less visible.
I hope you have fun with your mini Santa hats!
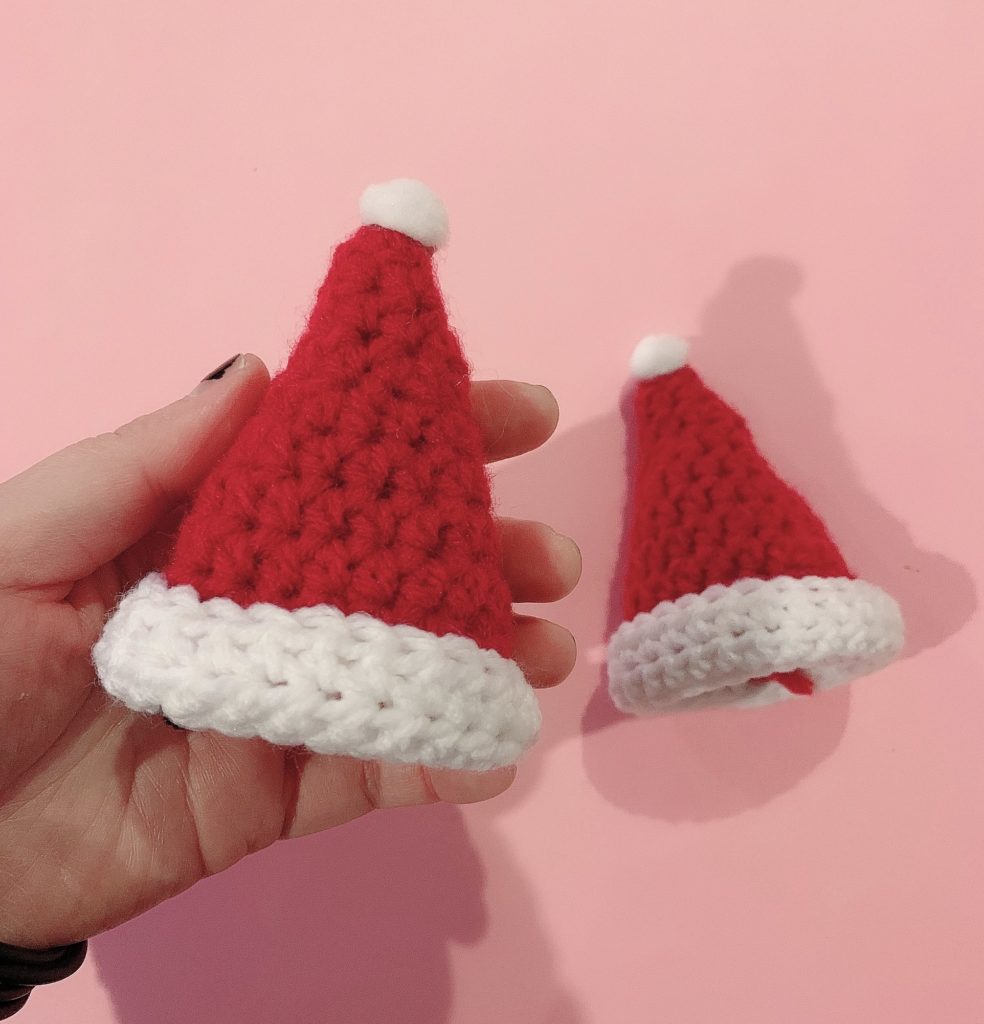
Mini Santa Hat Crochet Pattern
- You’ll need a small amount of worsted yarn in Red and White, an H hook, scissors, yarn needle, and you can either make a pom pom with yarn or you’ll need a store-bought one to glue on. I think mine were 1/2 inch white Pom Poms.
- The RS of your work in Red will show on the outside of the hat, and you’ll flip up the White brim so the WS will be showing.
Abbreviations
ch(s): chain(s)
FLO: front loops only
rnd(s): round(s)
RS: right side
sc: single crochet
sl st: slip stitch
st(s): stitch(es)
( ): work everything inside the parentheses into the next stitch
[ ]: work everything inside the brackets the number of times
indicated
Hat Pattern
With Red and H hook, make magic circle or ch 3 and sl st to 1st ch to form ring.
Rnd 1: Ch 1, 6 sc into ring. Don’t join rnds. – 6 sts
Rnd 2: sc, 5 hdc. – 6 sts
Rnd 3: [(2 hdc), 2 hdc] 2 times. – 8 sts
Rnd 4: [(2 hdc), 3 hdc] 2 times. – 10 sts
Rnd 5: [(2 hdc), 4 hdc] 2 times. – 12 sts
Rnd 6: [(2 hdc), 5 hdc] 2 times. – 14 sts
Rnd 7: [(2 hdc), 6 hdc] 2 times. – 16 sts
Rnd 8: [(2 hdc), 7 hdc] 2 times. – 18 sts
Rnd 9: [(2 hdc), 8 hdc] 2 times. – 20 sts
Rnd 10: [(2 hdc), 4 hdc] 4 times. – 24 sts
Rnd 11: 23 hdc evenly, sc. – 24 sts
- Sl st to next st to join.
- Break off White. Join White.
Rnd 12: Work this rnd in FLO. Ch 2, work hdc evenly around. Sl st to 1st hdc to join. – 24 sts
Rnd 13: Work in both loops again. Ch 2, 24 hdc evenly around. Sl st to 1st hdc to join. – 24 sts
- Break off and weave in all ends.
- Flip up the White brim of the hat.
- Make a tiny White pompom to sew on top of the hat or glue your store-bought pompom on.
Welcome!


Learn to Crochet w/ Me!

Fun Affiliates!