New Pattern on Etsy: Cherry Pie Tissue Box Cozy!
/ | 7 Comments on New Pattern on Etsy: Cherry Pie Tissue Box Cozy!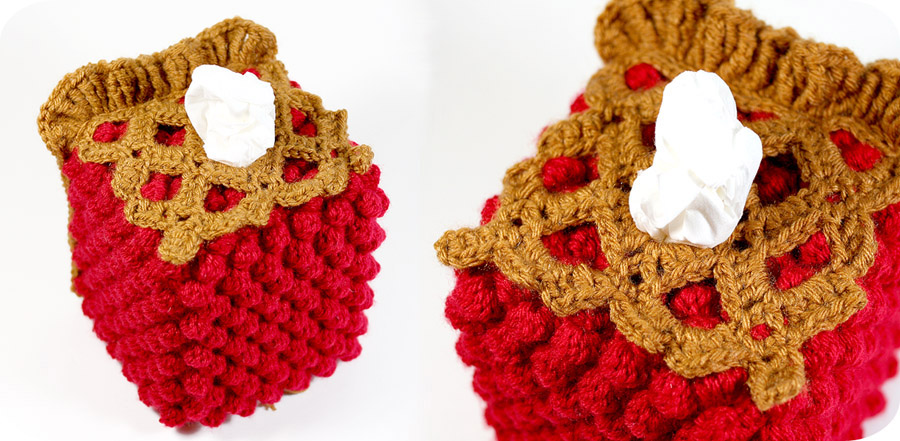 My Cherry Pie Tissue Box Cozy crochet pattern is now available on Etsy!
I worked really hard to re-vamp the lattice pie crust on top so that it’s less clunky and less cumbersome. I’m really happy with this little makeover!
The reason why I’m posting this pattern now, is for my charity project: the Tissue Box Bakery. I have posted about it on Facebook, but I don’t think I’ve blogged about it yet. I don’t have as many patterns on it yet as I plan to, but if you guys have any holiday-crafting time left before Renegade Craft Fair San Francisco, Dec 21-22, please consider making a fun tissue box cozy to send to me and donate to the cause! Check out the TBB site for more infos! I just received the first two cozies in the mail! So excited!
Free Crochet Pattern + Video Tutorial: Candy Garland or Candy Ornaments
/ | 19 Comments on Free Crochet Pattern + Video Tutorial: Candy Garland or Candy Ornaments This pattern is pretty much the easiest pattern ever: it’s a rectangle. The end.
It’s great for beginners! Great for kids! Host a holiday crochet party where everyone makes one crocheted candy and then string them all together to create a group garland! Or, everyone can keep their own candy and string them as ornaments. I will probably glue pinbacks and hair clips to the backs so that I can wear them. There are a lot of possibilities with just one little crocheted rectangle!
For more advanced beginners, you can get some great striping. You can alternate different colors every other row, and carry the unused yarn. Or, you can alternate colors ever 2 rows, and just drop the unused yarn and pick it up on the way back. Working a thin sparkle or sequin yarn with your regular yarn also and some subtle bling. Either way, all you need is a little bit of yarn and a styrofoam ball to get going!
I also tried filming a video tutorial for this. People have been asking me to do videos, but they are quite a bit of work, so I haven’t really been super eager to get on that task, since I do everything 100% by myself. But since this project is SO EASY, I thought it would be a good ice breaker for me to film a video and for you to break out some crochet hooks!
Continue reading
National Cotton Candy Day! & Crochet Pattern! (oldie but goodie)
| 8 Comments on National Cotton Candy Day! & Crochet Pattern! (oldie but goodie)Well, I had no idea today was going to be National Cotton Candy Day until I saw a few people, like Pee Wee Herman, post about it!
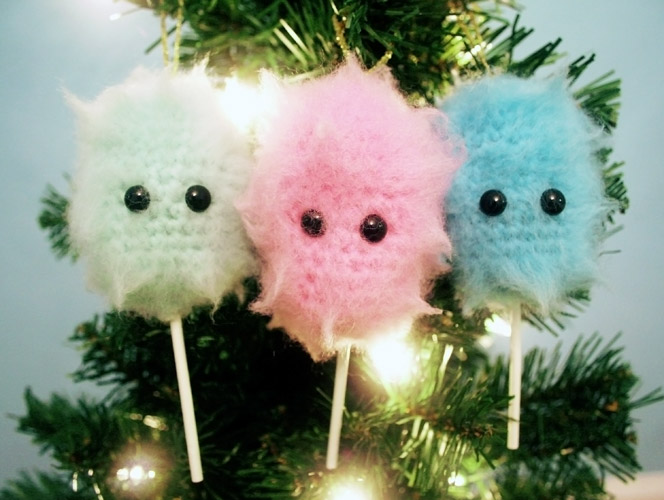
I just wanted to remind you guys that I have a free pattern for crocheting really cute cotton candy tree ornaments from last year!! Check it out again! 🙂
Cotton Candy Christmas Tree Ornament!
This project works up in about an hour and only uses chains and single crochet (sc) stitches. What makes this project super fun is using a wire slicker dog brush to turn a regular crocheted project into a super fuzzy hairy crocheted beast! Naturally “hairy” yarns like wool, alpaca, and mohair work best, but I’ve seen people also do it with acrylic yarn, with slightly different results. I’ll be using wool for my cotton candy (Cascade 220), because that’s what I have on hand.
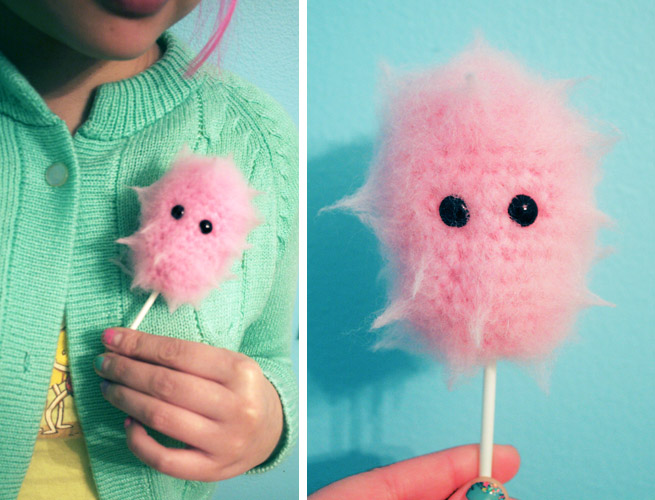
Not only does this cotton candy buddy make a cute ornament, but you can also turn it into a pin for your sweater, a clip for your hair, or a necklace for your neck!
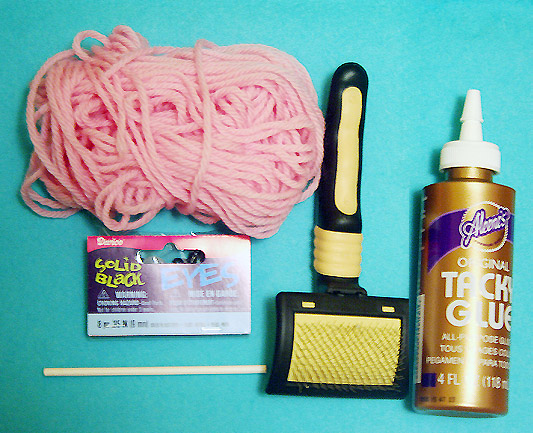
Materials:
– Pink worsted weight yarn (I am using wool, Cascade 220)
– 9 mm safety eyes (2 of them)
– 4 inch lollipop stick
– small wire slicker brush for dogs
– glue (hot glue or Tacky glue should do the trick)
Not pictured:
– H or I hook
– Polyfill stuffing
– tapestry needle
– depending on what you want to make, you will need ribbon or invisible thread to create a hanging loop for your ornament, OR, a pinback for a brooch, OR, a hair clip of your choice, OR a jump ring and chain to make a necklace.
Abbreviations:
ch(s): chain(s)
rnd(s): round(s)
sc: single crochet
sl st: slip stitch
st: stitch
( ): work what’s inside the parentheses into the next st – e.g. (2 sc) = 2 sc into the next st
[ ] : work what’s inside the brackets the number of times indicated
Cotton Candy
With pink yarn, make magic circle or ch 3 and sl st to 1st ch to form ring.
Rnd 1: Ch 1 and work 6 sc into ring. Don’t join rounds. (6)
Rnd 2: (2 sc) 6 times. (12)
Rnd 3: [(2 sc), 1 sc] 6 times. (18)
Rnd 4: [(2 sc), 2 sc] 6 times. (24) You may want to stick a marker in your work now, or use a scrap piece of yarn, to help count the following rnds.
Rnds 5-14 (10 rnds): Work sc evenly around. (24) At this point, my project is about 3 inches long. Don’t break off yet. I prefer for the right side of my sts to show on the outside of my projects.
Here comes the fun part. Get your wire brush and start brushing your project to make it fuzzy. Tamie from Roxycraft has a really great tutorial on how to do this here. The longer you brush it out, the fuzzier your project will get. It takes longer than you might think. Sit down in front of the tv while doing it! After getting your project fuzzy, insert and attach your safety eyes. I have found it’s easier for me to NOT put my hand inside of my work. I just grab the piece with one hand, grabbing both layers, and then attack it with the brush with my other hand. It’s less prickly, and I can also get to the bottom bits down by Rnd 14 more easily.
Rnd 15: [sc2tog, 2 sc] 6 times. (18)
Rnd 16: [sc2tog, 1 sc] 6 times. (12) Don’t forget to stuff your project with polyfill!
Rnd 17: [sc2tog] 6times. (6) Break off, leaving about 8 inches of yarn. Thread your tapestry needle with your 8 inches of yarn, weave through the remaining 6 sts, and pull to close, but don’t close too tightly. You still need to squeeze a lollipop stick in there. If you want, you can stick the lollipop stick in there now and close your sts around it. The stick won’t stay without glue, but at least you will know what kind of tension to close your project with. If you are finding it hard to push your stick through the polyfill, just stir it around a little bit as you jab. Finish off, and weave in all ends.
Carefully brush out the bottom of your cotton candy now, avoiding the eyes. Don’t worry if everything gets stretched and mutated during this process. You can always squish it back into shape!
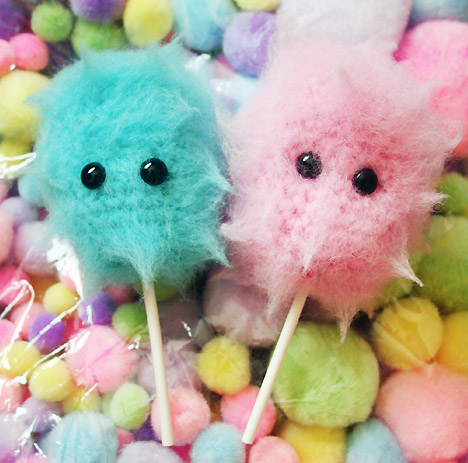
Okay, at this point, my cotton candy dude was freaking me out a little bit. It looked too human to me, or like, a pink alien head, so I twisted up some of the hair, liberty-spike style. Even though real cotton candy does not do this, I thought it was a cute touch. The spiking is entirely up to your discretion!
Coat about an inch and a half of your lollipop stick with glue and stick it into the bottom of your cotton candy, leaving about 2 inches of lollipop stick hanging out. I find that when I twist the stick back and forth while inserting it into the cotton candy, less glue will gather at the base and leak outside. Let this dry completely before messing around more with your project. You can also tie a cute little bow at the base for a little extra fancy decoration!
If you want to turn this into a tree ornament, simply loop some ribbon or invisible thread through the top of your cotton candy to hang on a tree. Or glue or sew a pin back or a hair clip to the back of the cotton candy to wear your new buddy out and about! You could also buy extra long lollipop sticks from the craft store to make hair sticks, although, the pink one kinda looked like a tumor sitting on my head.
* This pattern is intended for your personal use only and not for creating items to sell. Please do not sell this pattern or re-post it without my permission. Thank you!
Cut Out + Keep’s Secret Santa Craft Contest!
/ | 2 Comments on Cut Out + Keep’s Secret Santa Craft Contest!One of my favorite craft sites, Cut Out + Keep, is having its Secret Santa Craft Contest again, and Yummy You! is sponsoring one of the secret prizes!
“The rules are simple – enter any Christmas craft, or gift you’ve made for a friend this year and you’ll be in with a chance of winning. Join Crafterella on Christmas morning to find out what’s inside each present. We’ll announce the prize-winners at the end of the month.”
I wrapped up the secret present and sent it to the Cut Out + Keep offices. I think it’s still flying it’s way over there, but when they receive it and post a photo, I’ll post a photo here, too! I’m a terrible gift-wrapper and am a huge believer in MORE IS MORE! Warning!!! 😉
Have you been DIY’ing a lot of your gifts this year? Confession: I haven’t DIY’d a single gift yet. Eep! It’s time for us to get started!
Yummy You! VALUEMENU 25% off sale! Today only!
| 5 Comments on Yummy You! VALUEMENU 255 off sale! Today only!Today only! Using the discount code VALUEMENU will get you 25% off your whole order at Yummy You! (Kinda like Cyber Monday, except… today!) BUT, not only that … we added TWELVE deadstock items! We have really limited inventory on these old favorites. Once they are gone, they may never come back!

