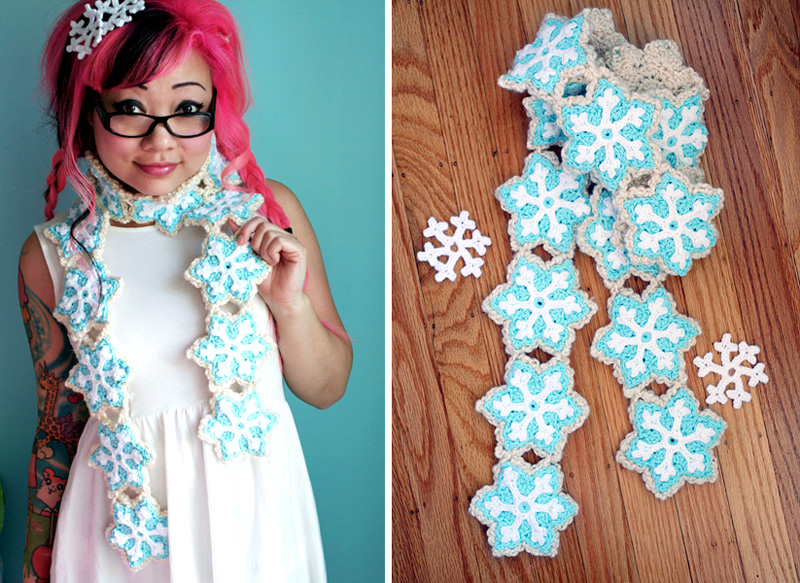
Here’s another pattern that was originally on Michaels.com in Dec 2013!
“I wanted to round out our craft-tastic 2013 with a pattern for one of my yummy food scarves, so I asked my Facebook fans for advice on which holiday pattern they’d like to see most. The winning votes went to this Snowflake Sugar Cookie Scarf, which I really love because it celebrates the season and has a sugary elegance without being too over the top. For a quicker project, you can work up a single snowflake sugar cookie and turn it into a brooch or hair piece. Happy Holidays and a sweet New Year!”
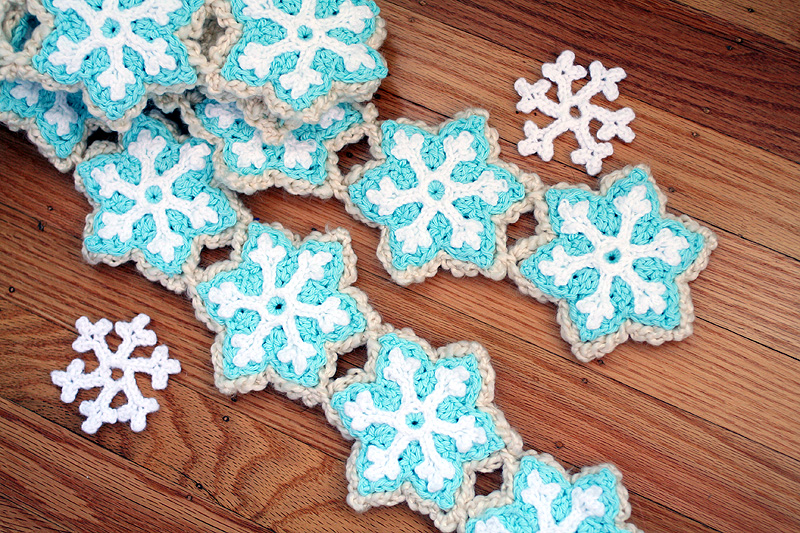
Snowflake Sugar Cookie Scarf
Designed by Twinkie Chan
Materials List
- Crochet Hook, size H8/5.00mm
- Crochet Hook, size J10/6.0mm
- Lion Brand® Homespun® in Deco (1 skein)
- Lily® Sugar ‘n Cream® in Robin’s Egg (2 balls)
- Red Heart® Shimmer™ in Snow (approx. 100 yards or half a ball)
- scissors or yarn cutter
- tapestry needle
- optional: beads, white sewing thread and needle
Gauge
Loops & Threads™ Charisma™: 13 sc x 14 rows = 4 inches x 4 inches
Caron® Simply Soft®: 16 sc x 20 rows = 4 inches x 4 inches
Lion Brand® Vanna’s Choice®: 15 sc x 18 rows = 4 inches x 4 inches
Abbreviations
ch(s) = chain(s)
dc = double crochet
hdc = half double crochet
htr = half triple crochet
sc = single crochet
sk = skip
sl st = slip stitch
st(s) = stitch(es)
[ ] = repeat what is inside the brackets the number of times indicated
Special Stitches
Picot: Ch 3, then sk 1st 2 chs and sl st into 3rd ch from hook.
Notes
– If you substitute yarns, remember that your Sugar Cookie Base yarn needs to be thicker/chunkier than your Blue Icing yarn. Otherwise, both pieces will be the exact same size, and you won’t get the same illusion of icing on top of a cookie.
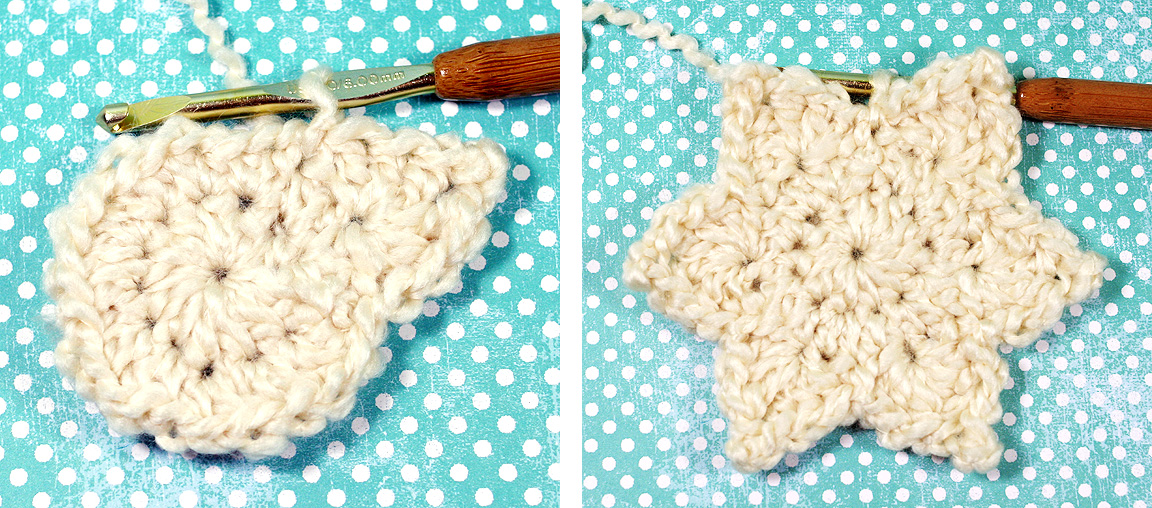 Primary Sugar Cookie Base – Make 1
With Deco and J hook, make magic circle, or ch 3 and sl st to 1st ch to form ring.
Rnd 1: Ch 2 and work 12 hdc into ring. Sl st to 1st hdc to join. (12)
Rnd 2: Ch 2 and work 2 hdc in each st. Sl st to 1st hdc to join. (24)
Rnd 3: [Sk 1 st. In the next st, work 2 dc, 1 htr, picot, 1 htr, and 2 dc. Sk 1 st, then 1 sl st in next st] 6 times. (48)
Break off. Weave in ends.
Joining Sugar Cookie Base – Make as many as you wish for your desired scarf length. I made 15.
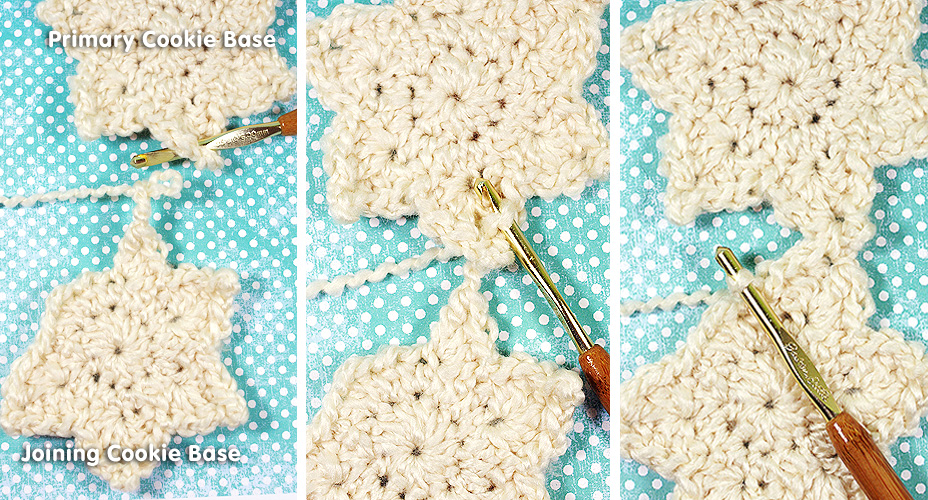
You will be working this part of the scarf in a join-as-you-go manner, so that you don’t have to sew all your sugar cookies together later or deal with a bunch of extra ends to weave in. You’ll do this by partially working the Primary Sugar Cookie Base first.
With Deco and J hook, make magic circle, or ch 3 and sl st to 1st ch to form ring.
Rnd 1-2: Repeat Rnd 1-2 of Primary Sugar Cookie Base.
Rnd 3: : [Sk 1 st. In the next st, work 2 dc, 1 htr, picot, 1 htr, and 2 dc. Sk 1 st, then 1 sl st in next st] 4 times. [Sk 1 st. In the next st, work 2 dc, 1 htr, then work the ch 3 of your picot. Before completing the picot, take your loop off the hook, then insert hook from front-to-back into the space below a picot from Primary Sugar Cookie Base while also re-grabbing the dropped loop from Joining Sugar Cookie Base. Complete the picot by working a sl st in the 3rd ch from hook, thus capturing and joining the two cookie bases together. Continuing in the same st as the picot,1 htr and 2 dc. Sk 1 st, then 1 sl st in next st.] 2 times.
Break off and weave in ends.
Keep crocheting Joining Sugar Cookie Bases and linking your cookies together until your scarf is your desired length, making sure that the Cookies always form a straight line.
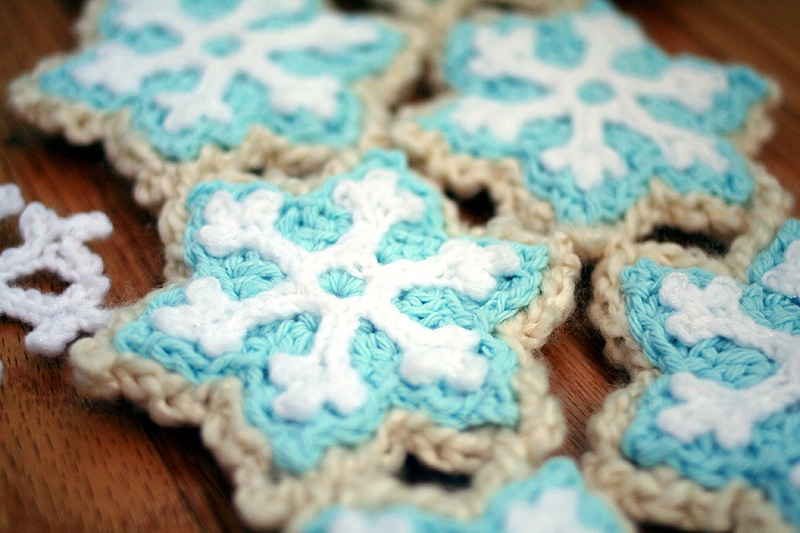
Blue Icing – Make 16
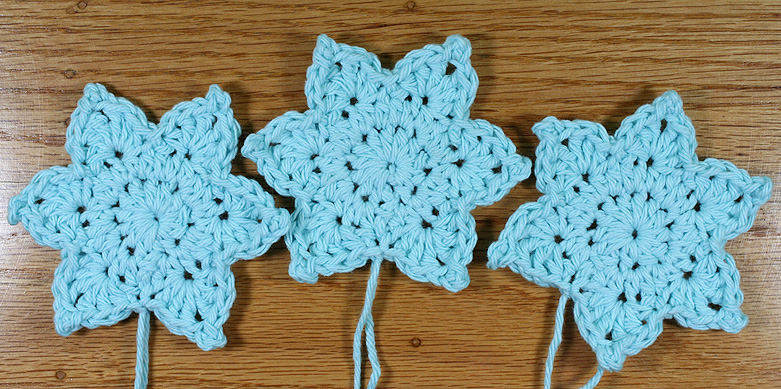
With Robin’s Egg and H hook, make magic circle, or ch 3 and sl st to 1st ch to form ring.
Rnd 1: Ch 2 and work 12 hdc into ring. Sl st to 1st hdc to join. (12)
Rnd 2: Ch 2 and work 2 hdc in each st. Sl st to 1st hdc to join. (24)
Rnd 3: [Sk 1 st. In the next st, work 1 hdc, 1 dc, 1 htr, picot, 1 htr, 1 dc, and 1 hdc. Sk 1 st, then 1 sl st in next st] 6 times. (48)
Break off leaving about a yard of yarn for sewing and weave in the other end.
White Icing – Make 16
If you are more comfortable with embroidering details, you can use Snow and a tapestry needle to embroider different styles of snowflake designs. The following is a simple snowflake crochet pattern.
Special Stitch: “branch.” To work a branch, ch 3, sk 1st ch, then work 1 sl st each in remaining 2 chs.
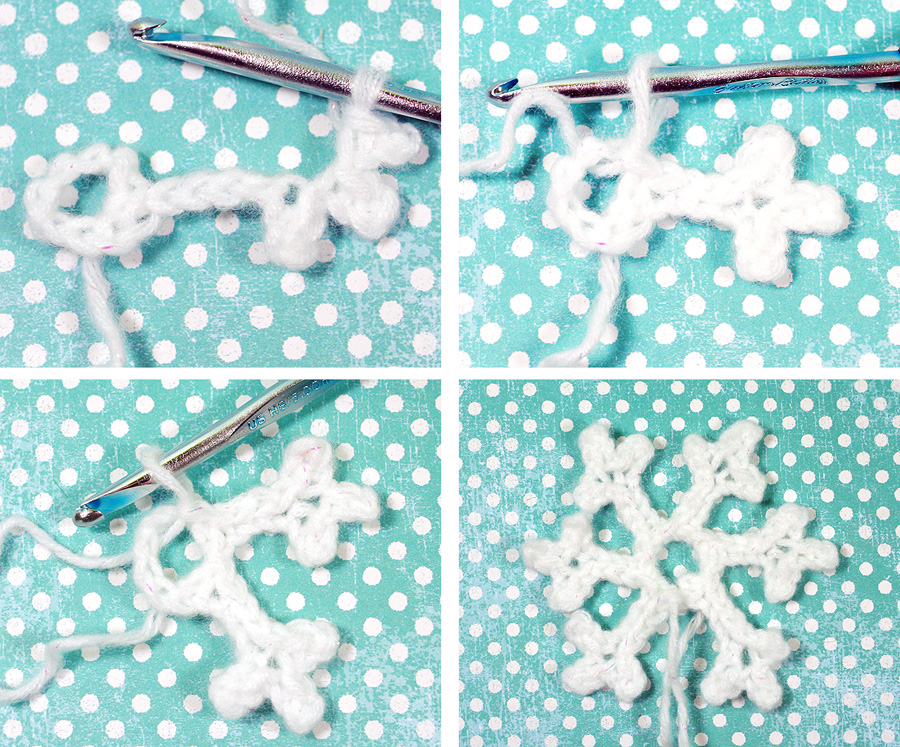
With Snow and H hook, ch 8 and sl st to 1st ch to form ring.
Rnd 1: [Ch 4, work branch 3 times, then 1 sl st each in remaning 4 chs. Sl st into ring to join] 6 times. Break off leaving a yard of yarn for sewing. Weave in other end.
Assembly
1. Sew all the White Icings to the tops of the Blue Icings. It’s okay if the back of Blue Icing is ugly, because this will be hidden anyway. I actually prefer to sew the White Icing down with sewing thread and a needle, but you can use yarn and a tapestry needle, too.
2. If you want to sew on decorative beads, now is the time.
3. Sew all Blue Icings to the tops of the Sugar Cookie Bases.
*The instructions for this project are intended for personal use only. Please do not copy, re-distribute, or sell these instructions or the items you make using these instructions without my permission. Thank you!*