 Here’s another crochet pattern I wrote for Michaels.com last year to promote their Loops & Threads line. The photo above shows yarns from KnitPicks (Brava worsted) because I think the colors are a bit brighter. But this pattern is really versatile, and any worsted weight yarn will do ya! I actually worked up a totally different jelly bean motif – worked in rows instead of rounds – a few weeks ago for a secret Yummy You! collab sample, so I may share that soon as well. (Is it weird to have two different patterns for jelly bean scarves? :P).
“I recently polled my Twitter followers about what kind of crochet pattern they’d like to see for Easter. One gal said, “Something with jelly beans!” I loved this idea, so I designed this multicolored jelly bean scarf for you to wear on Easter egg hunts. Use the combination of worsted weight colors that remind you of your favorite jelly bean flavors. This pattern is the ultimate stash-buster—the more variety, the better!”
New in: video tutorial on YouTube!
Materials List
- Crochet Hook, size I/5.5mm, or whatever size needed to obtain gauge
- Loops & Threads™ Impeccable™ in Amethyst, Arbor Rose, Aqua, Butterscotch, Cherry, Soft Fern, White (each jelly bean needs approx. 18 yards of yarn, and 13-15 jelly beans are needed to complete a scarf)
- scissors or yarn cutter
- tapestry needle for weaving in ends
Gauge
Loops & Threads™ Impeccable™: 14 sc x 16 rows = 4 inches x 4 inches
Abbreviations
ch(s) = chain(s)
hdc = half double crochet
rnd(s) = round(s)
sc = single crochet
sk = skip
sl st = slip stitch
st(s) = stitch(es)
[ ] = repeat what is inside the brackets the number of times indicated
Notes
At the beginning of each round, when the pattern says to “Ch 2 and hdc in same st,” you should work your hdc in the last sl st of the previous row, not the first hdc of the previous row. This is important for maintaining the correct jelly bean shape.
Jelly Bean (Make 13 or more in colors of your choice.)
The first 3 rounds work up an oval. The last 2 rounds vary, to give the jelly bean its shape.
With I-hook, ch 10.
Rnd 1: Sk 1st 2 chs and work 7 hdc evenly across. In the last ch, work 5 hdc, which will bring you around to the other side of the foundation chain. Work 6 hdc evenly across. In the last ch, work 4 hdc. Sl st to 1st hdc to join. (22)
Rnd 2: Ch 2 (counts as your 1st hdc) and hdc in same st. Work 6 hdc evenly across. [2 hdc in next st] 5 times. Then 6 hdc evenly across. [2 hdc in next st] 4 times. Sl st to top of ch 2 to join. (32)
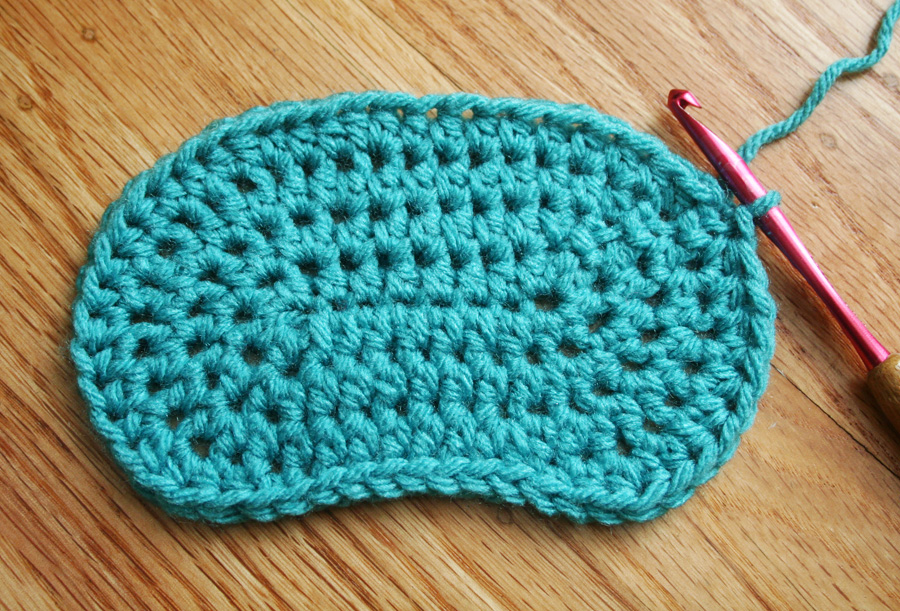
Rnd 3: Ch 2 (counts as your 1st hdc) and hdc in same st. Work 7 hdc evenly across. [2 hdc in next st, 1 hdc in next st] 5 times. Then 6 hdc evenly across. [2 hdc in next st, 1 hdc in next st] 4 times. Sl st to top of ch 2 to join. (42) (Photo #1)
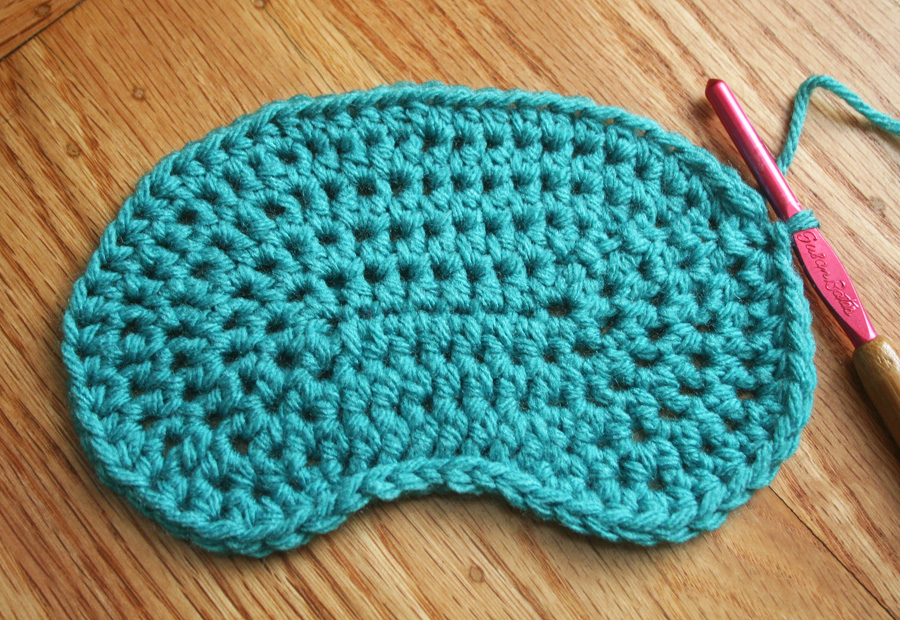
Rnd 4: Ch 2 (counts as your 1st hdc) and hdc in same st. Work 8 hdc evenly across. [2 hdc in next st, 1 hdc in next 2 sts] 4 times. [2 hdc in next st] 2 times, 1 hdc, 1 sc, 8 sl st (don’t sl st too tightly since you’ll have to crochet into them later), 1 sc, 1 hdc, 2 hdc in next st, [2 hdc in next st, 1 hdc in next 2 sts] 2 times. Sl st to top of ch 2 to join. (52) (Photo #2)
Rnd 5: Ch 2 (counts as your 1st hdc) and hdc in same st. Work 9 hdc evenly across. [2 hdc in next st, 1 hdc in next 3 sts] 5 times. 2 hdc in next st, 1 hdc, 1 sc, 6 sl st, 1 sc each in next 3 sts, 1 hdc, [2 hdc in next st, 1 hdc in next 3 sts] 2 times, 1 hdc in last st. Sl st to top of ch 2 to join. (60) Break off leaving 18 inches of yarn for sewing. (Photo #3)
Assembly
– The right side of all the jelly beans should face you while you sew them into a scarf, but you can rotate some of them 180 degrees for a more random look.
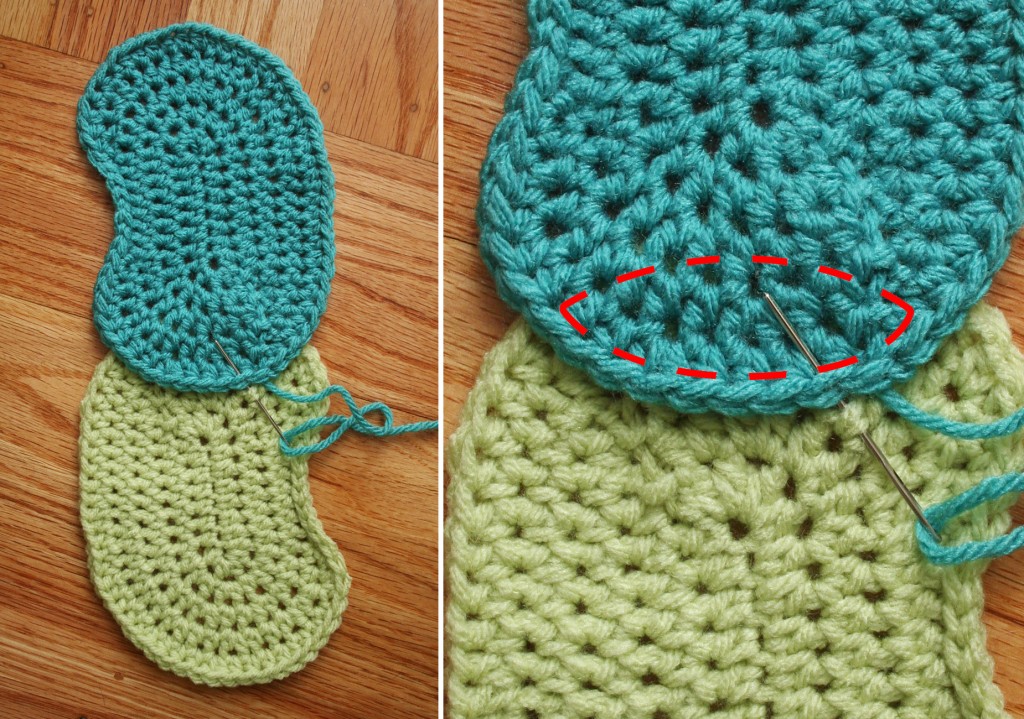
– I prefer that the jelly beans slightly overlap. Whichever jelly bean is on top is the color of yarn I’ll use to sew two jelly beans together. The stitches will form an almond shape, outlining where the two beans overlap. (Photo #4)
– While sewing, I only pick up a stitch or two of the jelly bean underneath. This way, my stitches won’t show through the back.
– Continue to sew jelly beans together until the scarf is the desired length.


