Sooooo Christmas of 2011, I decided to buy a cookie press and make some spritz cookies. I was like, “OMG THIS IS SO FUN! I WILL USE MY COOKIE PRESS EVERYDAY! EVERY EVERY DAY!!!” I never used it ever again.
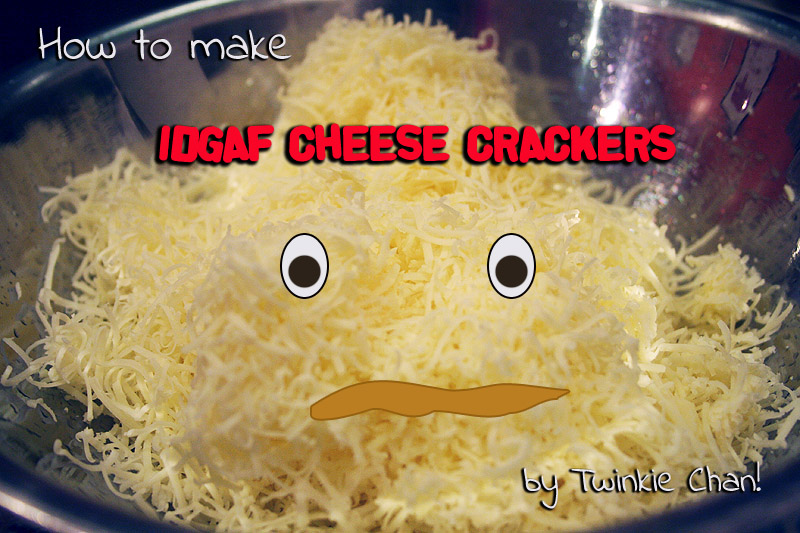
But tonight. Oh, tonight. I resurrected the cookie press and finally attempted to make some home made CHEESE CRACKERS!!!! AWWW YEAH CHEESE YEAH! I love Cheezits so much, that I literally make myself sick. My buddy Pickle once asked me, “What do you like most? The Cheez? Or the Its?” WHO CAN CHOOSE!?
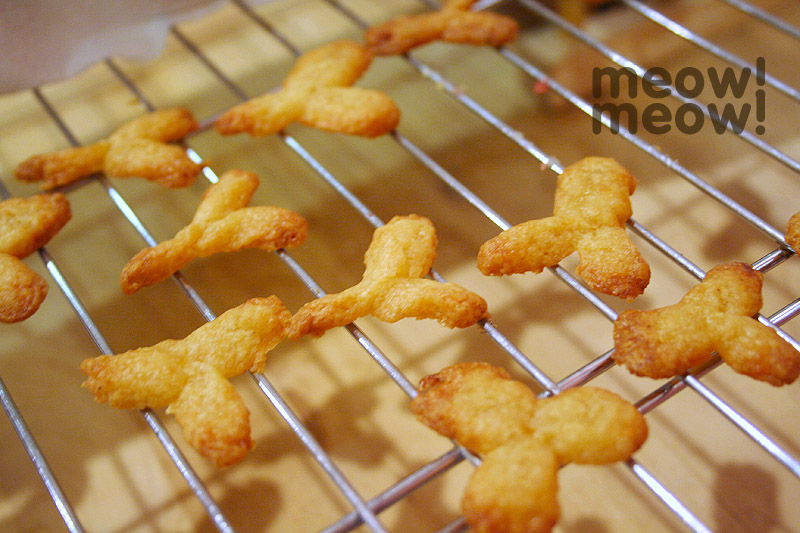
Needless to say, this was like my most humongous kitchen debacle. My cheese crackers look like cat chow and they smell like Bibi’s feet.
Let’s go on this journey together.
 I used the recipe from the Wilton website, Wilton being the maker of my cookie press. I know I should have done a little more research, but …. say it all together…. IDGAF! Actually, I do, but I’m also lazy.
Here are your ingredients:
-
1 pound sharp cheddar or aged swiss finely shredded
-
1/2 cup unsalted butter softened
-
2 teaspoons Worcestershire sauce
-
Dash hot red pepper sauce
-
1 1/2 cups flour
-
1/2 teaspoon salt
-
1 teaspoon paprika
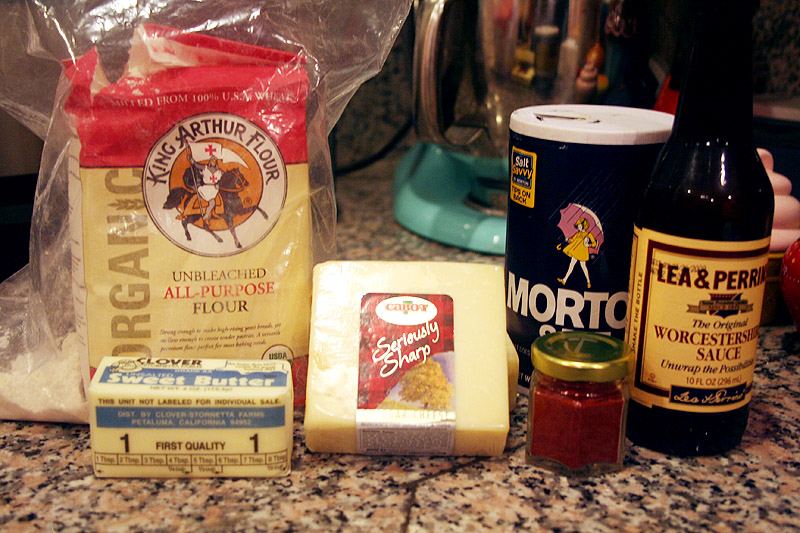
I am a very serious chef, and I only use VERY SERIOUSLY SHARP CHEDDAR. As should you. I wanted to get yellow cheddar because cheddar is supposed to be yellow in my book. But Hairy is a food snob and insisted on white cheddar. Plus, he got all cheesenerdy with some dude at Andronico’s, and they were like, “Good sir, you must select a cheese from Vermont.” “Right-o, good sir, I shall!”

1. I attacked the aerobic portion of the recipe first: grating 1 lb of cheese. I gave up after .5 lb, which ended up being the best decision of the whole night. You may think this was due to laziness, but the real reason was my plate was overflowing with cheese, and I didn’t think I had enough large bowls for mixing everything together. SO MUCH CHEESE. So I cut the whole recipe in half.
2. Preheat oven to 375°F. In a medium bowl, cream the cheese, butter, Worcestershire sauce and hot red pepper sauce until smooth. So, what exactly does it mean to cream something, because I attempted to do this, but it was basically like trying to turn the cheese powder from your pizza delivery into a liquid. Like, it’s not gonna happen! It was like 80 million parts cheese to 1 part worcester sauce and butter. I already knew this was a terrible, terrible sign. “Cream” was not what I had. I had superstiff cheeze playdough.
3. In separate bowl, toss flour and seasonings with fork. Gradually add to cheese mixture. I added my cheese playdough by small chunks. What appeared in my mixing bowl was first like a pile of pebbles and then later like a bucket of sand. Great dough, right!?
4. Mix until dough holds together and shape into small logs. Sand is just not going to hold together on its own. It needs LIQUID. Any sand-castle-buildin’ 2 year old will tell you that. But whatever. I figured there was cheese oil in there, so I stuck my hand in the cheese sand and started to mash and massage into little logs to insert into my cookie press.
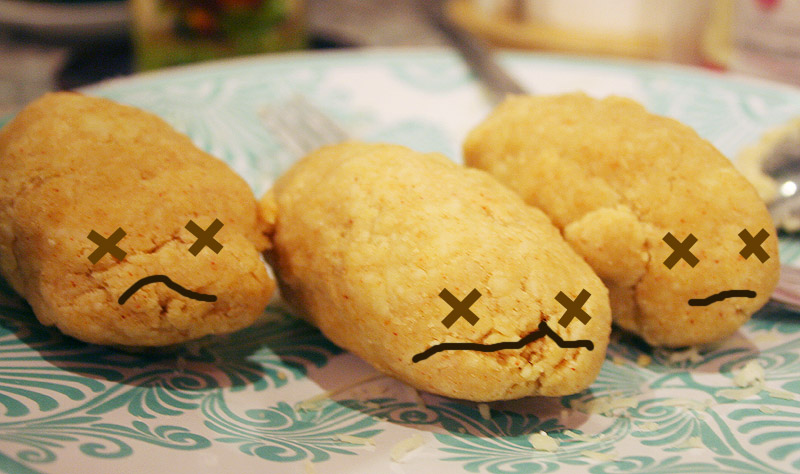 My logs did not look well. There was no way the dough was going to shoot through the cookie gun and stick to the cookie sheet. But I never give up!
5. Place in barrel of Cookie Pro™ Cookie Press using any disk, press onto ungreased cookie sheet. Ok, so this is the part where I gave up. For a cookie press to work, the dough needs to be sticky, so that your cookie stays put when you pull the gun away. What I ended up doing was shooting the dough through the gun, which was still stuck to the gun, and then I picked the clumps off with my fingers and reshaped them onto the cookie sheet. WHY DID I NOT JUST TAKE THE DOUGH LOG OUT OF THE GUN AND THEN HAND-SHAPE EVERYTHING?! I don’t know. I had so much faith in the cookie press. This process took approx 9 million years, so I did one cookie sheet and called it quits.
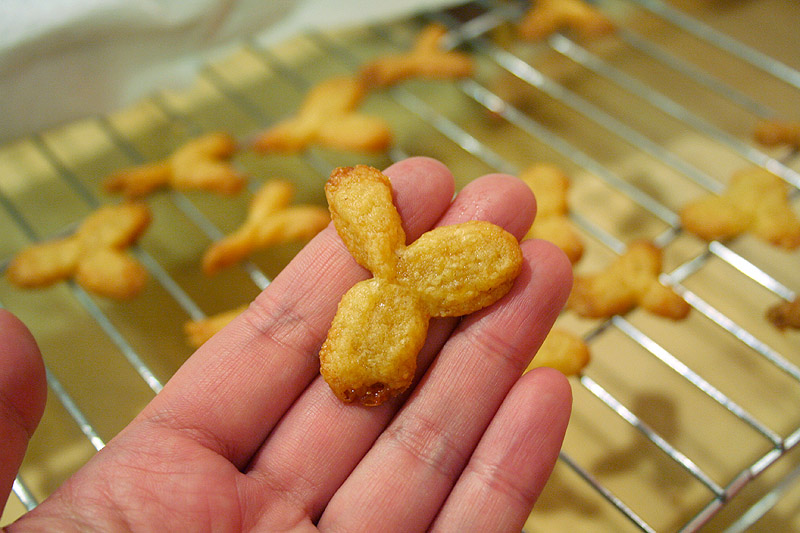
 I used the Y-disk which technically should create heart-shaped cookies, but given the crumblyness and dryness of my dough, they didn’t spread very much, so I just had Y-shaped crackers. Y as in WHYYYYYY GOD WHYYYYYYY.
6. Bake 10-12 minutes or until lightly browned. Remove and cool on rack. At 10 minutes, my crackers were pretty toasty looking, and I probably should have been watching them more closely instead of washing dishes.
7. Sprinkle with paprika. Sorry, my crackers did not deserve any paprika sprinkles.
 In an effort to cook/bake more of my snacks rather than eating packaged foods filled with weird chemicals and stuff, this was an interesting experiment. Although I’m pretty certain that I’ll never try this again, they are after all like 92% cheese, and you can’t go that wrong with cheese. It would probably be more efficient for me to eat the cheese right off the block and leave stuff like baking to the pros. But you know I’ll be back in the kitchen soon …