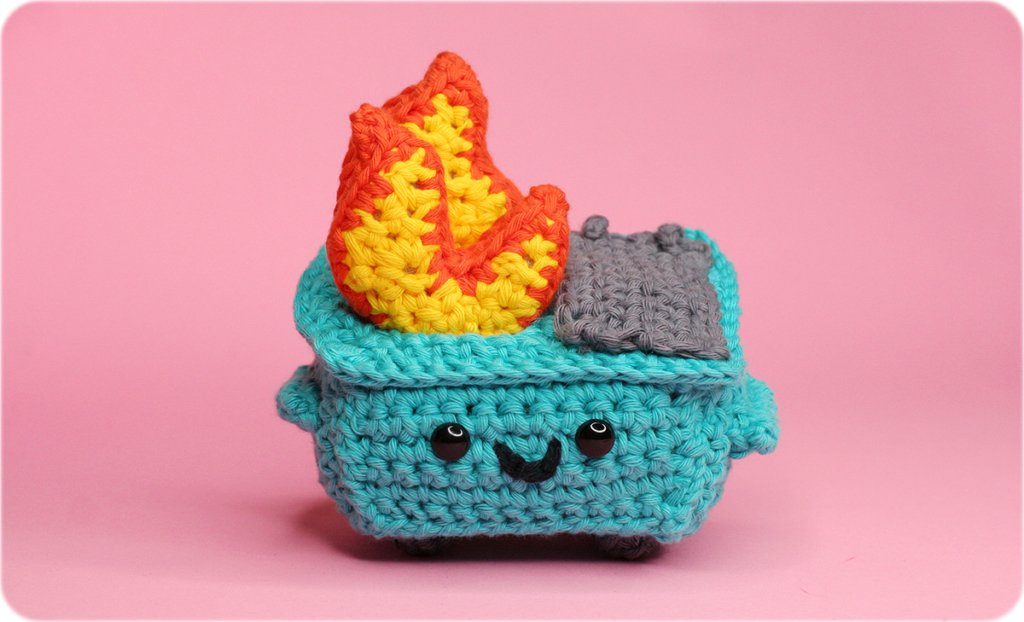
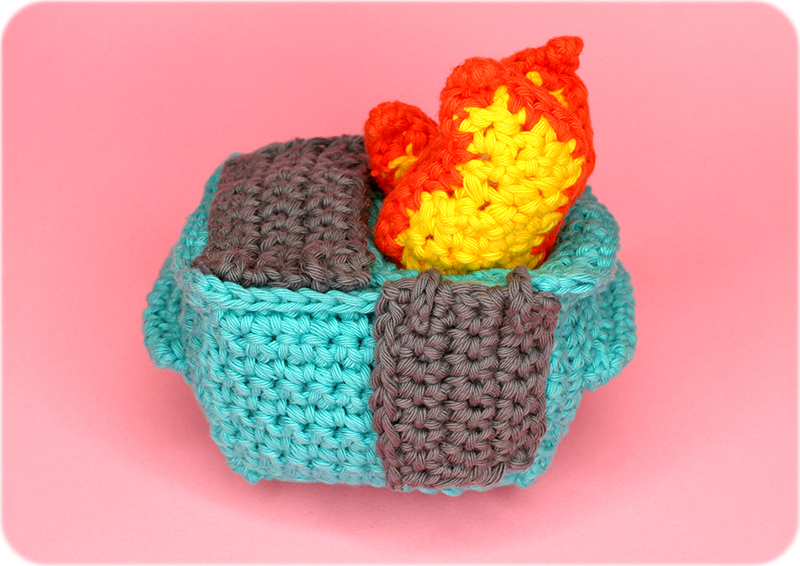
Let’s knock out 2020 with THE BEST CROCHET PROJECT OF THE YEAR!!! It’s 100% Soft‘s Dumpster Fire!!! Truck asked if I wanted to translate his iconic and super popular Dumpster Fire into a crocheted plush, and I said OF COURSE.
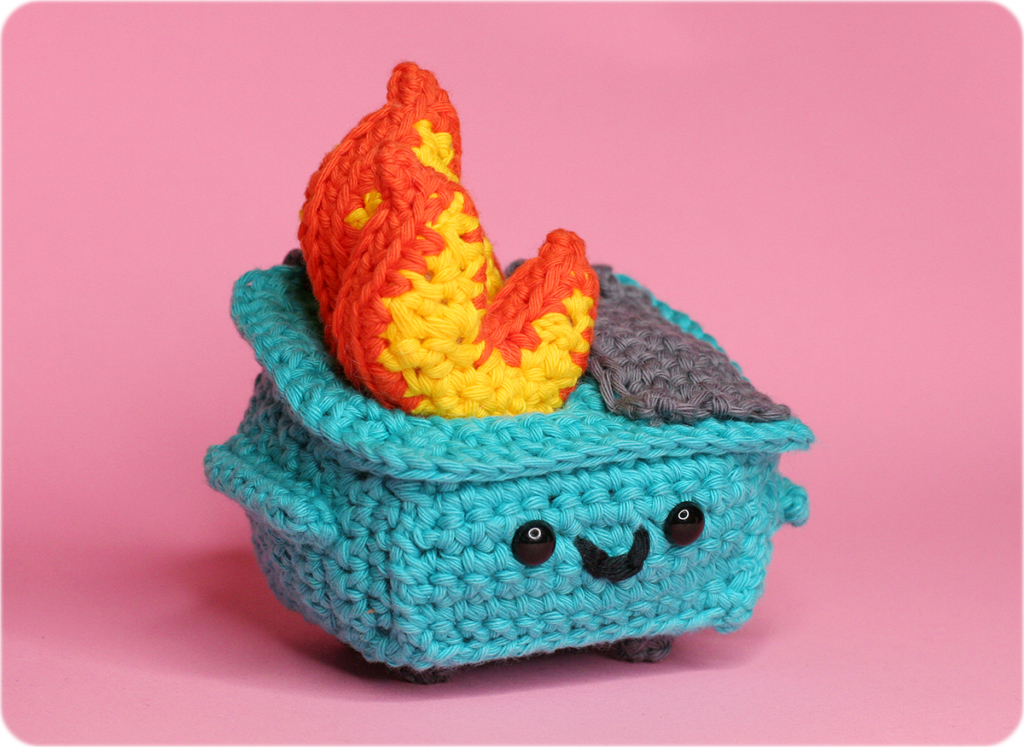
I stayed as true as I could to his original vinyl toy. I didn’t want y’all just crocheting a box with some weak flames inside. This means that the construction is a little bit more involved than with some of my other projects, but I truly feel the results are worth it. I mean, just look at this dude!
I have a YouTube tutorial for you also. It’s my longest yet at 2 hours and 15 minutes long. Get ready to hunker down with me. If you don’t need the video, you can find the free pattern below, and also a more gorgeous, printer-friendly PDF in my Etsy shop.
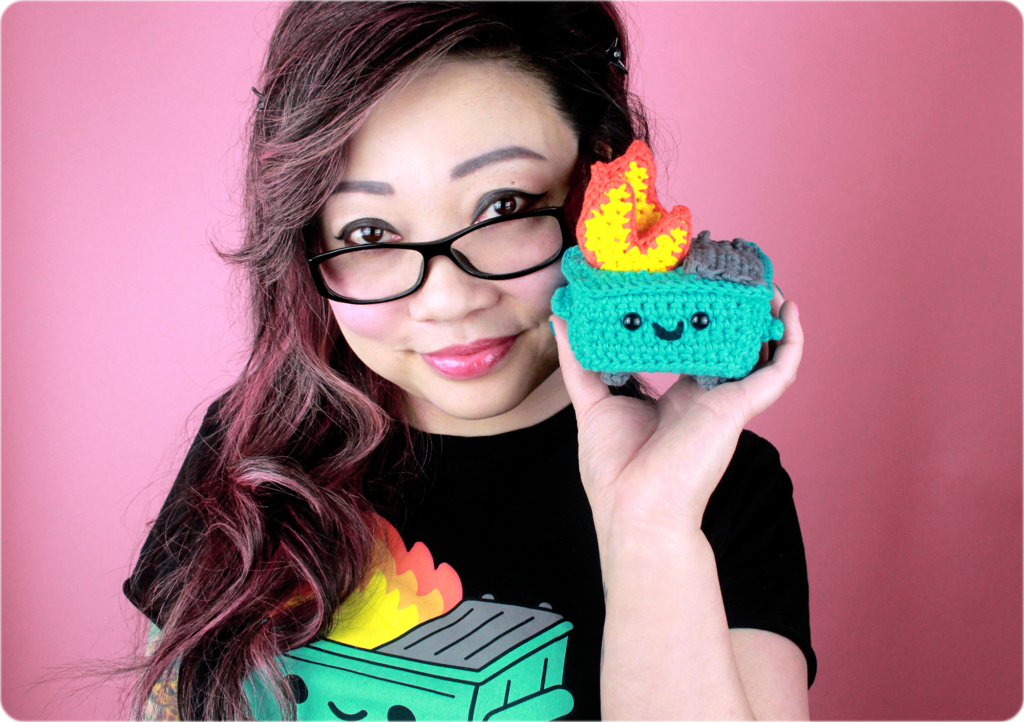
I can’t wait to see all of your lil dumps!
DUMPSTER FIRE CROCHET PATTERN
MATERIALS
Some of my materials links are affiliate links, which means I earn a very small percentage of the sale if you make a purchase.
I used Paintbox Yarns Cotton Aran, but any worsted weight yarn will work.
– Approx. 50 yards of Teal (Paintbox in Marine Blue)
– Approx. 20 yards of Yellow (Paintbox in Buttercup Yellow)
– Approx. 20 yards of Grey (Paintbox in Slate Grey)
– Approx. 10 yards of Orange (Paintbox in Blood Orange)
– Less than 1 yard of Black (Paintbox in Black)
– Two 9mm black round safety eyes
– G6/4.0mm crochet hook [I like a bamboo-handled Susan Bates]
– Scissors [cute as heck]
– Tapestry needle [my favorite size]
– Stitch markers or a piece of scrap yarn in a contrasting color
– 2 good handfuls of of Polyfil stuffing
– Optional: heavyweight interfacing, cardboard or plastic grid (plus fabric glue) to strengthen the crochet structure
– Optional: straight pins
GAUGE – I wouldn’t worry about it. Honestly. If your toy is bigger or smaller than mine, that’s okay. All toys are beautiful.
FINISHED SIZE – mine was approx. 4.5 inches wide and 5 inches tall including the flames
Abbreviations in U.S. terms
BLO: back loop only
ch(s): chain(s)
rnd(s): round(s)
RS: right side
sc: single crochet
sc2tog: single crochet 2 together
sk: skip
sl st: slip stitch
st(s): stitch(es)
WS: wrong side
YO: yarn over
( ): work everything inside the parentheses into the next stitch
[ ]: repeat everything inside the brackets the number of times indicated
Stitch Refresher
sc2tog – single crochet two together – Insert hook into desired stitch, YO, pull through 1. Insert hook into following stitch, YO, pull through 1. YO, pull through all 3 loops on hook.
Notes
– Some of you might wonder why I designed this in so many separate pieces. Yes, it would have been possible to consolidate some of them and reduce the amount of sewing, but since certain sides of the dumpster have various embellishments, it is easier for me to communicate and for you to visualize where these embellishments go if you only have to handle one small section at a time. I also feel like it’s easier to visualize how to assemble.
__________________________________

Front Panel
– With Teal, ch 13.
Row 1: Sk 1st ch, sc evenly. – 12 sts
Rows 2-6: Ch 1, turn. Sc evenly. – 12 sts
– Break off and weave in both ends.
__________________________________
Back Panel
– With Teal, ch 13.
Row 1: Sk 1st ch, sc evenly. – 12 sts
Rows 2-10: Ch 1, turn. Sc evenly. – 12 sts
– Break off and weave in both ends.
__________________________________
Bottom Panel
– With Teal, ch 13.
Row 1: Sk 1st ch, sc evenly. – 12 sts
Rows 2-11: Ch 1, turn. Sc evenly. – 12 sts
– Break off and leave an arm-length yarn tail for sewing later.
__________________________________
Side Panels – Make 2

– With Teal, give yourself an 18-inch yarn tail, then ch 7.
Row 1: Sk 1st ch, sc evenly. – 6 sts
Row 2: Ch 1, turn. Sc evenly. – 6 sts
Row 3: Ch 1, turn. (2 sc), 5 sc. – 7 sts
Rows 4-5: Ch 1, turn. Sc evenly. – 7 sts
Row 6: Ch 1, turn. 6 sc, (2 sc). – 8 sts
Rows 7-8: Ch 1, turn. Sc evenly – 8 sts
Row 9: Ch 1, turn. (2 sc), 7 sc. – 9 sts
Rows 10-11: Ch 1, turn. Sc evenly. – 9 sts
– Break off leaving an 18-inch yarn tail.
__________________________________
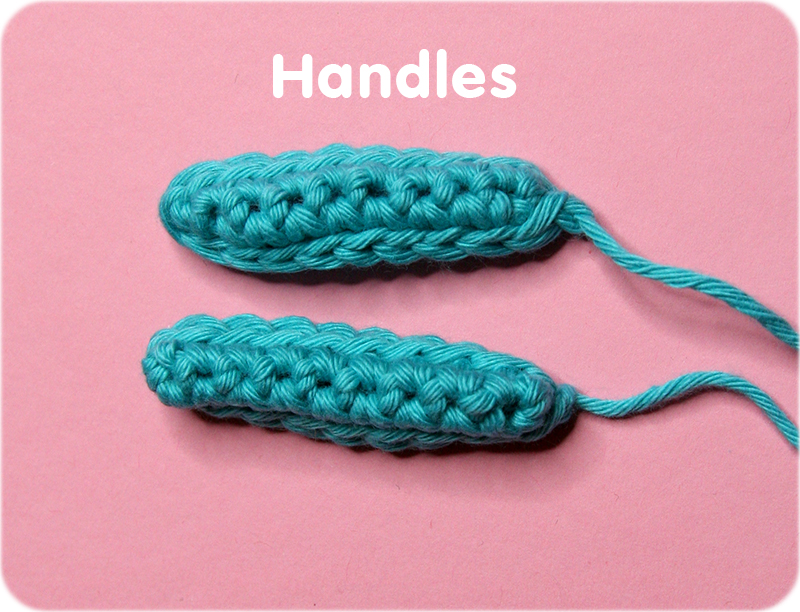
Handles – Make 2
– With Teal, ch 10.
Rnd 1: Sk 1st ch, 8 sc. In last ch, (2 sc). Working on the opposite side of the foundation ch, work 8 more sc. Don’t join the rnd. – 18 sts
Rnd 2: Sl st evenly around, then sl st to 1st sl st to join. – 18 sts.
– Break off leaving 18 inches of yarn for sewing and weave in other end. The RS of your work should show on the outside of the Handle.
– It’s ok if your Handle doesn’t lay flat. It’s not supposed to. You’ll eventually be folding it in half length-wise to sew it onto a Side Panel.
__________________________________
Top Panel

– This is going to look a little weird. The Top Panel needs to have a big hole in it to make space for the Flame Bucket and dumpster flames.
– With Teal, ch 13.
Row 1: Sk 1st ch, sc evenly. – 12 sts
Row 2a: Ch 1, turn. 6 sc. Leave remaining sts unworked. – 6 sts
Rows 3a-12a: Ch 1, turn. 6 sc.
– Break off and leave an 8-inch tail for sewing. Weave in other end.
– Now you will complete the other side and the top edge of this panel, thus enclosing the big space.
Row 2b: Without turning your piece, the WS of Row 1 should be facing you now. Re-join Teal into the far left stitch, which is the 1st sc of Row 1. Ch 1, work 1 sc. – 1 st
Rows 3b-10b: Ch 1, turn. 1 sc. – 1 st
Row 11b: Ch 1, turn. 1 sc. Then ch 6. – 1 st and 6 chs
Row 12b: Sk the 1st ch from your hook, then 5 sc evenly in remaining chs. Complete this row by working 1 sc into the top of the sc from Row 11b, making sure that this row of 5 sc points toward the “A” section of stitches and is not sticking out the opposite direction. – 6 sts
– Don’t break off because you’re going to keep crocheting later to attach the Top Panel to the top of your dumpster. Pull the loop on your hook to make the loop really big and avoid accidentally pulling out any stitches while you work on other parts. You can also break off leaving a tail of 5 yards for using later, or just break off and weave in the end, knowing that you’ll have to rejoin in the same spot later.
– Next, you need to close the gap between Row 12a and 12b. Do this with a tapestry needle and the remaining yarn tail from 12a. Sew a whipstitch or two and tie down. Weave in that end.
__________________________________
Flame Bucket
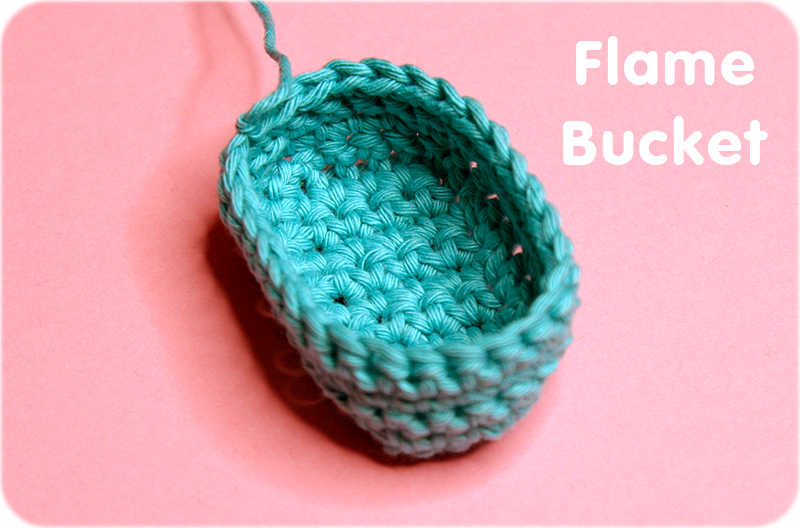
– This is going to be the base for your flames. We want the flames to look like they are shooting out from inside the dumpster and not just sitting on top of it. So we’re creating a bucket for them to sit in. Not only will this help make the flames look like they are shooting out from inside, but it will also be a lot easier to sew the bottom of the flames down. This piece will be a rectangle the same size as the hole in the Top Panel, with a couple rounds of sc around it to form the sides of the bucket.
– With Teal, ch 6.
Row 1: Sk 1st ch, sc evenly across. – 5 sts
Rows 2-10: Ch 1, turn. Sc evenly across. – 5 sts
– Now you’ll start to work around this rectangle.
Rnd 1: Ch 1, turn. In BLO, work 5 sc. Now working in the side of the rectangle, 9 sc evenly. Across the bottom edge, work 5 sc. Then across the last side, work 9 sc. Sl st to 1st sc to join. – 28 sts
Rnds 2-4: Ch 1, turn. Now working in both loops, sc evenly around. Sl st to 1st sc to join. – 28 sts
– Break off leaving 24 inches of yarn for sewing and weave in other end.
_________________________________
Big Flames – Make 2
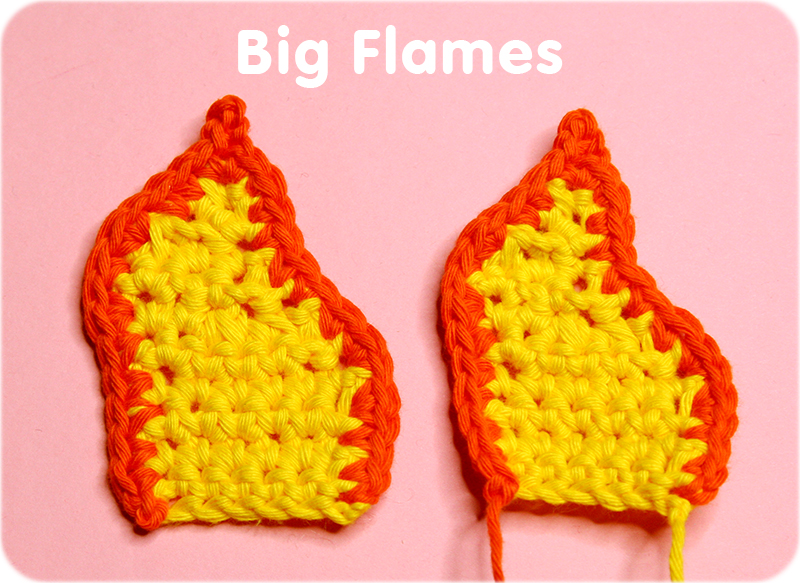
– This flame is made like a pillow, with 2 of the same pieces sewn together and lightly stuffed.
– We’re also going to play around with increases and decreases to create curves in the flame shape.
– With Yellow, give yourself an 18-inch yarn tail and then ch 7.
Row 1: Sk 1st ch, sc evenly. – 6 sts
Rows 2-4: Ch 1, turn. Sc evenly. – 6 sts
Row 5: Ch 1, turn. (2 sc), 3 sc, sc2tog. – 6 sts
Row 6: Ch 1, turn. Sc2tog, sc2tog, sc, (2 sc). – 5 sts
Row 7: Ch 1, turn. (2 sc), sc2tog, sc2tog. – 4 sts
Row 8: Ch 1, turn. 2 sc, sc2tog. – 3 sts
Row 9: Ch 1, turn. Sk 1, sc2tog, then work one more sc in same st. – 2 sts
Row 10: Ch 1, turn. Sc2tog. – 1 st
– Break off Yellow.
– With the RS of Row 10 still facing you, join Orange in the bottom right corner, where your beginning Yellow yarn tail is sticking out. You’ll be working a rnd of sc, just along the long edges of the flame, and not the bottom. Because there are curves involved, we will need to add some extra stitches here and there.
Rnd 1: Ch 1, in next st work sc and sc again in next st. (2 sc), then (2 sc) again. Then 6 sc evenly to get to the top. The next stitch should be the single sc2tog from Row 10 at the tip of the triangle. In this st, work (sc, ch 3, sl st in 2nd ch from hook, sl st in next ch, sc) to create a nice point for the flame. Then 2 sc, (2 sc), sc, (2 sc), 5 sc, then sl st into the corner to join.
– Break off leaving 24 inches of yarn for sewing and weave in the 2 short ends.
– When you make the 2nd piece, you don’t need to leave long tails at the beginning or end, and you can weave in all ends.
__________________________________
Little Flames – Make 2

– This piece is similar to the Big Flame except it will be 2 flames stuck together that are shorter and thinner.
– With Yellow, give yourself an 18-inch yarn tail, then ch 6.
Row 1: Sk 1st ch, sc evenly across. – 5 sts
Row 2a: Ch 1, turn. 3 sc evenly. Leave remaining 2 sts unworked. – 3 sts
Row 3a: Ch 1, turn. Sk 1, sc, (2 sc). – 3 sts
Row 4a: Ch 1, turn. (2 sc), sk 1, sc.– 3 sts
Row 5a: Ch 1, turn. (2 sc), sc2tog. – 3 sts
Row 6a: Ch 1, turn. Sk 1, 2 sc. – 2 sts
Row 7a: Ch 1, turn. Sc2tog. – 1 st
Row 8a: Ch 1, turn. Sc. – 1 st
– Break off Yellow.
– Work on the other small triangle of this piece. With the RS of Row 2 facing you, re-join Yellow in the next free st in Row 2.
Rows 2b-3b: Ch 1, sc evenly. – 2 sts
Row 4b: Ch 1, turn. Sk 1, sc. – 1 st
Row 5b: Ch 1, turn. Sc. – 1 st
– Break off Yellow.
– Work a rnd of Orange along the top of the flames, and not the bottom edge.
– With the RS of Row 1 facing you, join Orange in the lower right corner, at the beginning of Row 1.
Rnd 1: Ch 1, sc in the next st, then 4 more sc evenly along the edge until you get to the top of the first peak. Work (sc, ch 3, sk 1st ch from hook then sl st in next 2 chs, sc), then 4 sc evenly down the other side. You might not be all the way down at the bottom of the triangle but that’s ok. This will help keep the Little Flame from getting too wide. Now you’ll be working on the next triangle. I work my first sc into the side of Row 3a. 5 more sc evenly up the side. At the top of this peak, work (sc, ch 3, sk 1st ch from hook then sl st in next 2 chs, sc), then 3 sc, (2 sc), sc, (2 sc), 2 sc. Sl st into the corner to join.
– Break off leaving 18 inches of yarn for sewing later and weave in other Orange end. There will probably be a bit of a gap in the middle of Row 3-Row 4, and you can use a Yellow yarn tail to sew up this gap as you weave in the rest of the short ends.
__________________________________
Top Lid

– With Grey, ch 12.
Row 1: Sk 1st ch, sc evenly across. – 11 sts
Rows 2-7: Ch 1, turn. Sc evenly across. – 11 sts
__________________________________
Back Lid
– With Grey, ch 9.
Row 1: Sk 1st ch, sc evenly across. – 8 sts
Rows 2-7: Ch 1, turn. Sc evenly across. – 8 sts
– Break off leaving an arm’s length of yarn for sewing later and weave in other end.
__________________________________
Hinges – Make 4

– With Grey, ch 4.
– Break off. Your yarn tails don’t need to be very long here. Maybe just like 6-8 inches each.
__________________________________
Wheels – Make 4

– With Grey, make magic circle, or ch 3 and sl st to 1st ch to form ring.
Rnd 1: Ch 1, 6 sc into ring. Sl st to 1st sc to join. – 6 sts
– Break off leaving an 18-inch yarn tail.
– With a tapestry needle, weave the long yarn tail through the 6 remaining sts and pull to close up the stitches and create a small ball. The WS of my stitches will end up on the outside of the ball. Tie off and keep this end for sewing later. Weave in the shorter end.
__________________________________
Assembly
- If you want, you can block all of your pieces before sewing them together. I’m honestly too lazy to do this and don’t mind if there are some inconsistencies and asymmetries in my finished plush.
- You don’t have to reinforce any of your pieces with heavyweight interfacing, but I choose to do so for the Bottom Panel. Cut a piece of interfacing that is slightly smaller than the size of the Bottom Panel. You want to keep an edge of crochet clear around the interfacing so you have room to sew through the edges of the panel for assembly. I also round the corners of the interfacing so there aren’t any corners poking out of my crochet work. Use fabric glue to attach.
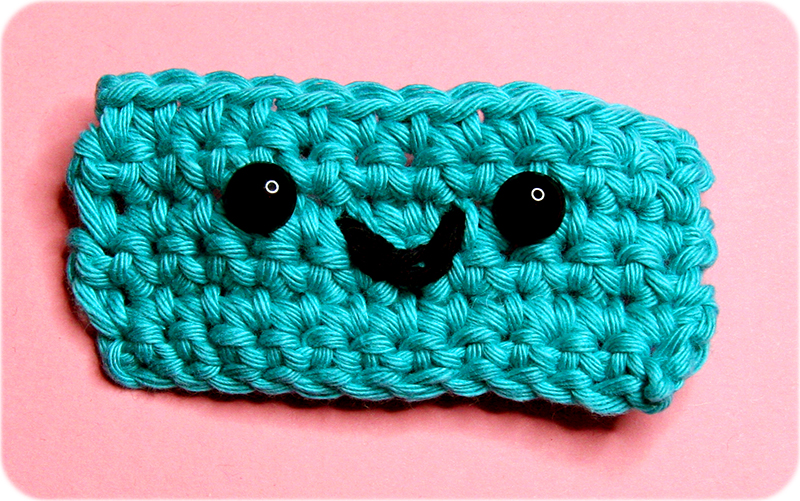
- If you want to reinforce the Front Panel, you need to be mindful of the safety eyes. I didn’t reinforce anything except the Bottom Panel, so if you don’t want to either, ignore the parts where I talk about the interfacing from now on. Cut out the interfacing slightly smaller than the Front Panel. With Row 6 of the Front Panel at the top and Row 1 at the bottom, insert safety eyes (don’t snap the backs on yet) in Row 4, with 5 stitches in between them. You can use your own judgment for placement, but that’s where I placed mine. You’ll need to cut a small hole or X in the interfacing so that the post of the safety eye goes all the way through. If you’re using interfacing, you’ll need to add a mouth before snapping the safety eyes closed on the Front Panel and the interfacing. If you’re not, go ahead and snap the eyes here.
- With Black yarn, create a small smile with surface sl st or an embroidery stitch of your choice. It only takes a few sts. I used 3. Break off and weave in ends.
- If your you’re using interfacing, you can now line up the interfacing with the Front Panel, snap the eyes into place, and secure the interfacing with fabric glue.
- Sew one Handle to each Side Panel. The top of the Side Panels is the edge with all of the increases, and the bottom is the edge with the yarn tails sticking out. Be sure before sewing each Handle down that you’ve got one Side Panel oriented to the right and the other to the left. The Handles can be squished to be flatter or more 3D. I press the long sides together so that the Handle is more 3D before sewing. Pin in place before sewing if that’s easier. If you want to reinforce the inside of each Side Panel, go ahead and do that now with interfacing and fabric glue.

- Place the Bottom Panel on a flat surface. Use that yarn tail to sew the long edge of the Bottom Panel to the long edge (Row 1) of the Back Panel.

- Place the Bottom Panel on a flat surface. Use that yarn tail to sew the long edge of the Bottom Panel to the long edge (Row 1) of the Back Panel.
- Grab the Side Panel that has a Handle facing the outside of the dumpster with its tall side lined up with the edge of the Back Panel. They should be the same height. Sew the bottom of this Side Panel to the Bottom Panel.
- Grab the Front Panel, and with the face toward the outside of the dumpster, sew the bottom of the Front Panel to the Bottom Panel.
- Grab the other Side Panel, making sure the Handle is facing the outside of the dumpster. The tall side should align with the Back Panel. Sew the bottom of this Side Panel to the Bottom Panel.
- Sew together all the edges of the panels to create a box with an open top. You can use all the extra yarn tails to do this. The box may seem a little lopsided, but you can manipulate and pull and stretch the pieces a bit.

- Now you’ll work on the Top Panel and the flames. Line up the corner of the Flame Bucket so that the openings of the two pieces match. I start with the long yarn tail of the Flame Bucket in the top left corner of the Top Panel hole. Think of the Top Panel as a countertop and the Flame Bucket as the sink. Pin down in the corners first if helpful and then whipstitch the edges together all around.

- Take the 2 pieces of the Big Flame and lay one on top of the other, matching the shapes. The RS of the Orange rnd should face up toward you. Use the Orange yarn tail to whipstitch the orange edges together. To reduce bulk in the seam, I whipstitch only one loop from each piece, and I use the loops that are closest to where the 2 pieces meet, i.e. the back loop of the front piece and the front loop of the back piece. Leave the Yellow edge open and put in a little stuffing. You don’t need too much. If you want to make your flames removable, sew this bottom seam closed and skip the step for sewing the flames into the bucket.

- Repeat previous step with the Little Flame.

- Arrange Big Flame and Little Flame inside the Flame Bucket. You can play with how much stuffing you want to put in the flames here and see how they fit in the bucket. Use the long yellow tails to sew the bottom edges of each flame to the bottom of the bucket. I sometimes find it easier to pop the bucket up and out toward me so that I can easily see how the bottom of the flames and bottom of the bucket meet. Before tying any knots, pop the bucket back down and make sure you like the placement of your flames. This stitching doesn’t have to be perfect. Nobody will see it, and you just want to make sure that the flames don’t fall out or sit in the bucket in a weird way.

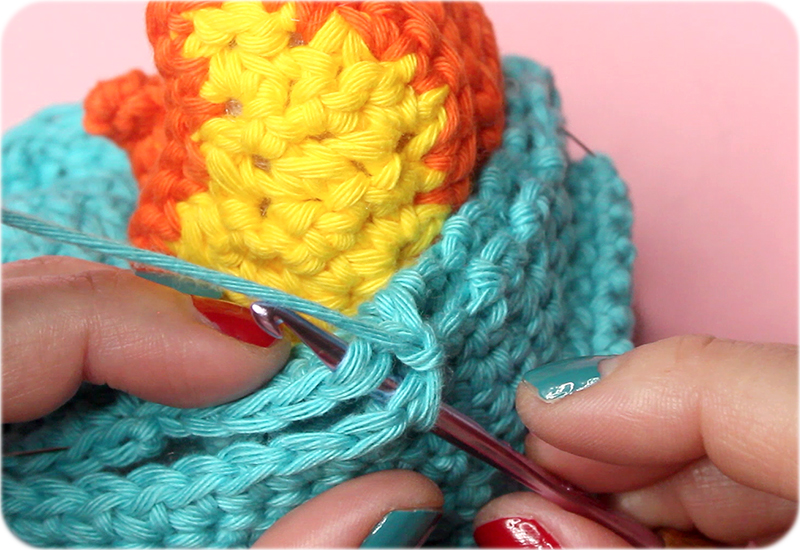
- Put the Top Panel on top of the dumpster. Arrange a little bit of stuffing under the flame bucket and in front of it, and also stuff the right side of the dumpster. You won’t need a lot. Use your judgment and what looks best to you. With the dumpster face looking at you, line up the corner of the Top Panel and the last stitch you worked in it with the back left corner of the dumpster. You will be sc’ing through both layers to attach the Top Panel to the top of the dumpster and create a border with a slight ridge. Pin the Top Panel in place first, especially matching up the corners, all the way around, to make sure nothing shifts while you crochet.
- You’ll want the WS of this rnd of sc stitches to show on the top of the dumpster. This is really important and can alter the entire look if the RS of the stitches end up showing on top. Place your hook back into the live loop on the Top Panel. Ch 1 and TURN. Insert your hook through the Back Panel and then the Top Panel and work your single crochet. With each subsequent sc, your hook will first go through the Back Panel and then the Top Panel to work the stitch. 12 sc total across this edge. In the corner, work (3 sc). Now 10 sc evenly across the next edge. Check your level of stuffing here and add or subtract. (3 sc) in the corner again. 12 sc across the front, (3 sc) in the corner, 10 sc again across the last side edge, then (3 sc) in the last corner. Sl st to the first sc of this rnd and break off. Weave in ends.
- Each lid will need 2 Hinges. Place the Top Lid on the right side of the dumpster. You should still be able to see some teal border around it. The lid shouldn’t meet any of the dumpster top edges exactly. If you need to, add or subtract rows to get the look that you want. Pin in place, leaving yourself some room to work on the top/back edge. Decide where you want the 2 Hinges. Attach them by piercing the top of the lid with one of the Hinge tails and then securing it with a knot underneath the lid. Then, with the other yarn tail, take the Hinge over the top edge of the Lid, pierce through the top of the dumpster without crossing over the dumpster edge and without seeing your stitch on the back of the dumpster, then bring your needle back up through the top lid, and you can either secure with a knot on the dumpster or underneath the lid. Doesn’t matter where as long as the Hinge is secure and the ends are all hidden under the lid. Repeat with the other Hinge. If you find that your Hinges seems too short or too long, adjust how many chains long they are.

- Pin Back Lid to the back of the dumpster, making sure that the top edge of the Back Lid peeks over the edge of the dumpster by about 1 row. Arrange the Hinges. With the front of the dumpster facing you, take one end of a Hinge and pierce your needle into the top and back of the dumpster, basically into the lip created by the sc round. Tie a knot on the back of the dumpster. Nobody will see this since the Back Lid will cover it. The other end of the back hinge will come over the top of the lid and into the back wherever the Hinge naturally lands. Tie a knot underneath the lid to hide it.


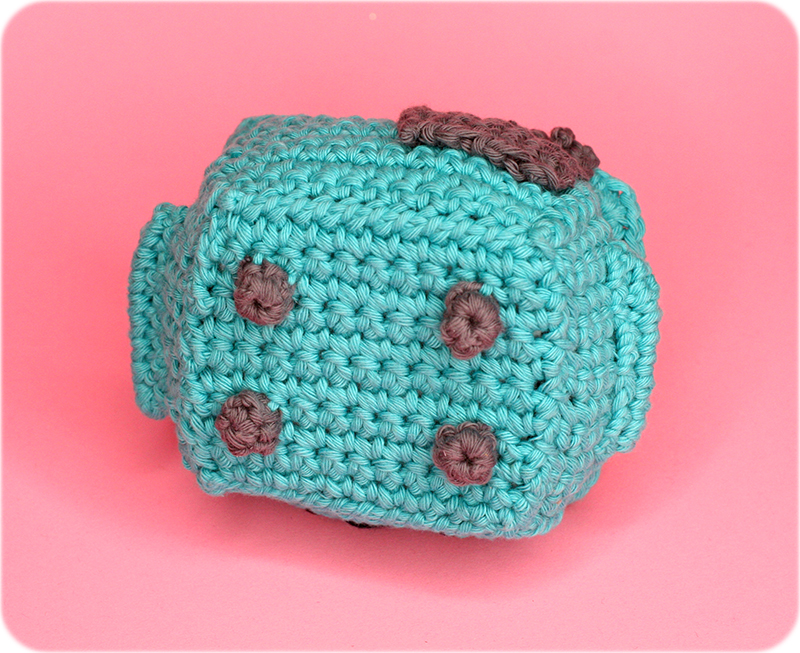
- Flip the dumpster over to see the bottom. Arrange 1 Wheel in each corner, slightly away from the edges. Sew down and weave in ends. This is the last step!

YAY! YOU DID IT!
Don’t forget to tag @twinkiechan and @100soft if you post photos of your finished dumpsters.
We’d love to see them and share!