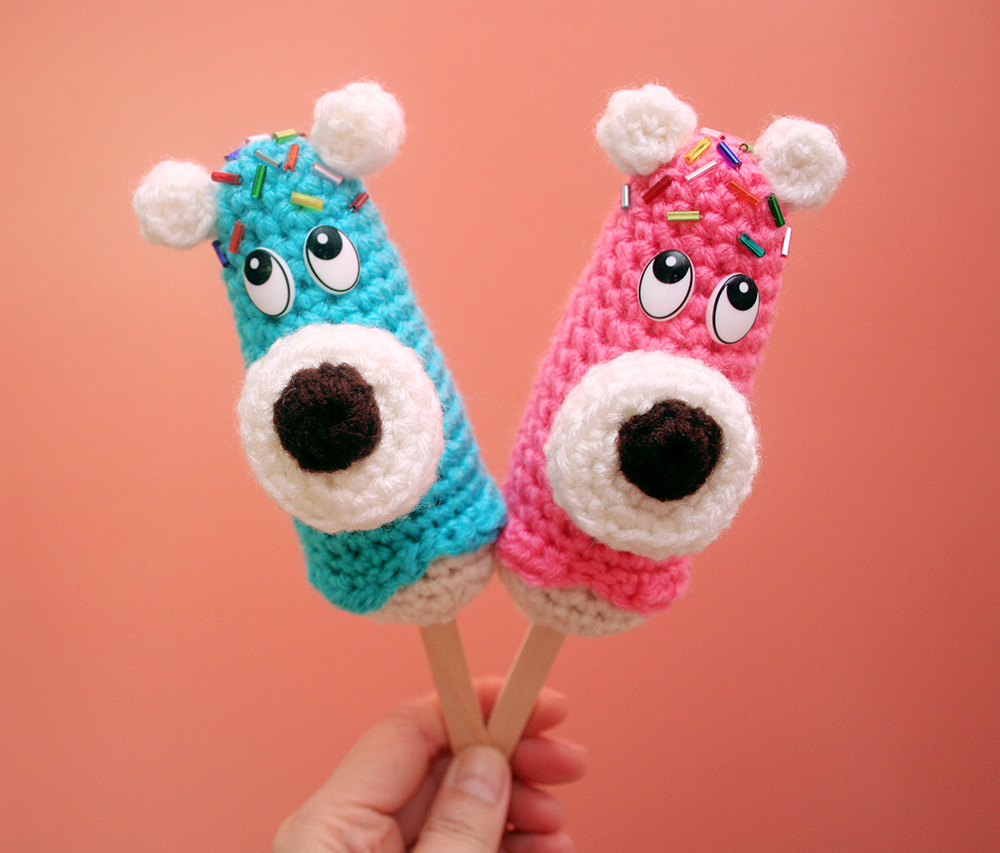
 I have a fun summer-time pattern for you guys! I saw a cute photo of somebody’s actual frozen treat, which was a chocolate-covered frozen banana, decorated to look like a bear. The snout was a little cookie, and I can’t remember the other decorations. I tried Googling it, but couldn’t find the same image again, but I did run into THIS tutorial to make “polar bears.” You know I love me some color, so I imagined that instead of just using white chocolate to coat your frozen banana, you could use colorful chocolate/candy melts and have all different colors of bears! Also, I shot photos in my new popsicle dress and felt like a lil popsicle bear would be the perfect accessory. Unfortunately, most of the photos I took with the popsicle turned out focused improperly…….doh.
Here is my initial sketch.
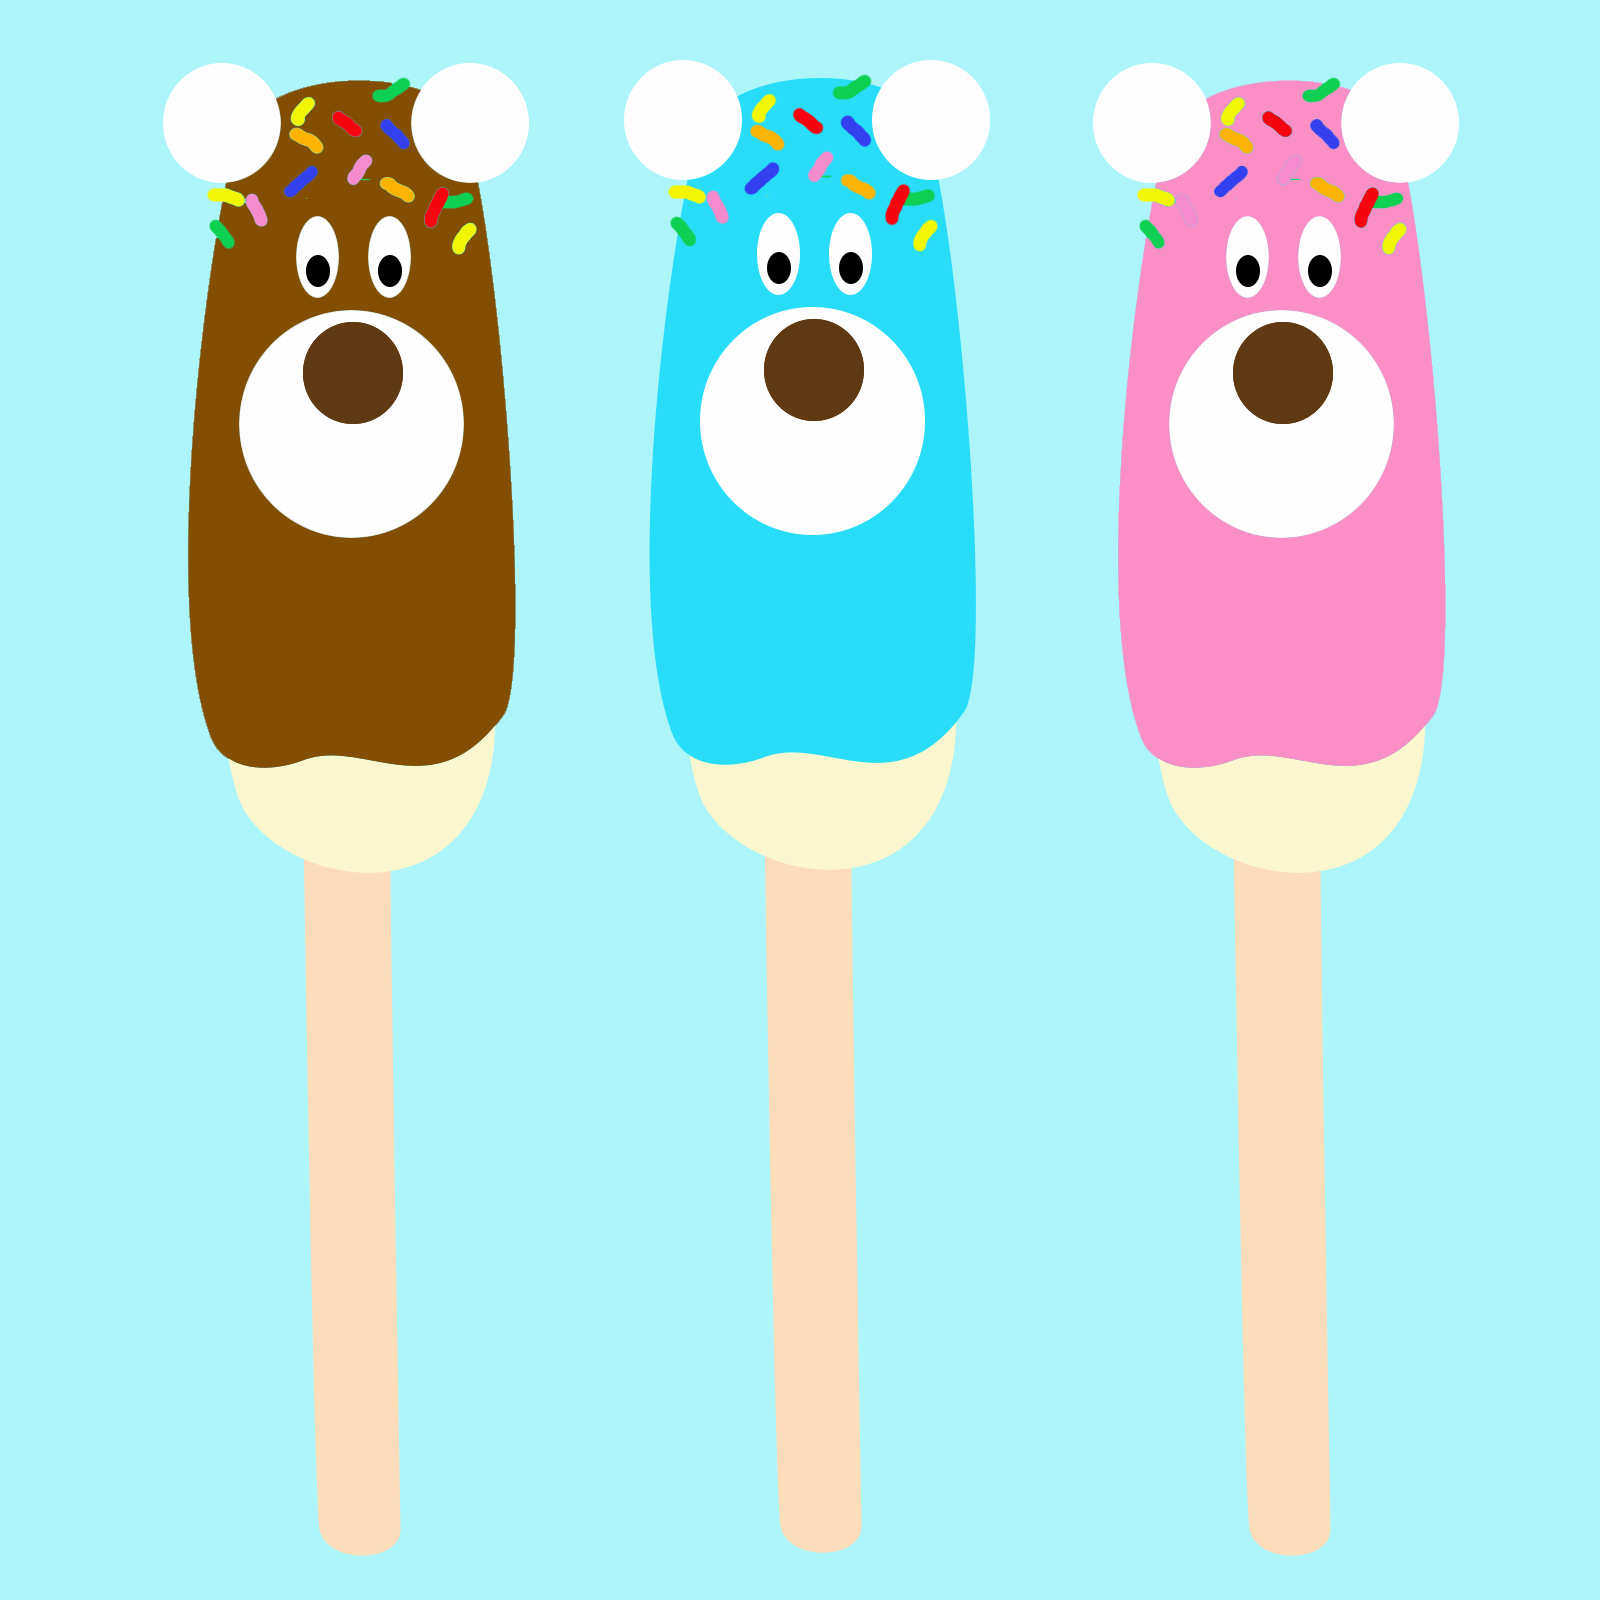
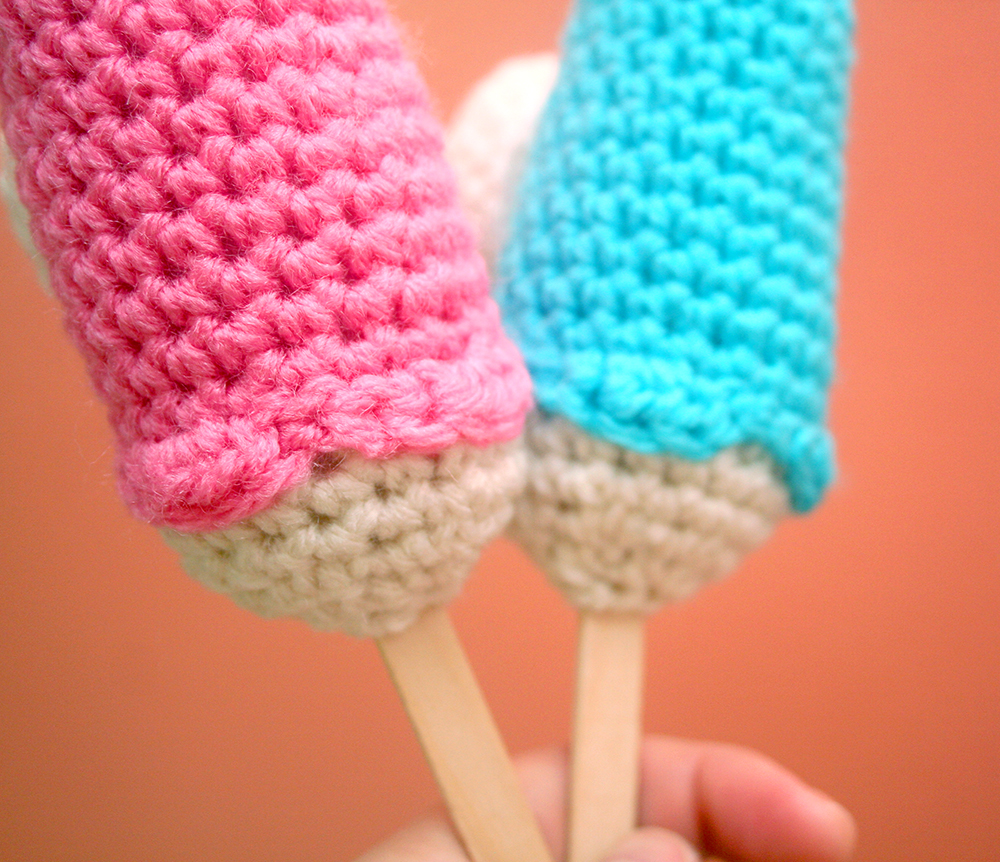
And here are the finished blue and pink versions! I wanted to make a brown one, too, but I’m also still working really hard on prepping for Renegade.
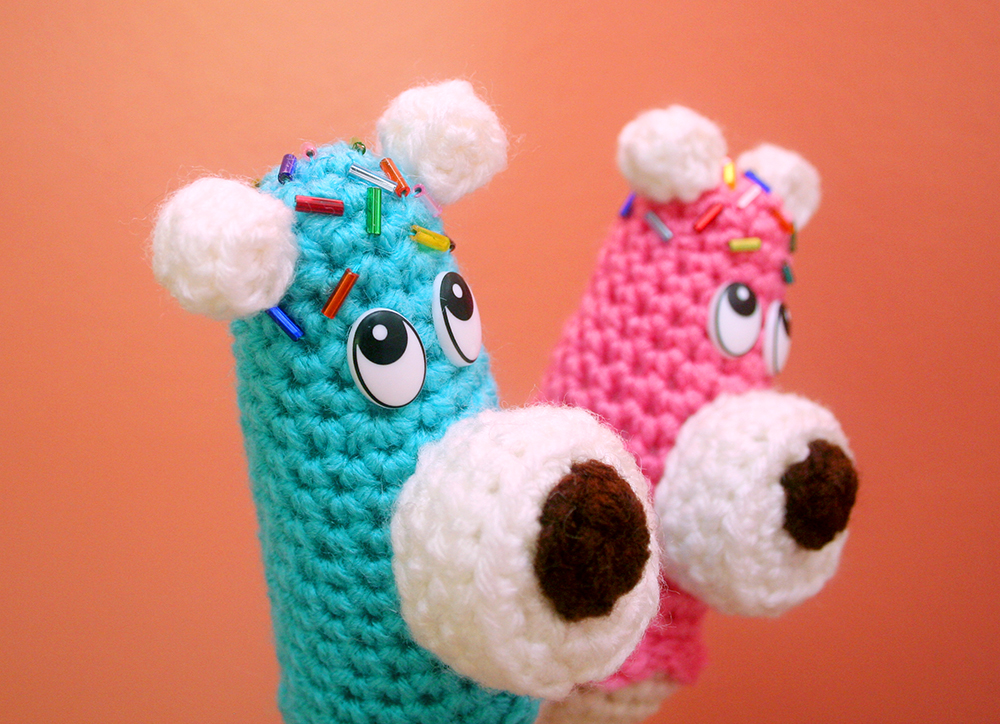
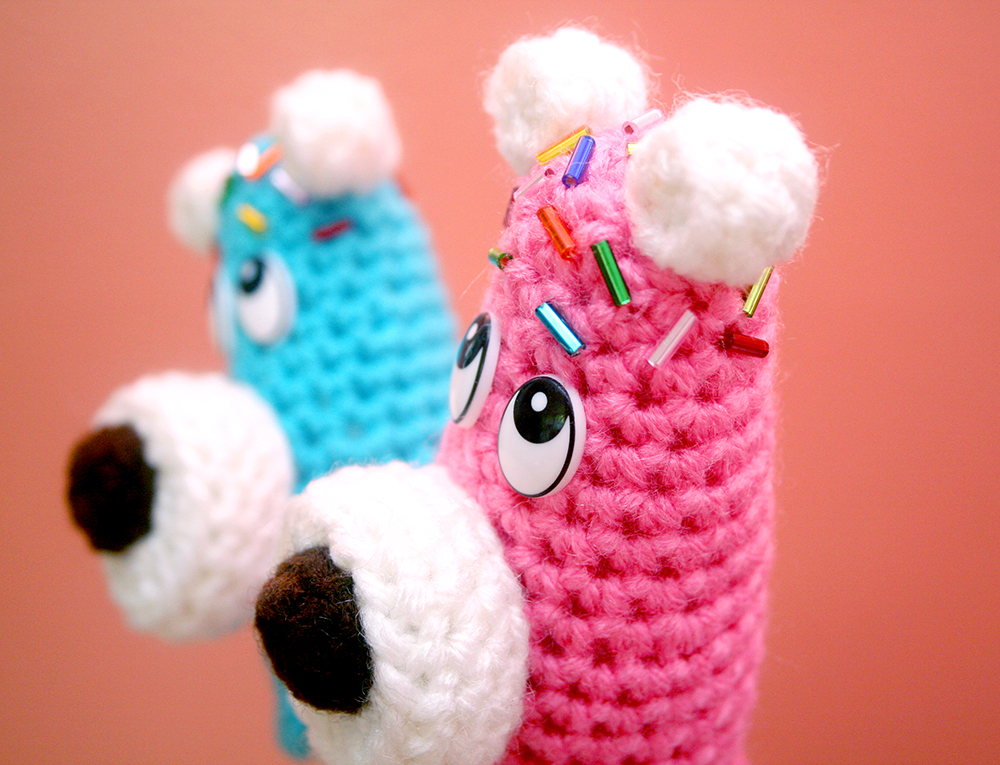
I hope you guys enjoy these cute goodies! My favorite part is crocheting the mini-marshmallows! I think they’re really funny and cute.

I apologize in advance if there are any errors in this pattern. Nobody else has edited or looked at it, and I just dashed it off really quick! Let me know if there any issues! 🙂
Ingredients:
- Worsted weight yarn in Pink (or whatever color you want your chocolate dip), approx. 20 yards (Red Heart Super Saver in Perfect Pink, Turqua, or Coffee)
- Worsted weight yarn in Off White, approx. 5yards (Red Heart Super Saver in Aran)
- Worsted weight yarn in White, approx. 10 yards (Red Heart Super Saver in Soft White)
- Worsted weight yarn in Brown, approx. 2 yards (Red Heart Super Saver in Coffee)
- Popsicle stick
- Safety eyes or felt scraps to create eyes, and any glue or thread needed to attach them
- Craft glue
- H8/5.0mm crochet hook
- Scissors
- Tapestry needle
- Optional: stitch markers, hot glue, some kind of sprinkles for the top, like yarn, embroidery thread, or beads
Abbreviations (US terms):
ch(s): chain(s)
hdc: half double crochet
rnd(s): round(s)
sc: single crochet
sk: skip
sl st: slip stitch
st(s): stitch(es)
( ): work everything inside the parentheses into the next stitch
[ ]: work everything inside the brackets the number of times indicated
Notes:
- The Right Side of your work should always show on the outside of your project.
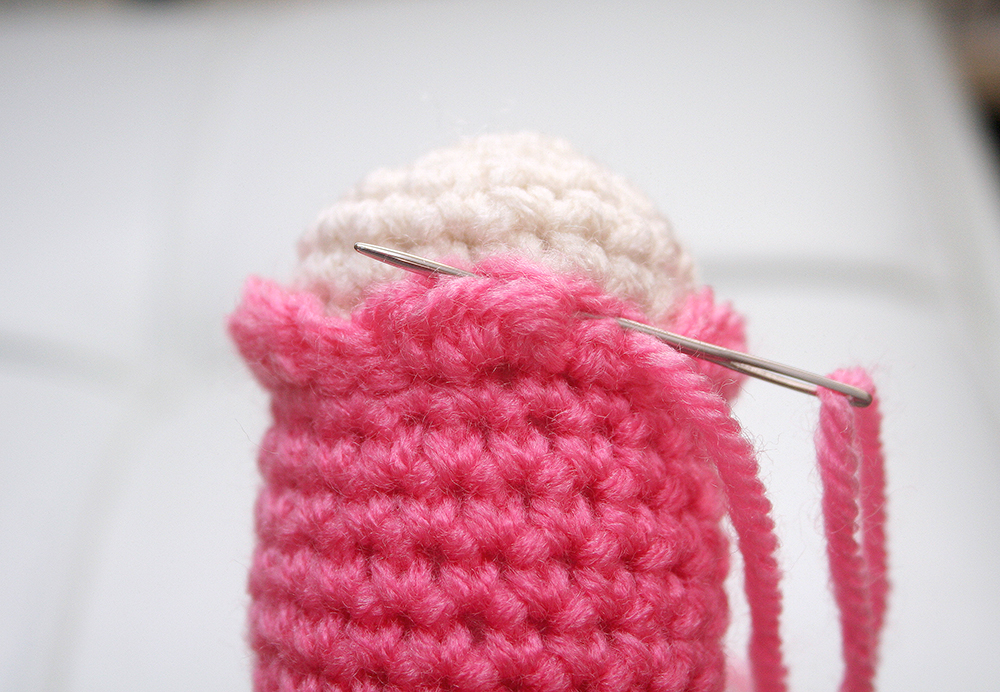
Chocolate Dip (or top of the bear)
- With Pink, make magic circle, or ch 3 and sl st to 1st ch to form ring.
Rnd 1: 6 sc into ring. Don’t join rnds. Use a stitch marker if desired. (6)
Rnd 2: (2 sc) 6 times. (12)
Rnd 3: Sc evenly around. (12)
Rnd 4: [(2 sc), 3 sc] 3 times. (15)
Rnds 5-7: Sc evenly around. (15)
Rnd 8: [(2 sc), 4 sc] 3 times. (18)
Rnds 9-11: Sc evenly around. (18)
Rnd 12: [(2 sc), 5 sc] 3 times. (21)
Rnds 13-18: Sc evenly around. Sl st to next st to join. (21)
Rnd 19: CH 1 AND TURN. Work this rnd in BLO. [sl st, sl st, sc, (2 hdc), sc] 4 times. Sl st in last st, then sl st to 1st sl st.
- Break off leaving about 24 inches of yarn for sewing later.
Banana (or bottom of the bear)
- Turn Chocolate Dip and join Off White into one of the unworked back loops from Rnd 18. The wrong side of Rnd 19 should be facing you.
Rnd 1: Continue working this rnd in the unworked back loops from Rnd 18. [invdec, 5 sc] 3 times. Don’t join rnds. (18)
Rnds 2-3: Sc evenly around. (18)
- Begin stuffing the project and continue to stuff as you work.
Rnd 4: [invdec, sc] 6 times. (12)
Rnd 5: invdec 6 times. Sl st to next st to join. (6)
- Break off leaving about 10 inches of yarn for later. You will not be drawing the remaining sts closed right now, because you’re saving room for the popsicle stick. Weave in short end.
Big Marshmallow (snout)
- With White, make magic circle, or ch 3 and sl st to 1st ch to form ring.
Rnd 1: 6 sc into ring. Don’t join rnds. (6)
Rnd 2: (2 sc) 6 times. (12)
Rnd 3: [(2 sc), sc] 6 times. Sl st to next st to join. (18)
Rnd 4: Working in BLO, sc evenly around. Don’t join rnds. (18)
Rnds 5-6: Working in both loops, sc evenly around. After rnd 6, sl st to next st to join (18)
Rnd 7: Working in BLO. [invdec, sc] 6 times. Don’t join. (12)
- Stuff very lightly.
Rnd 8: invdec 6 times. Sl st to next st to join. (6)
- Break off leaving about 18 inches of yarn.
- With tapestry needle, weave yarn tail through remaining 6 sts and pull to close. Tie off. To keep the top and bottom of the marshmallow flatter, I run a stitch through the top and bottom of the marshmallow with the thread traveling through the center and stuffing of the marshmallow Don’t pull too tightly, as this will really warp the marshmallow, but a stitch or two running through the entire center of the piece can help a lot.

Mini Marshmallow (ears, make 2)
- With White, make magic circle, or ch 3 and sl st to 1st ch to form ring.
Rnd 1: 6 sc into ring. Sl st to next 1st to join. (6)
Rnd 2: In BLO, sc evenly around. (6)
Rnd 3: In both loops sc evenly around. Sl st to next st to join. (6)
- Break off leaving about 8 inches of yarn.
- Stuff marshmallow with a bit of White.
- With tapestry needle, weave yarn tail through FLO of remaining loops and pull to close. Tie off and weave in ends. You can run a stitch or two through the center, just like the Big Marshmallow, if you like.
M&M (nose)
- With Brown, make magic circle, or ch 3 and sl st to 1st ch to form ring.
Rnd 1: 6 sc into ring. Sl st to 1st sc to join. (6)
- Break off leaving about 10 inches of yarn for sewing later and weave in short end.
Assembly
- With tapestry needle and Pink yarn tail, sew the edges of the Chocolate Dip down to the Banana. This step isn’t absolutely mandatory if you like the look of the Chocolate Dip as is, but I like it to look a bit flatter, so stitching it down helps.
- Pick which side of the Big Marshmallow you like best and sew M&M to the top of it to make a nose.
- Tentatively arrange the face to see where everything might go, and then sew or hot glue the Big Marshmallow to the Chocolate Dip where you want the snout to be.
- Sew or hot glue the Mini Marshmallows to the top of the Chocolate Dip where you want the ears to be.
- Attach eyes.
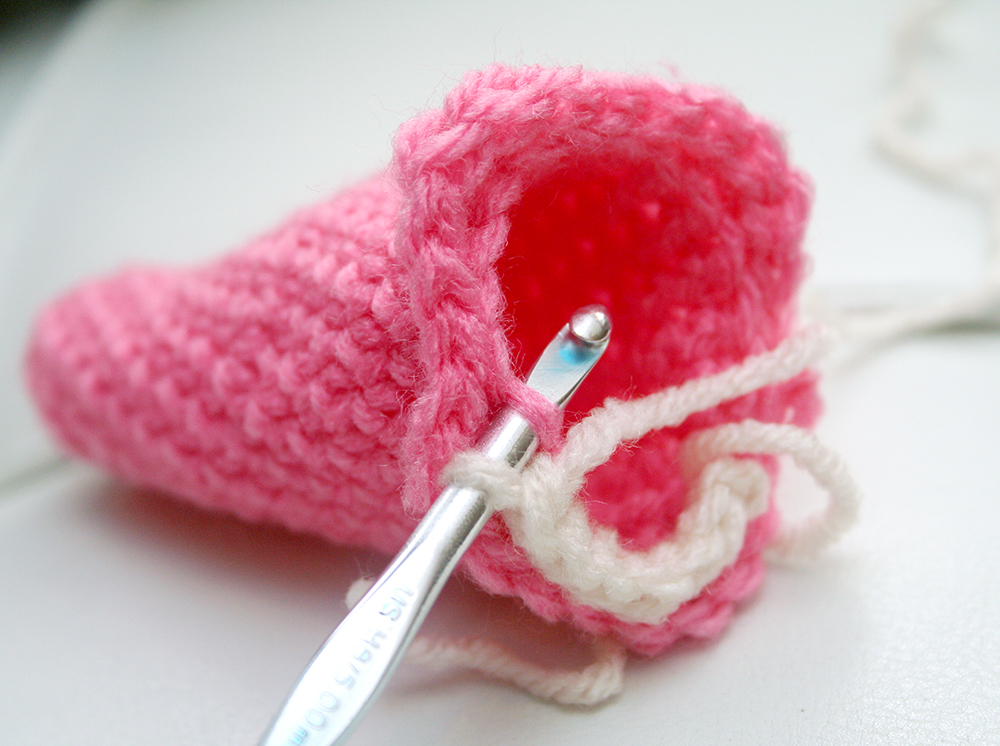
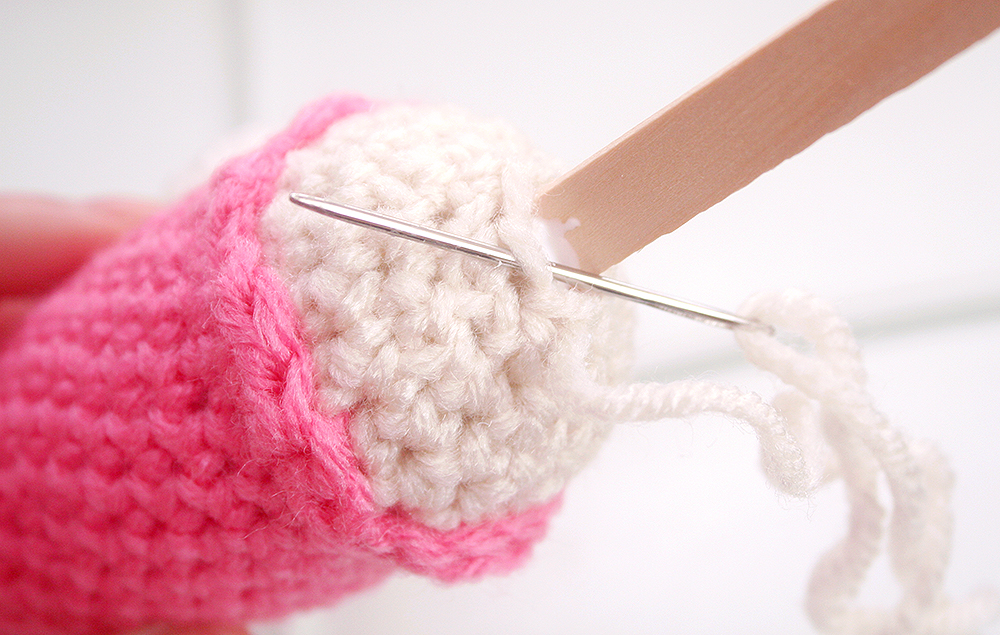
- Insert the popsicle stick into the opening of the Banana to see how far in you want it to go. Then remove it and coat the tip of the popsicle stick with glue. I would coat an inch or less, because the glue will also spread downward as you insert the stick, and you don’t need a bunch of extra glue oozing out where the stick will be exposed.
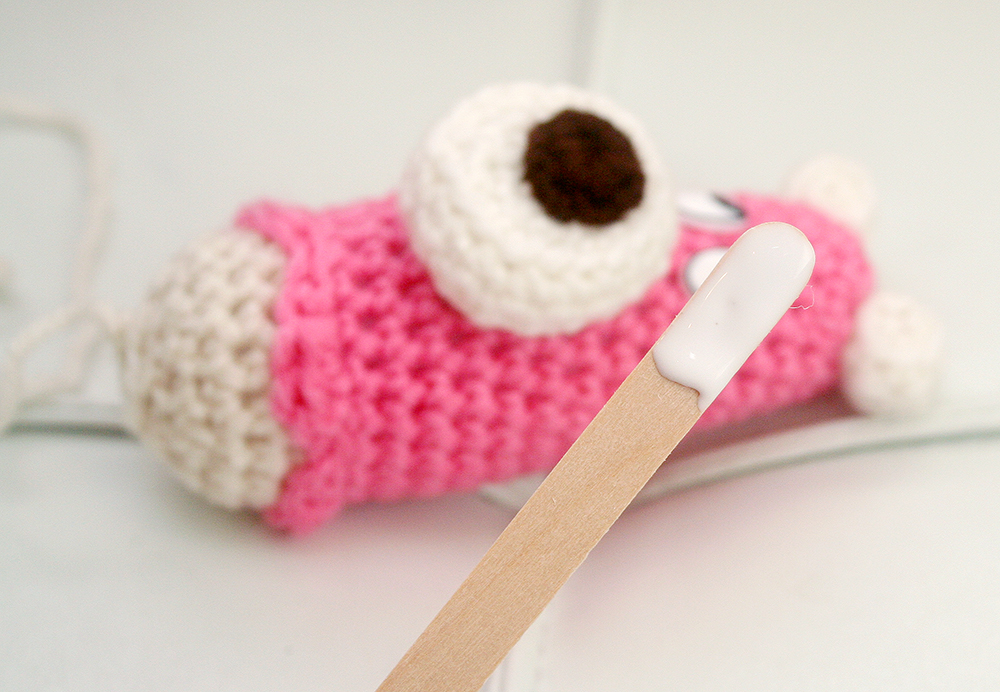
- Insert the stick, moving around the stuffing as you go, to try to embed the stick securely. Also remember to have the wide part of the stick facing frontward since the popsicle will look nicer that way.
- Squirt a little glue into the opening to make sure the yarn will make nice contact with the stick, then carefully use the Off White yarn tail to weave through the sts around the hole to make the hole smaller. Tie off and weave in end.
- Add sprinkles!