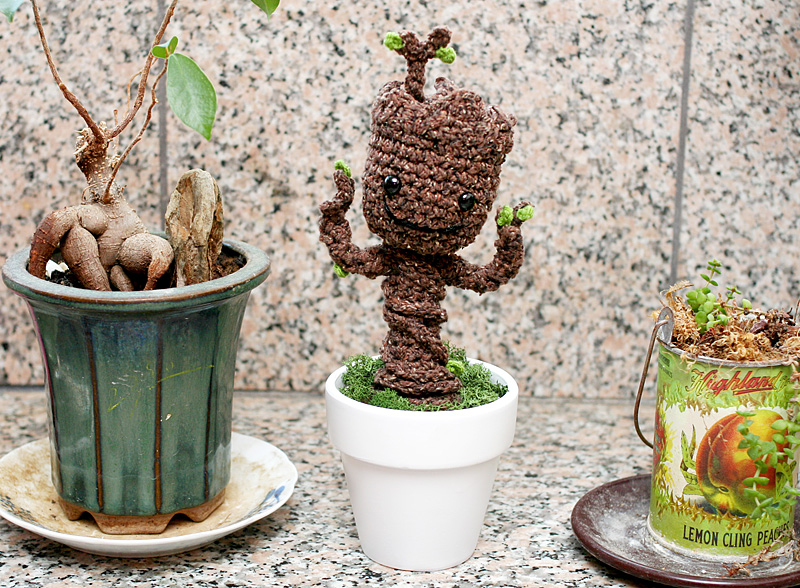
Free Crochet Pattern: Potted Baby Groot from Guardians of the Galaxy

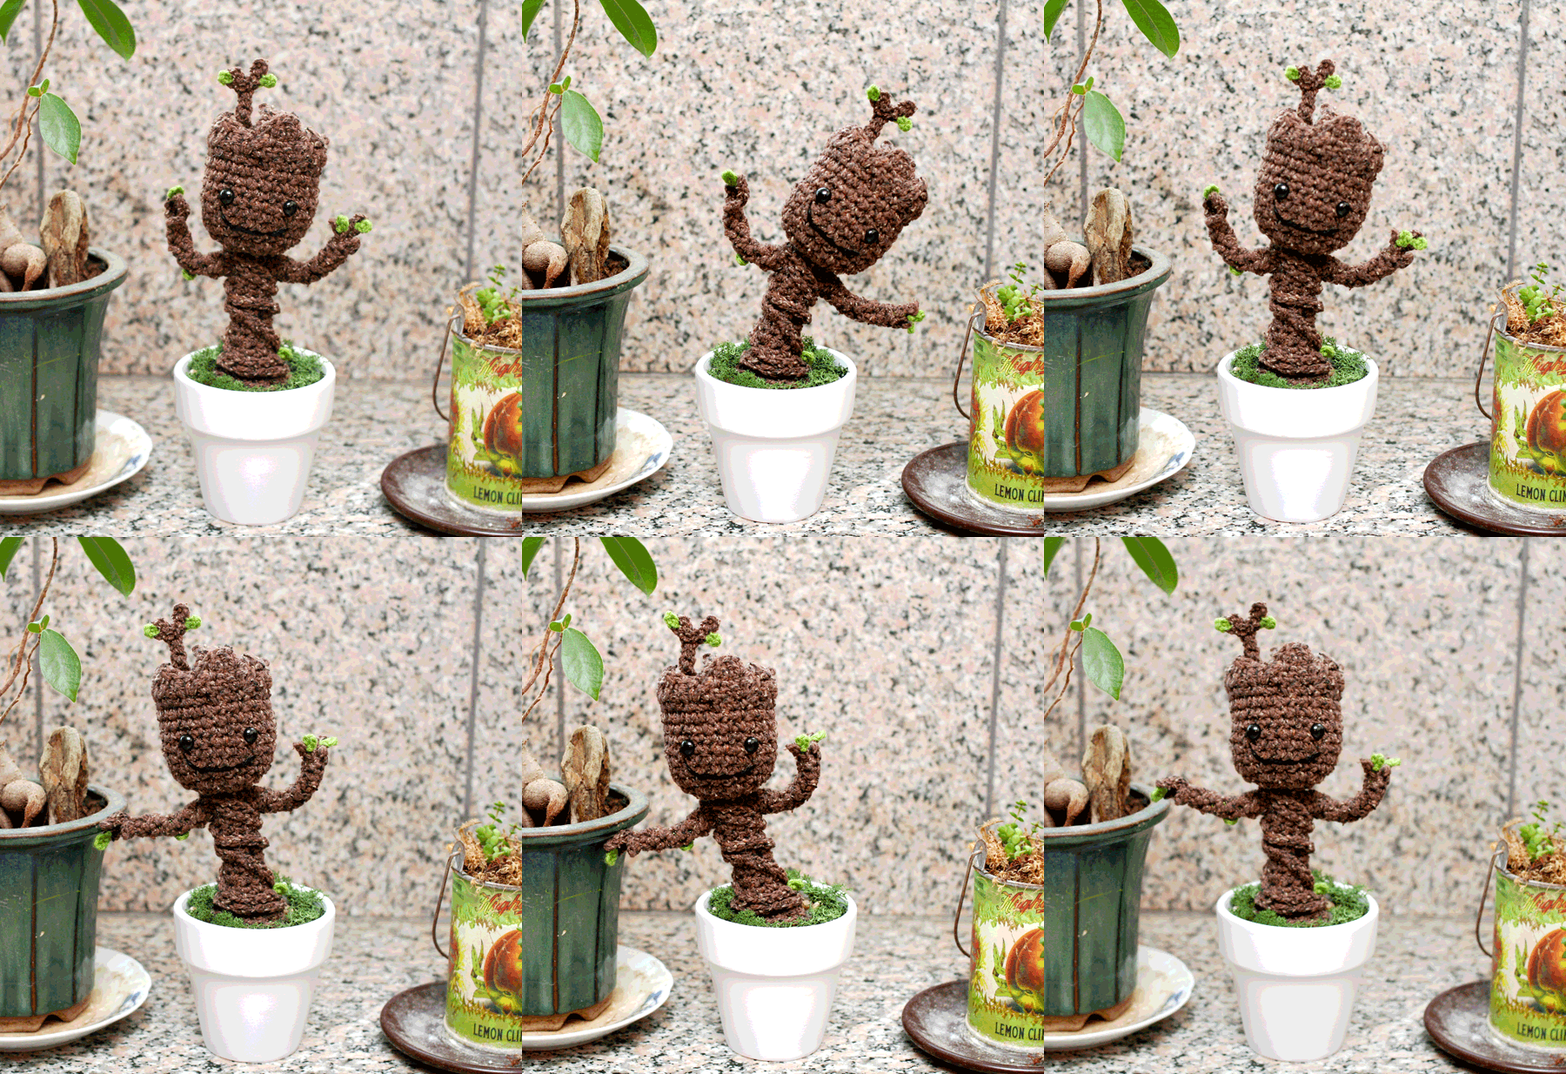
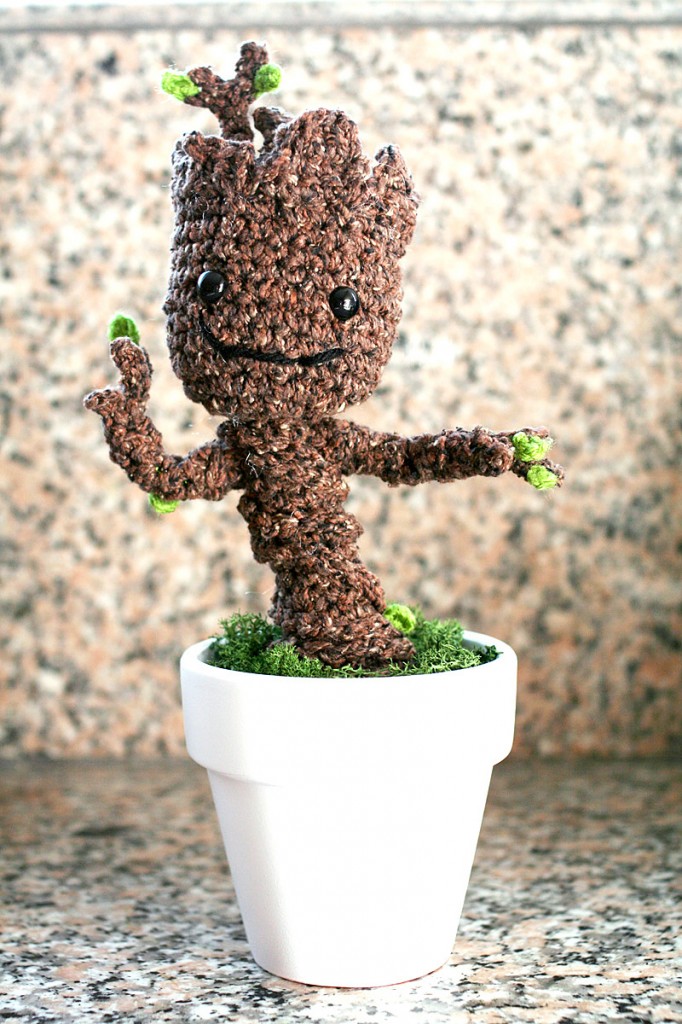
GrootDancing(You have to watch this .gif while listening to Awesome Mix Vol.1) I saw Guardians of the Galaxy last weekend because Manda and our friend Ehren both wanted to see it.  A lot of my friends have been over the moon about it, but I’m really not a comic book person, and the trailer wasn’t really catching my attention. I said I would see it if someone bought my ticket :P.

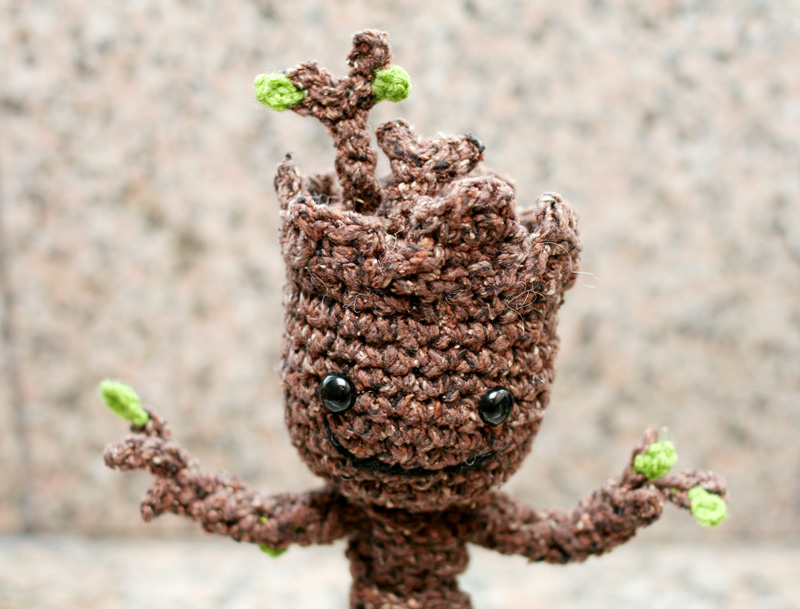
My takeaway from the movie was that WE ALL NEED A BABY Groot, so here is your free crochet GROOTORIAL! If you haven’t seen the movie, Groot is this tree-like alien who is really big and strong and can grow stuff off his body and is basically like the Giving Tree on steroids.
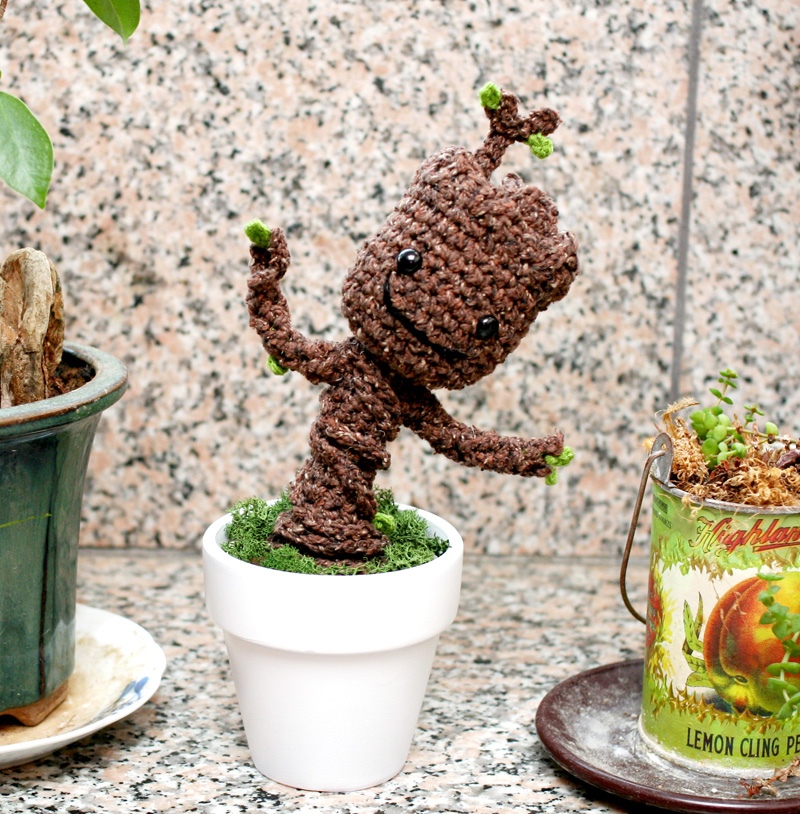
GrootDance8smI don’t want to spoil why there is a baby Groot and why people are going crazy about him if you haven’t seen the movie yet, so go see it and then it will all make sense!

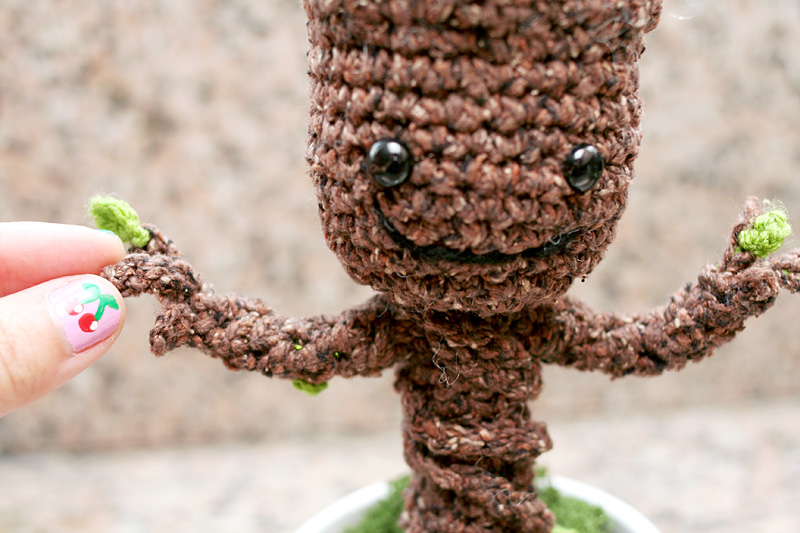
I put pipe cleaners in his arms so that he could “dance.” I tried wiring his body, too, but was running into complications with figuring out how to put stuffing in him AND a wire….plus the pipe cleaner wasn’t really strong enough to support his head and body and pipe cleaner was all I had in the house… so I need to play with that more at some point! Anyway, now you all can have your own baby Groot! And I am sure you guys will each put your own little spin on him!! I used online images of the Funko bobble head as my inspiration, cuz I think it’s super adorable!

Grootfinished7Grootfinished1csmGrootfinished5Grootfinished8smGrootfinished4smGrootfinished3sm

Also, here is a step by step video tutorial on YouTube to accompany the written pattern below.


P.S. Thank you for all your kind and excited inquiries about whether I will be selling finished baby Groots. I’m really so happy that you guys like him so much! I will not be doing so, since I currently do not have permission or a license from Marvel. I do plan to have a giveaway soon, though, so stay tuned! (And no, I will not be doing a giveaway directly to you only, which is something someone asked!)

Finished Size: Mine is approximately 7.5 inches tall.

What You’ll Need:

– H8/5.00mm and F5/3.5mm crochet hooks
– Worsted weight yarn in Brown (I used Rowan Summer Tweed in Chocolate Fudge, but it’s discontinued now. I believe Lion Brand Vanna’s Choice has a brown tweed, and Plymouth Encore Worsted definitely has a brown tweed, but any brown or tan/wood color will work!)
– Sport weight yarn in Green (I used Red Heart Designer Sport in Pistachio)
– Black embroidery thread or Black worsted weight yarn (I used Lion Brand Vanna’s Choice in Black) – If you’d rather not crochet tiny leaves, you can also use green felt to cut out leaves, and sew them on with green or brown thread.
– 2 9mm safey eyes (12mm looks cute, too!)
– small amount of Polyfil
– 1 12-inch pipe cleaner or some kind of wire for the arms
– scissors
– tapestry needle
– small plant pot
– a handful of small, smooth pebbles
– optional: fake moss, hot glue

Abbreviations in U.S. terms:

ch(s): chain(s)
sc: single crochet
sk: skip
sl st: slip stitch
dec: decrease – you can use invisible decrease (invdec) or sc2tog
( ): work everything inside the parenthesis into the next stitch
[ ]: work everything inside the bracket the number of times indicated

Notes:

I just busted out this pattern last night, and it has not been tested yet. If there are any booboos or weird spots, let me know! 🙂

Head Part A

Groot1sm

With Brown and H hook, make magic ring, or ch 3 and sl st to 1st ch to form ring.

Rnd 1: Ch 1, 6 sc into ring. (6) Don’t join rnds. Continue to work in a spiral.

Rnd 2: (2 sc) 6 times. (12)

Rnd 3: [(2 sc), 1 sc] 6 times. (18)

Rnd 4: [(2 sc), 2 sc] 6 times. (24)

Rnd 5: [(2 sc), 7 sc] 3 times. (27)

Rnds 6 -11: Sc evenly. (27)

Sl st to next st to join.

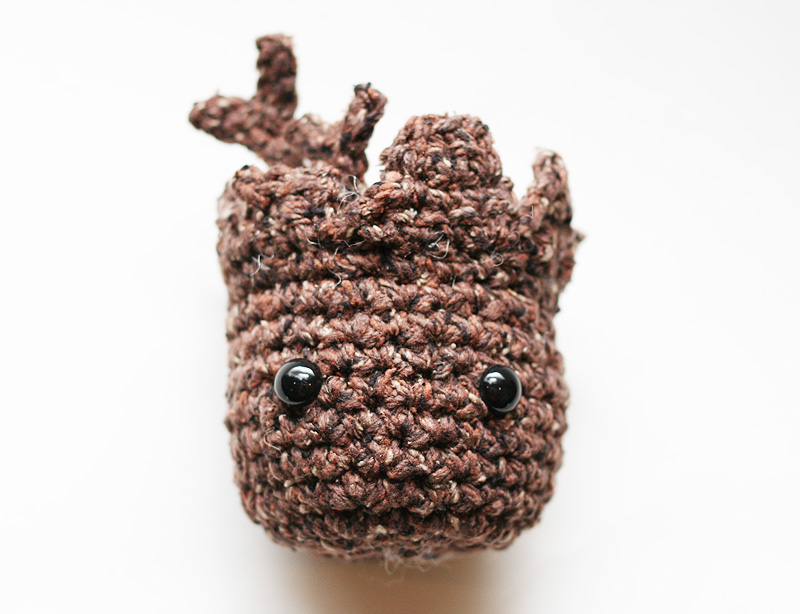
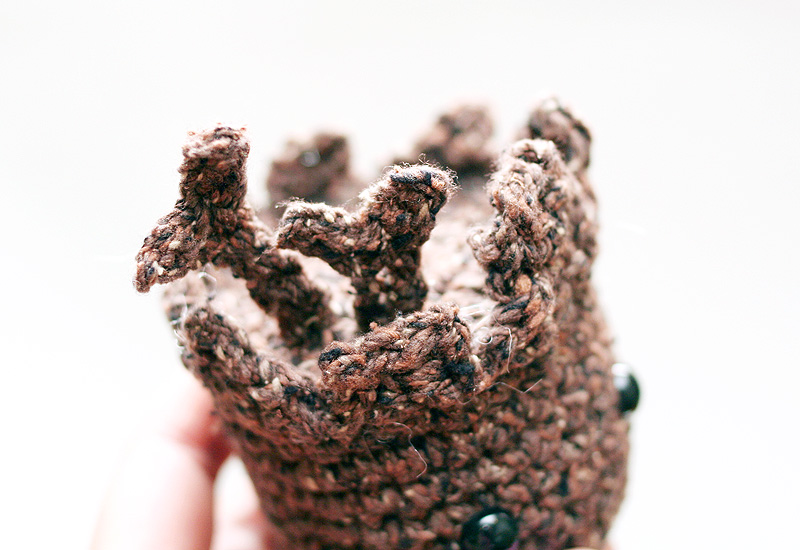
You’ll now work on his broken-wood head accents.

Rnd 12: You’ll be crocheting triangular-ish and rectangular-ish shapes, and then slip stitching down one side of each shape to get your hook back to Rnd 11. We do this so we don’t have to break off and re join over and over again to continue our work. I broke each shape into different paragraphs so that they are easier to see and organize.

Ch 1, 3 sc evenly. Ch 1, turn. 3 sc evenly. Ch 1, turn. Sk 1 st, 2 sc evenly. Sl st down the side of the rows you just worked until you are about to work into Rnd 11 again.

4 sc evenly. Ch 1, turn. 4 sc evenly. Ch 1, turn. Sk 1 st,  1 sc, sk 1 st, 1 sc. Ch 1, turn. Sk 1 st, 1 sc. Ch 1, turn. Sl st down the side of the rows you just worked until you are about to work into Rnd 11 again.

4 sc evenly. Ch 1, turn. 4 sc evenly. Ch 1, turn. 3 sc, sk last st. Ch 1, turn. 3 sc. Ch 1, turn. Sk 1, 1 sc. Sl st down the side of the rows you just worked until you are about to work into Rnd 11 again.

3 sc evenly. Ch 1, turn. 3 sc evenly. Ch1, turn. 1 sc, sk 1, sl st. Sl st down the side of the rows you just worked until you are about to work into Rnd 11 again.

4 sc evenly. Ch 1, turn. 4 sc evenly. Ch 1, turn. Sk 1 st,  1sc, sk 1 st, 1 sc. Ch 1, turn. Sk 1 st, 1 sc. Ch 1, turn. Sl st down the side of the rows you just worked until you are about to work into Rnd 11 again.

3 sc evenly. Ch 1, turn. 3 sc evenly. Ch1, turn. sk 1, 2 sc.  Sl st down the side of the rows you just worked until you are about to work into Rnd 11 again.

3 sc evenly. Ch 1, turn. 1 sc , sk 1, 1 sc. Ch1, turn. Sk 1, 1 sc. Sl st down the side of the rows you just worked until you are about to work into Rnd 11 again.

3 sc evenly. Ch 1, turn. 3 sc evenly. Ch1, turn. 1 sc, sk 1, sl st. Sl st down the side of the rows you just worked until you are about to work into Rnd 11 again.

Sl st into Rnd 11 and break off. Weave in end.

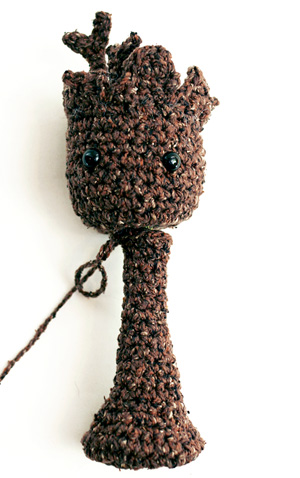
Insert eyes. You get to decide which part of the head should be the face.

Now you’ll finish the top of the head. You’re just making a circle to cover the hole.

Head Part B

With Brown, repeat Rnds 1-4 of Head Part A.

Sl st to next st to join. Break off leaving 24 inches of yarn.

If you want a branch or two sticking out of his head, crochet these now and sew them to the top of Head Part B before you sew it to the top of Head Part A.

Branch

With Brown and H hook, ch 8, sk 1 ch, work 2 sl st evenly. Ch 4, sk 1 ch, work 3 sl st evenly, then continue to sl st evenly down original ch. Break off.

Short Branch

With Brown and H hook, ch 6, sk 1 ch, work 2 sl st evenly. Ch 3, sk 1 ch, work 2 sl st evenly, then continue to sl st evenly down original ch. Break off.

Lightly stuff Head Part A.

Since Head Part B is 24 sts around and open hole of Head Part A is technically 27 sts around, you can’t sew stitch for stitch, so just sew it on as best you can and make it look good. I found that using a 27 st circle was too big for the opening. You can use Rnd 11 of Head Part A as a guide for sewing. While sewing, you also don’t want the head to look like it has Frankenstein stitches going all around it, so try to sew as invisibly as you can. Put in more stuffing if needed.

Groot2sm

Body

Repeat Rnds 1-4 of Head Part A.

Rnd 5: [(2 sc), 3 sc] 6 times. (30)

Rnds 6-7: Sc evenly. (30)

Rnd 8: [dec, 3 sc] 6 times. (24)

Rnd 9: [dec, 2 sc] 6 times. (18)

Rnd 10: [dec, 4 sc] 3 times. (15)

Put in some stuffing or your sack of poly pellets. If you plan to wire the Body, anchor the bottom wire now if you like, but you can also run the wire after you complete the Body if you don’t have a bag of pellets at the bottom.

Rnd 11: [dec, 3 sc] 3 times. (12)

Rnds 12-13: Sc evenly. (12)

Rnd 14: [dec, 2 sc] 3 times. (9)

Rnds 15 – 25: Sc evenly, stuffing lightly as you go. (9) (Note, I worked to 25 rnds because at first I was measuring the Body against a piece of pipe cleaner that I had. You can make him as tall as you like. For a longer Groot, I crocheted until the Body was about 6 inches long.)

Sl st to next st to join. Break off leaving 18 inches of yarn for sewing.

Sew top of Body to bottom of Head Part A. If you are wiring the body, trim the wire so that it reaches about half way into the head, and then poke the wire into the bottom of the head before sewing.

GrootBody

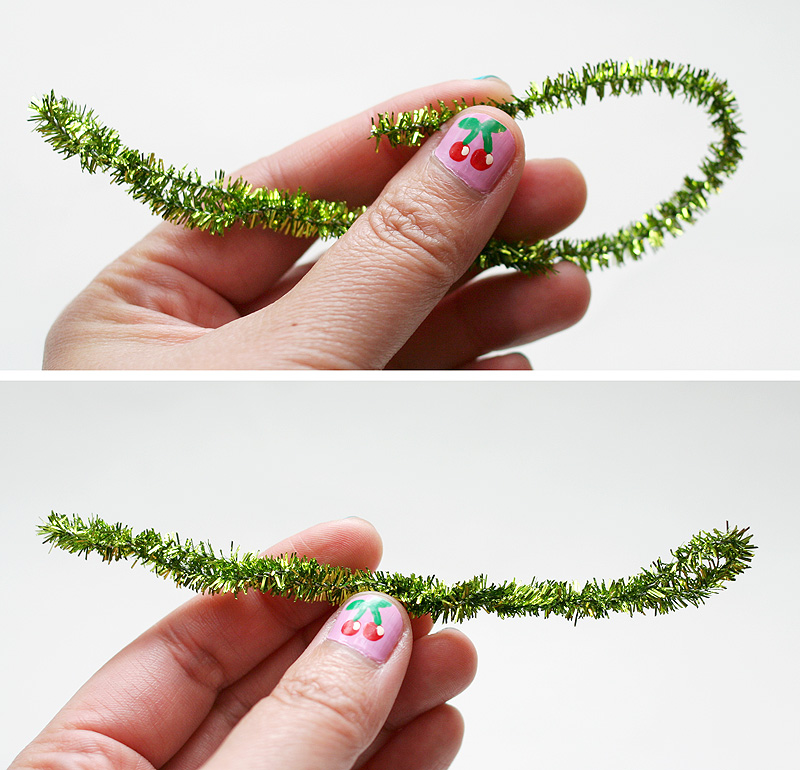
To prepare Arms, fold each end of the pipe cleaner to its center and then twist. If you are using wire, simply measure out the full length that you need for both arms.

Groot3sm

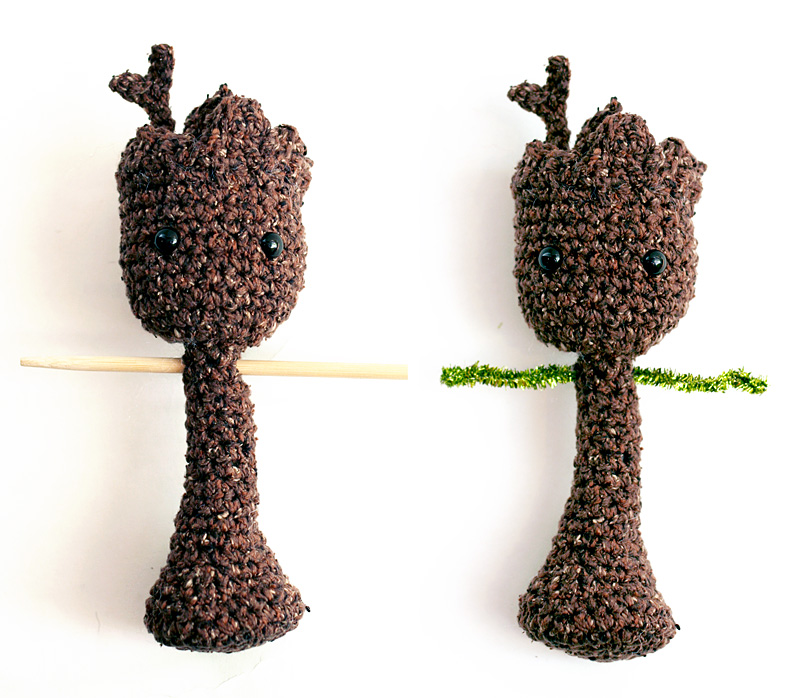
Use a pointy stick to stab through top of Body where Arms will go. I go 1 rnd below the the very top of the neck. This will help guide the pipe cleaner arms through the body, but is not necessary for wire. Slide twisted pipe cleaner into place.

Groot4sm

You can now determine how long you want the arms and lengthen/shorten the pipe cleaner/wire  accordingly. If you are using wire, bend the ends in now so that they are not so pokey.

Arms (make 2)

Pull out about 10 inches of Brown yarn for sewing later.

With H hook, ch 3 and sl st to 1st ch to form ring. (Don’t make a magic circle, or if you do, keep the opening loose because you need to fit the pipe cleaner through this hole.)

Rnd 1: Ch 1, work 4 sc into ring. (4)

Rnds 2 – 8: Sc evenly around. (4)

Slip Arm through pipe cleaner to see if it fits. Keep working evenly if you need more coverage.

When you reach the length that you need, create the finger branches.

Sl st to next st to join.

Ch 3, sk 1st ch, sl st 2 times. Sl st to next st.

Ch 5, sk 1 st ch, sl st 4 times. Sl st to next st.

Ch 4, sk 1st ch, sl st 3 times. Sl st to next st.

Sl st to next st. Break off.

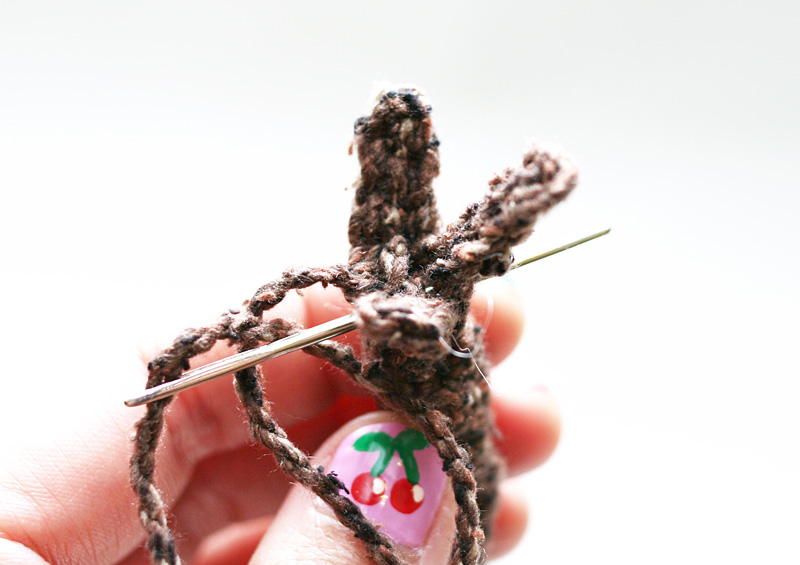
While weaving in your end, also sew through the base of the fingers to pull the fingers inward so they are not splayed too open.

Groot5sm

Slide Arm back onto pipe cleaner and then sew to body. Repeat on other side.

Groot6sm

Leaves

The number of leaves and their placement are up to you!

With Green and F hook, ch 5 or ch 4 and sl st to 1st ch to form your leaf. Break off.

Tie leaf onto tree with yarn tails and then carefully weave in ends and/or hide them inside the tree.

Twisty Body Bits

If you want to add some twisty/viney bits to the body, simply work a length of chains about 12 – 18 inches for a shorter tree and 24 inches for  a taller tree with Brown and H hook, then wrap chain lengths around Body, sewing down at each end, and also tacking down with a few stitches around the middle wherever you want to make sure the vine stays put. I only made 2 lengths of chain, but you can add more, or put some on the arms, if you like!

Final Assembly

– Embroider a smile with black yarn or embroidery thread.

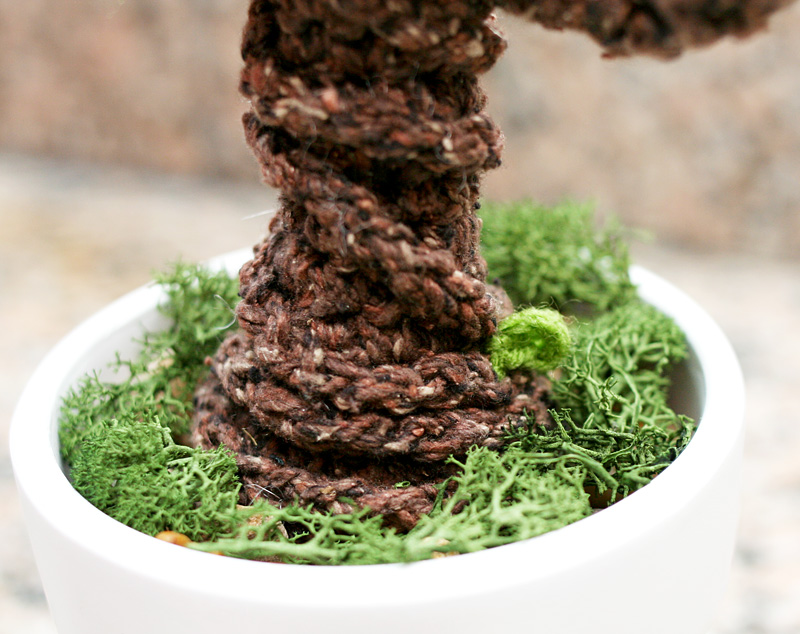
– Place baby Groot inside a small pot.

– Fill in with smooth pebbles to keep him upright. You might also need some pebbles underneath, so that he is not sitting too low in the pot.

– Decorate with fake moss.

– If you are giving this as a gift, and you don’t want anything to move around, you can also hot glue your baby Groot to the bottom of your pot, or glue something to the bottom of the pot for him to stand on, and then glue him to that, then cover with pebbles, moss, or both!

– EDIT: A couple people have commented that their Groot is too top heavy to stand on its own. I did not design him to stand up by himself. I always keep mine in his little white pot. The next one I make for my friend, I am going to try putting a little sack of Poly Pellets at the bottom and see if that helps. Don’t use loose pellets, as they might leak out of the stitch spaces. I’ve seen on google that some people make a little sack with a dryer sheet, but I’ll probably use a small square of fabric and sew it up, place it at the bottom/feet of the body, and then fill the rest of the body with regular stuffing. I’ll let you know if it works! Also don’t use beans to weigh down your toys. I’ve heard that sometimes if there is too much moisture, the beans will sprout! Which, in this particular case, might be kinda funny, but would also probably ruin your toy :P.

GrootDance3sm

 * This free pattern is intended for personal use only. Please do not copy, redistribute, or sell this pattern. Groot and Guardians of the Galaxy are the intellectual property of someone else who is not me or you, I am guessing Marvel Comics? So I would advise you not to sell items from this pattern without permission.

539 Comments on “Free Crochet Pattern: Potted Baby Groot from Guardians of the Galaxy”

  • El

    says:

    What are those eye snaps called? And where did you get them?
    -El <3 Eggos

    • Jennifer Bristol

      says:

      Those are just Animal Eyes. You can find them in a package at any craft store.

    • Lilly

      says:

      They are called “Safety Eyes.” They will not come off the backing (the eye has a post which you push into a backing – like post earrings) once you put the backing on, no matter how hard you tug! That’s why they’re called safety eyes. They do not come off in the wash either.
      Amazon has them as do the craft stores.

  • Connie

    says:

    Love this. Pattern was eady to follow. I put glass beads in the “fat” bottom and he stands on his own perfectly.

    • TwinkieChan

      says:

      Great idea!

  • Nichole

    says:

    Hi, thank you for sharing this amazing pattern!! I love Groot! I am working on him now and come across a boo boo in the pattern. When you get to “3 sc evenly. Ch 1, turn. 3 sc evenly. Ch1, turn. sk 1, 2 sc. Ch 1, turn. 1 sc, sl st. Sl st down the side of the rows you just worked until you are about to work into Rnd 11 again.” There is one chain to many. It will be turned the wrong way. All I did was took the 3rd chain out and it worked. :). It was a easy fix . Once again, thank you for sharing this pattern, amazing!

    • Jennifer Bristol

      says:

      It supposed to be four rows. What I did on that one was another ch 1 turn after the last sl st, then continued as written.

      I also made the bumps bigger on the final shape which reads: ch 1 turn. sc 1, sk 1, sl st, sc 1 section by doing hdc, sk 1, hdc.
      That line also has an extra sk1 that needs to be omitted.

  • Karen

    says:

    My two boys go to kickboxing and the boss there came up to me with her phone saying isn’t this cute. Normally I don’t do hints but fell in love with it and had to have a go. Really good pattern. Very easy to follow.

    • TwinkieChan

      says:

      I’m so glad you gave it a try!

  • Stephanie

    says:

    I wish i understood gow to read patterns. Inlove groot and want tonlearn how tonmake this i have to see if there is a video i can watch.

    • TwinkieChan

      says:

      I have a video on YouTube for the whole thing.

  • Anita

    says:

    Just finished! I adore your patterns and work. So much fun. Ty

    • TwinkieChan

      says:

      I’m happy you liked it!

  • CarolPhae

    says:

    Hello,
    I am trying to just get the head part A done and it just turns out a flat circular shape.
    How do you get the head “cup” shape??? I don’t see any decreases in the instructions…I am pretty sure I am following instructions correctly…I think!!

    • TwinkieChan

      says:

      The cup shape forms, not from decreasing, but just from working evenly, or stopping the increasing.

  • Jo Wright

    says:

    Loved making this today – not often I sit and make a project in one sitting but loved it.

    TOP TIP – As I made the base I was sat near the money box and filled it with coins – 2p the 1p then 5p coins as the trunk grew and it works both as a weight and also you can wiggle the stack to look like a dancing Groot.
    I did the arms as long thin regtangles (15ch by four rows) which was just easier for me.
    I also added random green strands afterwards like the little gif of Groot from the end of the first film

    So pleased with the result…. Thanks again
    Thank you

    • TwinkieChan

      says:

      Great tip with the coins! I love it!

  • Debra S.

    says:

    I just had to thank you for this AWESOME pattern. I love all your designs. The instructions were easy to follow and the notes and photos were help. I made a baby Groot for my sister and she loved it.

    Thank you for sharing your pattern with us!!

    • TwinkieChan

      says:

      Yay! I’m so glad! <3

  • ThaiiHG

    says:

    Hi miss twinkiechan, I just want to say THANK YOU SO MUCH that you share this incredible pattern, I made a baby Groot for my boo, it was his birthday’s gift and he loved it :3 thank you! Thank you! Thank you!

    • TwinkieChan

      says:

      Yay! I’m glad you liked the pattern!

  • Terijr

    says:

    OMGosh!!! What a wonderful pattern! My family loves GROOT! Thank you so much for sharing your talent with us. Salena Baca shared your blog post today on Facebook.

    • TwinkieChan

      says:

      Aw yay!!! Salena is the best!

  • Harmony

    says:

    I just finished making a groot with your amazing pattern. To make it not so top heavy i used dollar tree stones in the bottom. I placed a few on the very bottom and he stands up perfectly on his own. I also ran a pipe cleaner through the bottom up into the base of his head

    • TwinkieChan

      says:

      Great idea! Thank you!

  • Rohini

    says:

    Great pattern, works up quickly and the results are fantastic

    • TwinkieChan

      says:

      So glad you liked it!

  • Nettie

    says:

    Love the Groot
    Don’t want to look a gift horse in the mouth, but do you have a pattern for legs like the Baby Groot in the movie

    • TwinkieChan

      says:

      I haven’t seen the new movie yet!!! YIKES!!! I will see when that happens! hehe

    • TwinkieChan

      says:

      Since the baby Groot starts at the bottom, I imagine that the whole pattern might have to change a bit to accommodate a different lower body shape for the legs, but I’ll see.

      • Annie

        says:

        Ok, I’ve never been interested in crochet before, but I will now start with Groot. It is wonderful. I’m looking forward for the two legged Groot to make a stuffed Groot for my son!

  • Christina

    says:

    So I’m working on the arms, and kinda confused because it seems like you are making the branches on the open end? Or am I reading it wrong? Because that’s the end you slip over the pipe cleaner and then the “hand” would end up next to the body? Did I completely miss something? Aaaggghhh! Please help! Thank you so much!!!

    • TwinkieChan

      says:

      Did you check out the video? You can skip ahead to the arm part!

  • Nina

    says:

    Hello, I just want to thank you so much for that pattern. I fell in love with baby groot as soon I saw him in the movie, and I want one so bad, we’ll for sure there is no way to get a living one but this one looks soooo cute. So, thanks again

  • Nancy Alcorn

    says:

    Has anyone thought about using aquarium gravel sown in a pouch as a substitute for the Polly Pellets? Would that work?

  • Kim

    says:

    You say at the very bottom info not to sell item, but I have been offered to buy one from me and now I don’t know what to do. Maybe I will tell them just a donation would do ( enough to cover costs ).

    • TwinkieChan

      says:

      Yeah, as I mentioned, I just don’t want to go around endorsing selling items based on another company’s IP. Probably most of them won’t care, but I approach it with an artist’s point of view: if I created a character, I probably wouldn’t want people selling items based on my character without my permission. Everyone will have their own opinions and approaches :).

  • SpyderTea

    says:

    I love this. I haven’t made it yet but when I do I’m going to try to install it on a solar dancer. Spent half this morning viewing Youtube videos on how they work and are constructed. Just an idea. I’m thinking this version is a bit bigger than that but after I make one I’ll know more. Thank you for offering this free pattern.

    • TwinkieChan

      says:

      Good luck with your project!

  • Jeanne

    says:

    Just wanted to thank you for a great pattern! I just finished making this for my grandson and he is going to love it. Thanks!

  • Haemin

    says:

    This is AWESOME thing I’ve ever seen!
    Thank you. I’m not sure i can finish.. but I’ll do it… !!

  • Susan

    says:

    I am so happy that you shared your pattern! I love Baby Groot! Yours looks just like him! He is so cute! I can’t wait to get the yarn and get started! Again, thank you!

  • Bethany

    says:

    Love guardian of the Galaxy. and Gru is great.

  • Martina Wurz

    says:

    Hi!
    Thank you for your fantastic pattern!!! I’m working on my second baby-groot now, and as my children wanted him to have feet, I worked out a version with pipe-cleaner lege. If you want me to, I could write a pattern and send it to you with some fotos, so you could publish it in your site as version b … it’s really cute.

  • Sue

    says:

    Loved this I made one for a male friend of mine in his late 40s and he loved it. Then in my local shop one of the staff going home had a baby Groot tote bag. “I’ve just crocheted one of those for a friend” I said. Now I am making three others for the shop ladies. Love this pattern as a beginner it was just so easy but I must admit I hate doing the arms.

    • TwinkieChan

      says:

      I’m glad everyone is loving your Groots! <3

      • Susan Peel

        says:

        Thank you TwinkieChan,
        when doing the arms to put the cover over the pipe cleaner I fed the arm onto a crochet hook then bent the pipe cleaner over the crochet hook hook and gently pulled the pipe cleaner whilst feeding the crochet cover onto pipe cleaner.
        I hope that makes sense. I am a beginner and found your pattern so easy and I thank you for the photos. to help. x

        • Karen

          says:

          Great idea!

  • Lynn E

    says:

    Thank you for sharing such a lovely pattern. Although I’m in the Uk I found it very easy to follow and my son loves his X Baby Groot.

  • Katherine

    says:

    Thank you so much for creating this pattern! My Baby Groot turned out great, and will be part of a baby shower gift. I was also able to adapt some of the instructions to create a Baby Groot diaper cover and beanie! Thank you again!!!

  • Lynette

    says:

    I solved the problem of skinny stiff stuffing when I was making skinny cacti. Cut a stiff green scrubber (e.g. Scotchbrite) into strips. Sometimes I add it as I’m working (if the tube I’m stuffing is thin). Sometimes I pull it through with a tweezers. If the tube is thicker, you need several layers of green scrubber. Works perfect for flat prickly pear cactus leaves. Much better than regular polyester stuffing. Also for large projects – easier to control than polyester. I often combine the two.

  • Keren

    says:

    Hi! I saw this cute pattern and I loved it!!!
    So I want to do it, but I would like to know how big the groot would be.

    • TwinkieChan

      says:

      Hi, if you watch the video, you can see its size compared to me. It will also depend on what yarn you use and how tightly you crochet. Mine was about 8 inches tall.

  • Megan Tomlinson

    says:

    I’m a little late to this pattern but thanks! It’s super cute. I used wired instead of pipe cleaner and it worked perfectly. (Didn’t have anything to use and so I used a paper clip) heheh

  • Claire Kennedy

    says:

    I am so glad I found this pattern. I followed the video and was amazed how quickly this was complete. I have no doubt that my niece will love her baby Groot. I tagged you in the post on FB

    • TwinkieChan

      says:

      Yay! I am glad you enjoyed the tutorial!

  • Sue Morris

    says:

    You can print to your own document folder – press print then the ‘Save as PDF’ icon.

  • Melanie Jackson

    says:

    There are all kinds of sites that show you how to make a wire frame for a doll. There are even some on Pinterest.

  • Karen

    says:

    I love the pattern! The arms were a little harder to make but the rest was easy. I already made 3 of them! I’d love to know how you made him dance. Thanks for posting the pattern!

    • TwinkieChan

      says:

      I’m happy you enjoyed the pattern! His dancing is just an animated gif that I put together in Photoshop.

  • Jennifer Bristol

    says:

    A great trick I learned is to use a knee high nylon stocking similar in color to your project. Use it to contain the stuffing or for the beads/pellets/pebbles.

    I wouldn’t recommend plain wire inside – it may rust. Use Pipe Cleaner or coated wire.
    Try this- Insert the Pipe cleaner first towards the back, add in the stocking and stuff as you go.

    • Jennifer Bristol

      says:

      I found that one pipe cleaner is too flimsy. I twisted two of them together for a better backbone.

      I also bent the pipe cleaner arms so they now have fingers, so he can hold a card.

  • Sam

    says:

    Do you have a smaller version of this?! I made it and it’s perfect! He sits by my bed. But my mother in law would love a smaller one.

  • Lynda

    says:

    My DH and I just watched Guardians of the Galaxy for the 2nd time and really cracked up at little Groot dancing. Then I was looking on line for various patterns and just happened to run across a picture of Baby Groot on Pinterest. I followed some links and found your blog and the free pattern. What a serendipitous coincidence! I love this little Baby Groot you’ve made. THANK YOU so much for sharing it!

    • TwinkieChan

      says:

      Hi! I’m so happy you enjoyed the pattern!

  • Mirian dos Santos

    says:

    Simplesmente apaixonada!!!!!

  • Mary Holmes

    says:

    i finished this this morning. i took it to work and people just flipped! im looking at doing the hulk now, do you have a pattern for him? i used pipe cleaners in the body along with the stuffing and it has worked out great.

    • TwinkieChan

      says:

      Hi! Aw, I’m glad he’s so loved! I do not really write patterns based on cartoons/movies/etc. This was sort of an exception.

  • Joshua

    says:

    Is there any place I can download a pdf of this pattern?

    • TwinkieChan

      says:

      Hi! No, I don’t usually make PDF’s for my free patterns. Sorry about that!

  • I love your patterns 🙂 I just made groot. Tool me about an your. He came out so stinking CUTE!!!!! I can’t post a pictyre for some reason. But you can see him on my page. Or open invite to my group. Facebook.com/groups/MomsAngelHands

    • TwinkieChan

      says:

      Yay! I’m so glad you loved the pattern! (sorry for late response!)

  • Dee

    says:

    Late to the party… want to share a picture but can’t attach it. I worked the body from the neck down and made legs… used bolts with nuts in the feet and wrapped an armature from those feet that spans the entire body through the arms and head. I didn’t do the fingers, they are not able to wrap/hide the wires. He stands on his own two feet and is poseable including the body can bend. I used antique bronze to black flat shank buttons and embroidered the smile. He took a better selfie than I do.

    • TwinkieChan

      says:

      Thanks for sharing your Baby Groot experience!

      • Dee

        says:

        Even older friends (in their 80’s) that have no clue about the movies think he’s adorable. I’m making a whole forest of them now… I have ‘self’ stuffed them with 2-3″ pieces of the same yarn I crochet them from so that the filling doesn’t show through. I use stainless steel bolts and nuts, and aluminum craft wire for the body armature construction, so no rust. *It’s your original idea, I heavily modded the pattern, so where does it part from your artistic talent and generous lovely giving nature and become my art…I’m a pro and trying to decide this right now. Do you want a royalty?

        • Dee

          says:

          About 200 tree people later, I have the pattern engraved in my brain. I found adding several more twigs and leaves to the top and long vines to the body (hide all the sins and wires trying to peek through on the arms especially) and strategic leaves… I use about 2 dozen leaves to each one… really go over well. I make them in lots of colors. Some of the 8″ make them in camo, then do tan bandoliers across the body (make an x) and Dollar General had these really small nerfette guns (two for like $5) and tape and spraypaint those into black and silver and gold like Star Lord’s blasters… those go super well to adult collector geeks. Again, thank you so much Twinkie Chan, for the inspiration. Hardware store is happy to sell me boxes of nuts and hex bolts for the feet weights… Happy Hooking everybody!!!!!

  • Faye

    says:

    Hi
    After crocheting the accent parts at the top of his head are they supposed to meet up once they are completed. I still have some sc’s left (about 4). Is this correct?

    • TwinkieChan

      says:

      Hi! There shouldn’t be any sc’s left over. If you are ok with the look, you can just sl st to Rnd 11 and break off, but I accounted for enough stitches to get you all the way around the head.

  • Melinda Niccum

    says:

    My daughter wanted one, but wanted legs. So I used your head, upside down longer for torso, divided stitches in half for two legs. He turned out sooo cute. I’d send you a picture if I could figure out how. Thanks ps I’m working on number 7

    • Dee

      says:

      My need to make them multiplied too. I reworked the pattern pretty heavily and came up with weighted feet, a full armature (arms wires end at the ‘palm’ and LOTS and lots of vines and leaves). I made one in light purple, put dark purple vines and red leaves, and not only did my Red Hat friends love it but it won blue ribbon in the county fair. Working right now to upsize them, with legs and without armature, for stuffed dolls for smaller kids. I have six wanting them already. Thank you TwinkieChan for the original pattern (the head is the only thing mine uses anymore) and the inspiration!

  • Mary Shamburger

    says:

    I love this pattern. Thanks so much for sharing it! I’m adding legs onto mine! Have several to make for the grandkids for Christmas. They love Baby Groot, boys and girls, from the 8 year old up to 23!

  • Blaquerose

    says:

    Thanks for sharing, but I have tried over and over to do the large branch. When it says work sl st evenly is it in the same stitch….I know its been awhile ago so I hope you can still answer. Again thanks for sharing.

    • TwinkieChan

      says:

      Working any stitch evenly means you just work one stitch in each stitch for how ever many stitches indicated (or the rest of the row/rnd if indicated). So there’s no increasing and no decreasing. If the pattern says “work 3 sl st evenly” it means work on sl st each in the next 3 sts.

  • Marilee McMinn

    says:

    I’ve made 5 groots so far. Every time I give one as a gift i get a request for another! We love groot. Thanks for the great pattern!

    • TwinkieChan

      says:

      I’m so happy you are enjoying the pattern!!! Sorry for the late response. I’ve been locked out of my blog.

  • Dee

    says:

    TwinkieChan, I sell ‘tree people’. Others can say the ‘G’ word, I do not. They are simply cute ‘tree people’ and I have made many in other color schemes. As I have said, I heavily modified your pattern, only the head is the same. (and I use locking black safety eyes and embroider on the smile). The ones with armature and weighted feet (they WILL stand by themselves) stand about 8″ tall-and I clearly warn they are collectables NOT TOYS. I am currently making two about 12-14″ tall that will have armatures and be accessorized to order. And modifying the pattern again in that size to be armed and legged with NO armature and meant more for a child’s stuffed toy (I have several orders). I have made stuffed Rocket Racoons from a purchased pattern, and I do NOT display these with those, to further distance. Thank you so much for the original inspiration and to share your pattern with the rest of us.

Leave a Comment

Your email address will not be published. Required fields are marked *

This site uses Akismet to reduce spam. Learn how your comment data is processed.

To top