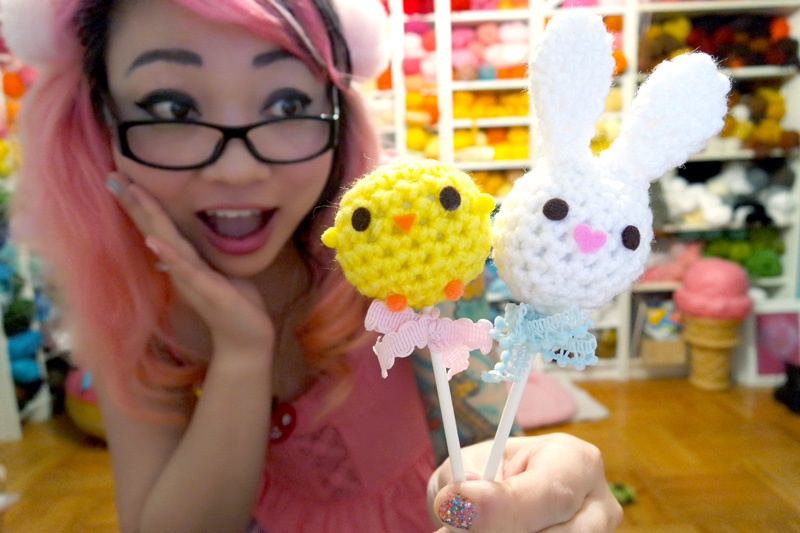
I didn’t know if I’d have time to post an Easter-themed pattern this year, but I saw a picture of some super cute Easter cake pops and thought, THOSE ARE BALLS. WE CAN CROCHET BALLS.
So this pattern is SUPER easy and basic. Think of it more as project inspiration. There are a kabillion ways to customize your own Easter cake pops, so I’m simply providing a road map!

As simple as these are, I think they are pretty darn cute!

I also updated my YouTube channel since it’s been a million years…! Let’s crochet!
What You’ll Need
- Worsted weight yarn. Sorry I didn’t count off the yardage! It’s not a lot! I used Red Heart Super Saver in Soft White for the bunny and Bright yellow for the chickie.
- H hook
- scissors
- tapestry needle
- small amount of polyester stuffing
- lollipop or cake pop sticks
- glue: I used FabriTac, but Tacky Glue or any craft glue really will be fine.
- optional: stitch markers
- up to you: stuff to decorate your cake pops, such as felt, pom poms, or embroidery thread. It’s really up to you! Also: cute tiny ribbon to make bows.
Abbreviations
ch(s): chain(s)
inv dec: invisible decrease
sc: single crochet
sl st: slip stitch
rnd(s): round(s)
( ): work everything inside the parentheses into the next stitch
[ ]: work everything inside the brackets the number of times indicated
Cake Ball
- Make magic circle, or ch 3 and sl st to 1st ch to form ring.
Rnd 1: Ch 1, 6 sc into ring. Don’t join rnds. (6)
Rnd 2: (2 sc) 6 times. (12)
Rnd 3: [(2 sc), sc] 6 times. (18)
Rnds 4-8: Sc evenly. (18)
Rnd 9: [inv dec, sc] 6 times. (12)
- Start stuffing!
Rnd 10: inv dec 6 times. Sl st to next st to join. (6)
- Break off leaving about 8 inches of yarn.
- With tapestry needle, weave yarn through remaining 6 sts, pull to close, tie off, and weave in end.
Bunny Ears (make 2)
- Make magic circle, or ch 3 and sl st to 1st ch to form ring.
Rnd 1: Ch 1, 6 sc into ring. Don’t join rnds. (6)
Rnd 2: [(2 sc), sc] 3 times. (9)
Rnds 3-4: Sc evenly. (9)
Remaining rnds: Don’t actually count rnds anymore. Work [inv dec, 3 sc] 4 times, around and around, until you have 5 sts remaining. Sl st to next st to join. (5)
- Break off leaving about 12 inches of yarn for sewing.
Finishing
- Sew ears to the top of cake ball.
- Insert stick into the bottom before adding facial features to ensure everything is in the right place.
- Add facial features.
- Glue in stick. I put glue only on the first 1/2 or 3/4 inch of the stick, because the glue will migrate down as you push the stick upward. Use a twisting back-and-forth motion while inserting. I find this also helps keep more glue inside the cake ball.
- Tie a nice little ribbon bow!
All photos and text are copyright © 2016 Twinkie Chan Inc. All rights reserved. Please do not sell or distribute this pattern in part or in whole without my permission. You may sell finished items you make from this pattern with a credit to “Twinkie Chan” as the designer. If you have any questions, please contact me. Thank you!


