 I know that Halloween is just around the corner, but these lil pumpkins are also a fun project for Thanksgiving! This pattern is SUPER EASY and great for beginners. There’s really nothing to it! The pattern is below, and I also uploaded a video tutorial to YouTube. Enjoy!
What You’ll Need:
– worsted weight yarn Orange – In my photos, I’m using Red Heart Super Saver in Pumpkin
– worsted weight yarn in Green – In my photos, I’m using Red Heart Super Saver in Spring Green
– H8/5.0mm crochet hook
– small amount of Polyfil
– scissors
– tapestry needle
– optional: black felt and fabric glue for the jack o lantern face, hair clip and hot glue
Abbreviations:
ch(s): chain(s)
dec: decrease
hdc: half double crochet
rnd(s): round(s)
sc: single crochet
sk: skip
sl st: slip stitch
st(s) : stitch(es)
( ): work everything inside the parenthesis into the next stitch
[ ]: work everything inside the brackets the number of times indicated
Notes:
– The Right Side of your work should always be the outside of your project.
– When I decrease/dec in this pattern, I always use the invisible decrease. Pick up the outside loop from the next st, then pick up the outside loop from the following st, YO, pull through 2 loops, YO, pull through 2 loops.
Pumpkin:
With Orange and H Hook, make magic ring, or ch 3 and sl st to 1st ch to form ring.
Rnd 1: Ch 1 and work 6 sc into ring. Don’t join rounds. Work in a spiral. (6)
Rnd 2: (2 sc) 6 times. (12)
Rnd 3: [(2 sc), 1 sc] 6 times. (18)
Rnd 4: [(2 sc), 2 sc] 6 times. (24)
Rnd 5: [(2 sc), 3 sc] 6 times. (30)
Rnds 6 – 15: Sc evenly around. (30)
Rnd 16: [dec , 3 sc] 6 times. (24)
Rnd 17: [dec, 2 sc] 6 times. (18) Start stuffing your pumpkin. Stuff more rather than less. If you under-stuff, your pumpkin will end up looking deflated and wrinkly in some parts. After stuffing, the pumpkin should look like a marshmallow, so don’t worry if it doesn’t look like a little pumpkin right now.
Rnd 18: [dec, 1 sc] 6 times. (12)
Rnd 19: dec 6 times. (6). Sl st to next st.
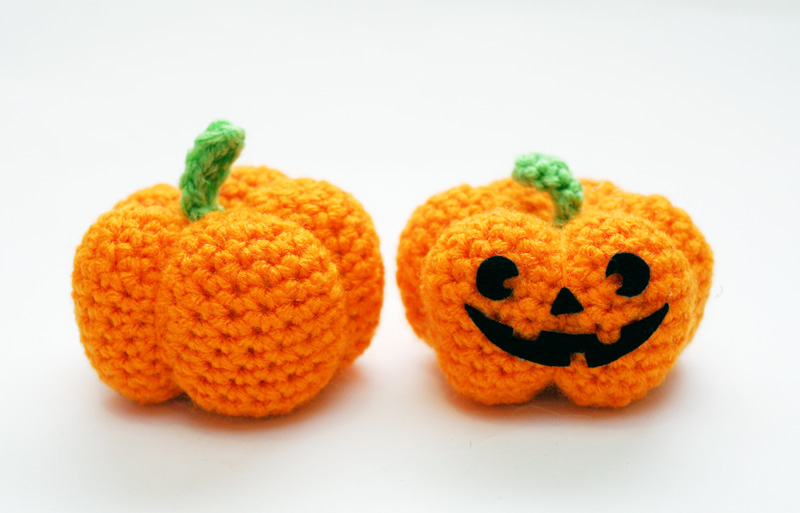
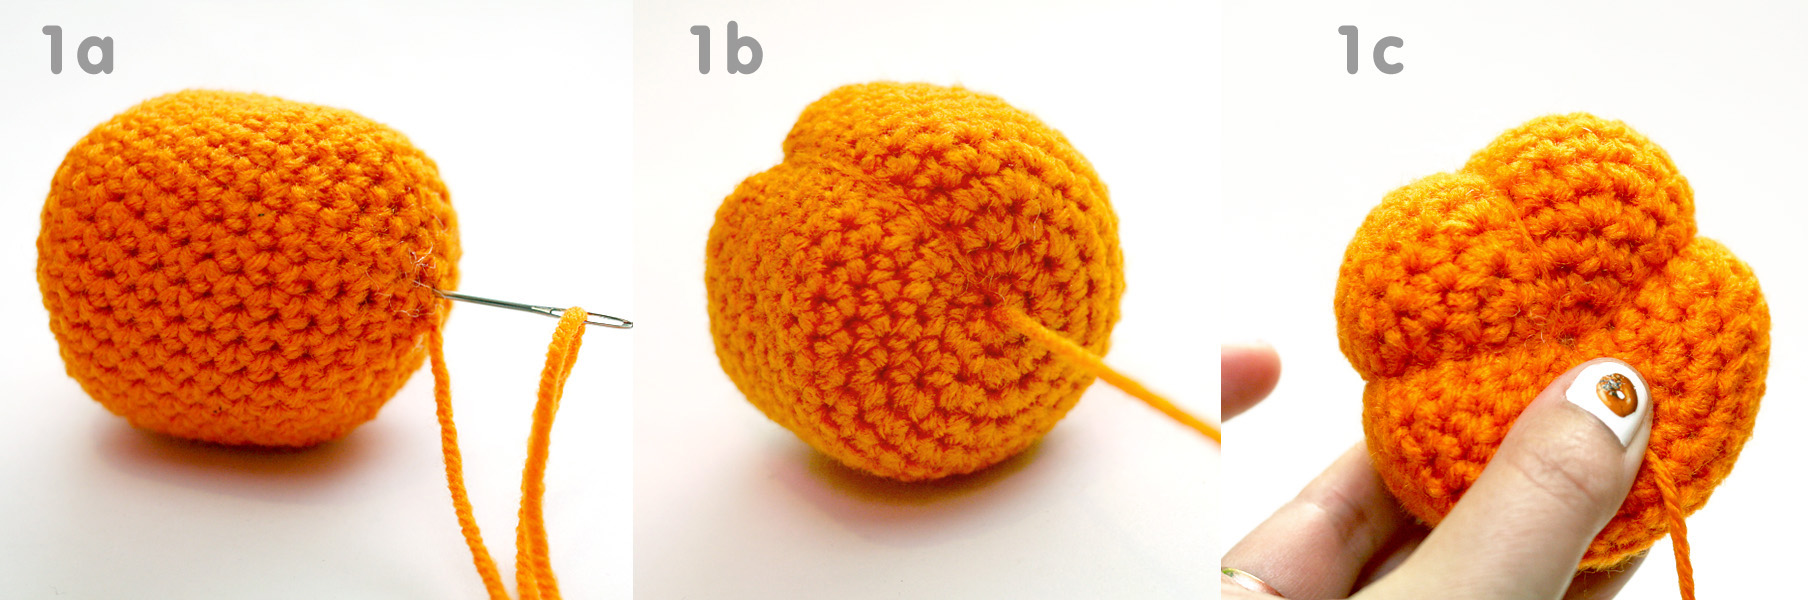
Break off leaving an arm-length of yarn to work with. Sew up the hole and tie off but don’t break off. Take your tapestry needle and stick it into the hole you just sewed up (1a). Bring your needle up and out the center of Rnd 1. Wrap your yarn around the outside of the pumpkin and stick the needle back up into the bottom hole and back up again through the top. Pull tight (1b). Wrap yarn again outside of the pumpkin but move the yarn away from your first wrapped yarn to create the different segments of your pumpkin. Stick needle back up into the bottom of the pumpkin and back up again through the top. Pull tight (1c). Do this 5-6 times to create 5-6 segments on the pumpkin. After the last one, tie a knot at the top of the pumpkin. Weave in end and break off. At this point, you can decide which ends will be the top and bottom of your pumpkin. Depending on how you wrapped your yarn, one end might look nicer than the other, so make sure to keep the nicer looking end up as the top, where you will put the stem.
Stem:
With Green, pull out about 8 inches of yarn first, and then ch 7.
Sk 1st 2 chs from hook, then 2 hdc, 2 sc, 1 sl st. Break off leaving about 8 inches of yarn again.
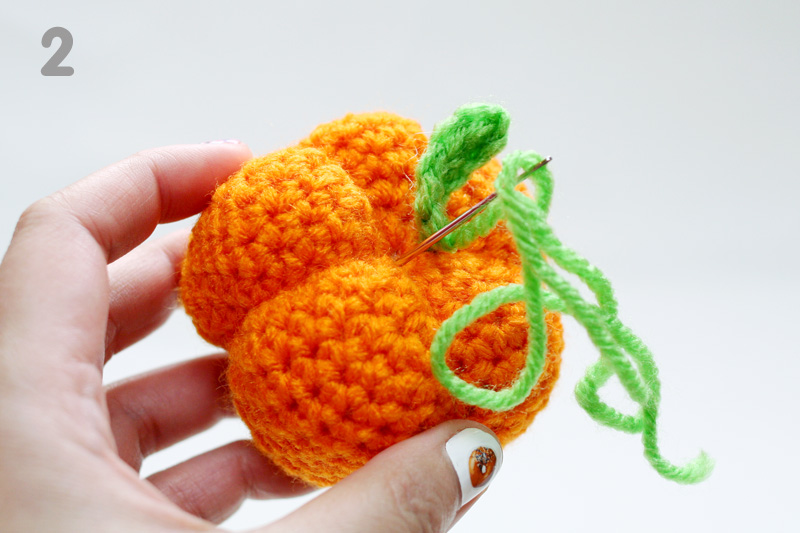
Thread one yarn tail through a tapestry needle and stick the needle into the top of the pumpkin and down through to the bottom of the pumpkin. Don’t sew exactly in the center, just slightly one row off center. Then thread your needle with the other end of the yarn and bring that yarn down through the top to the bottom, slightly off center and opposite the side of your first yarn tail (2). The point here is to anchor your two yarn ends down through the center of the pumpkin, to secure your stem, but if you pull both yarn tails through the same hole down the center, your stem can just get sucked down into the pumpkin. The yarn ends coming out the bottom should also not be going through the same hole, otherwise, when you tie them together, the knot can just disappear into the center of the pumpkin. The knot should remain on the outside of the pumpkin. Tie both yarn tails together at the bottom of the pumpkin to secure the stem, and then weave in ends and break off.
Optional:
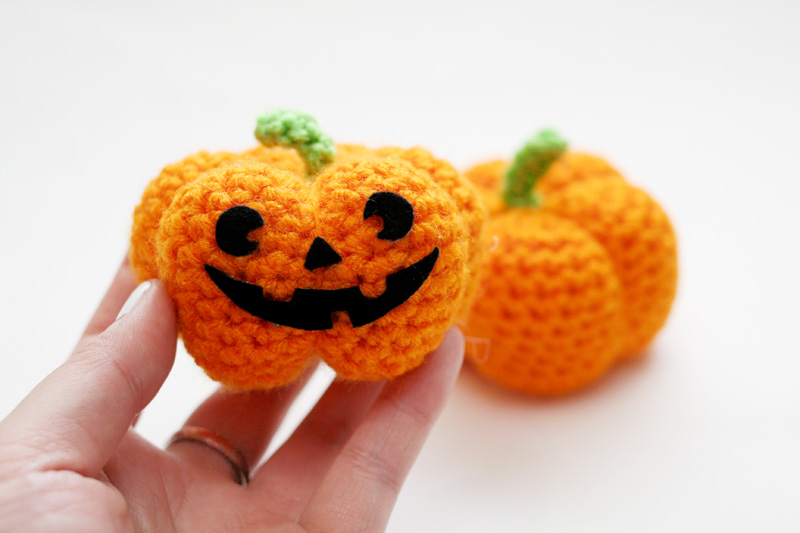
Carefully cut out a cute jack o lantern face with black felt and glue the face onto your pumpkin. Then, you can glue on a hair clip, or tie it to a wreath, or just display it as a super cute decoration!