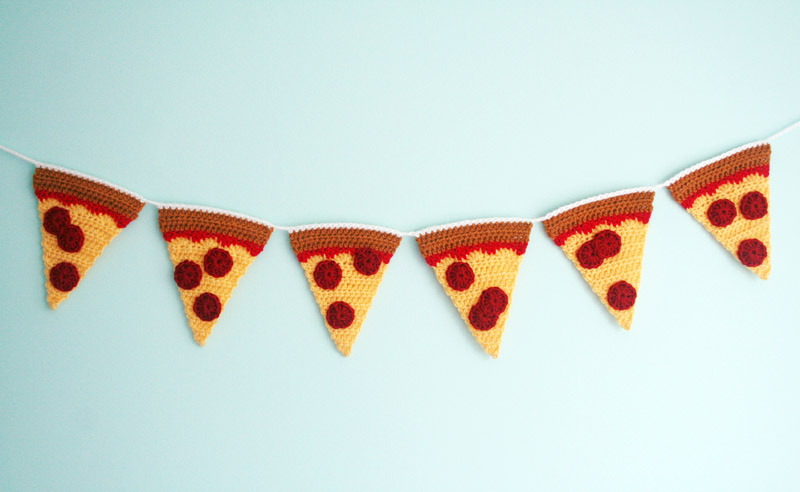
There’s only one thing that comes to my mind when I think of college, new adventures, and dorm life: PIZZA. This crocheted pepperoni pizza garland is a colorful and festive dorm room decoration for walls, windows, or doorways, and it’s really easy to make as long or short as you want. I love garlands as a statement of celebration for every day. Give a home-away-from-home a bright, playful, and cozy touch with these tasty slices!
(Obvs, I originally designed this pattern for Michaels.com as part of a back-to-school promo for Fall, and they asked me to create a project to decorate a new dorm room. But I think any pizza-lover of any age would get a good giggle out of this gift!)
Materials List
- Crochet Hook, size H/5.0mm
- Lion Brand® Vanna’s Choice® in Duckie – approx. 15 yards for 1 slice; 90 yards for a whole garland
- Lion Brand® Vanna’s Choice® in Scarlet – approx. 3 yards for 1 pizza slice; approx. 18 yards for a whole garland
- Lion Brand® Vanna’s Choice® in Honey – approx. 8 yards for 1 pizza slice; approx. 48 yards for a whole garland
- Caron® Simply Soft® in Autumn Red – approx. 9 yards for 1 pizza slice; approx. 54 yards for a whole garland
- Lion Brand® Vanna’s Choice® in White – or any color/brand worsted weight yarn you want to use to string pizza slices together, approx. 10 yards
- scissors or yarn cutter
- tapestry needle for weaving in ends
Gauge
Gauge is not very important in this project.
My pizza slices measured approx. 5.5 inches across the widest point and 7 inches tall.
Abbreviations
ch(s) = chain(s)
dc = double crochet
hdc = half double crochet
htr = half triple crochet
rnd(s) = round(s)
sc = single crochet
sc2tog = single crochet 2 together
sk = skip
sl st = slip stitch
st(s) = stitch(es)
tr = triple crochet
YO = yarn over
[ ] = repeat what is inside the brackets the number of times indicated
Notes
– I use a particular method to increase stitches in the Pizza Slice in order to make the edges of my work super straight and clean, but as long as you increase Rows 1-15 by 1 stitch per each row, your garland will still look fine.
Pizza Slice – I made 6, but you can adjust to your preference.
Cheese:
-With Duckie, ch 3.
Row 1: Sk 1st 2 chs, 1 hdc in last ch. (1)
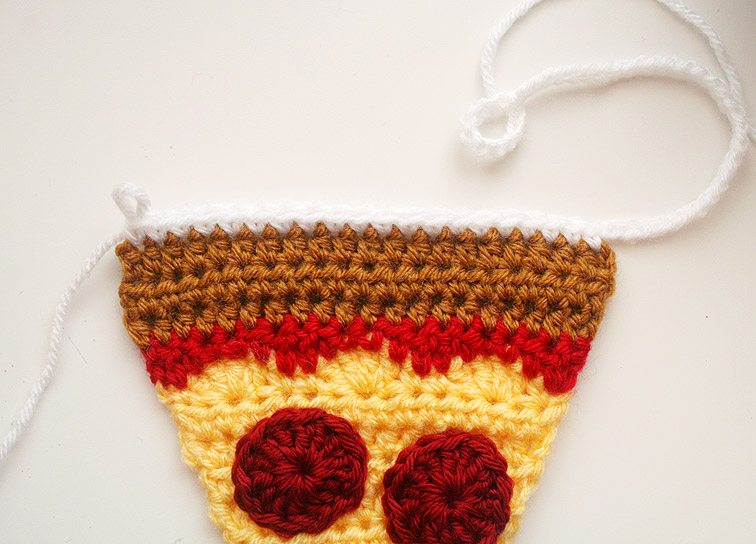
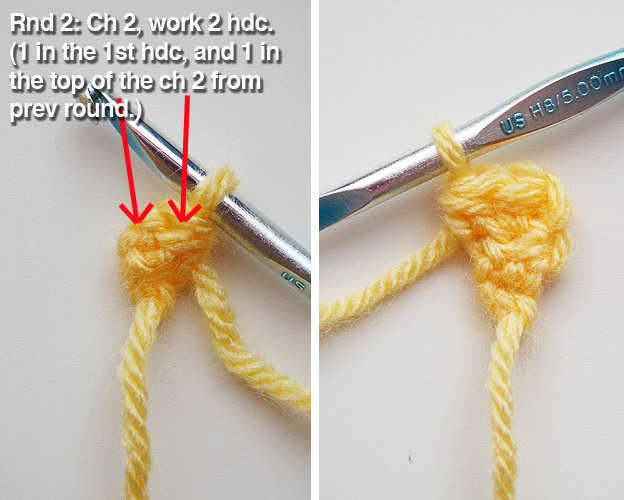
Row 2: Ch 2, turn. Work 2 hdc evenly. Your last hdc is worked in the top of the ch 2 from the previous row. You will continue to work this way for Rows 3-15. (2) See Photo 1.
Row 3: Ch 2, turn. 3 hdc. (3)
Row 4: Ch 2, turn. 4 hdc. (4)
Row 5: Ch 2, turn. 5 hdc. (5)
Row 6: Ch 2, turn. 6 hdc. (6)
Row 7: Ch 2, turn. 7 hdc. (7)
Row 8: Ch 2, turn. 8 hdc. (8)
Row 9: Ch 2, turn. 9 hdc. (9)
Row 10: Ch 2, turn. 10 hdc. (10)
Row 11: Ch 2, turn. 11 hdc. (11)
Row 12: Ch 2, turn. 12 hdc. (12)
Row 13: Ch 2, turn. 13 hdc. (13)
Row 14: Ch 2, turn. 14 hdc. (14)
Row 15: Ch 2, turn. 15 hdc. (15)
Row 16: Ch 1, turn. [1 sc, sk 1, 4 dc in next st, sk 1, 1 sc] Repeat 3 times. (18)
– Break off Duckie and join Scarlet.
Sauce:
Row 17: With Scarlet, ch 3, turn. Ch 3 counts as 1 dc, but still start row in the 1st stitch. [1 dc, 1 hdc, 2 sc, 1 hdc, 1 dc] 3 times. Work one more dc in last st. (20)
– Break off Scarlet and join Honey.
Crust:
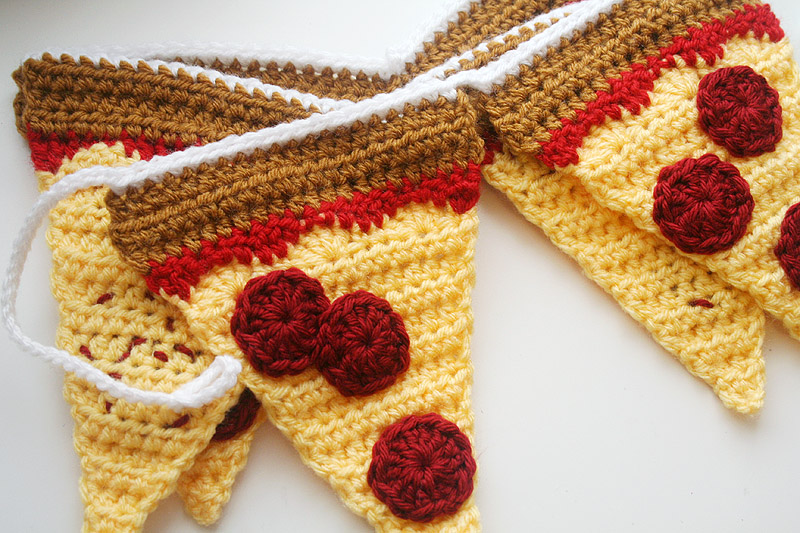
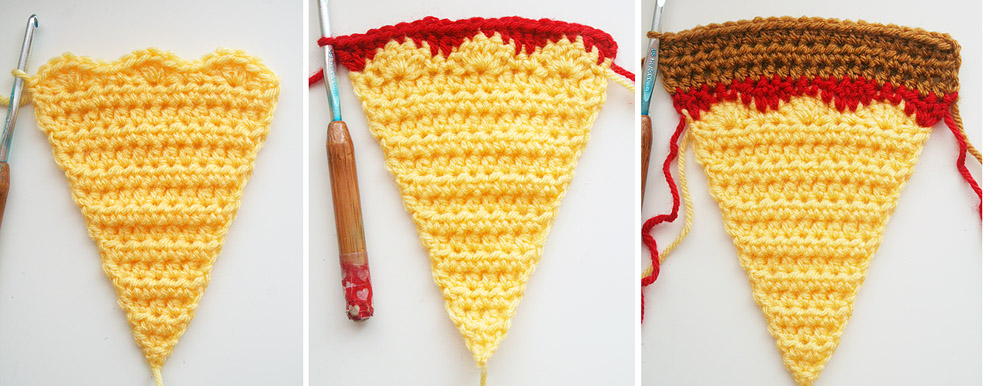
Rows 18 – 20: With Honey, ch 2, turn. Work hdc evenly across. (20)
– Break off Honey. Weave in all ends. See Photo 2.
Pepperoni – I made 18 (3 for each Pizza Slice), but you can adjust to your preference.
– With Autumn Red, make magic ring or ch 3 and sl st to 1st ch to form ring.
Rnd 1: Ch 2 (does not count as 1st stitch), work 13 dc into ring. Sl st to 1st dc to join.
– Break off leaving 18 inches of yarn for sewing.
Assembly
1. Weave in and trim the yarn tail from the center of Pepperonis. With right sides of Pepperonis facing you, and right side of the last row of pizza Crust facing you, sew 3 Pepperonis to each Pizza Slice in various arrangements.
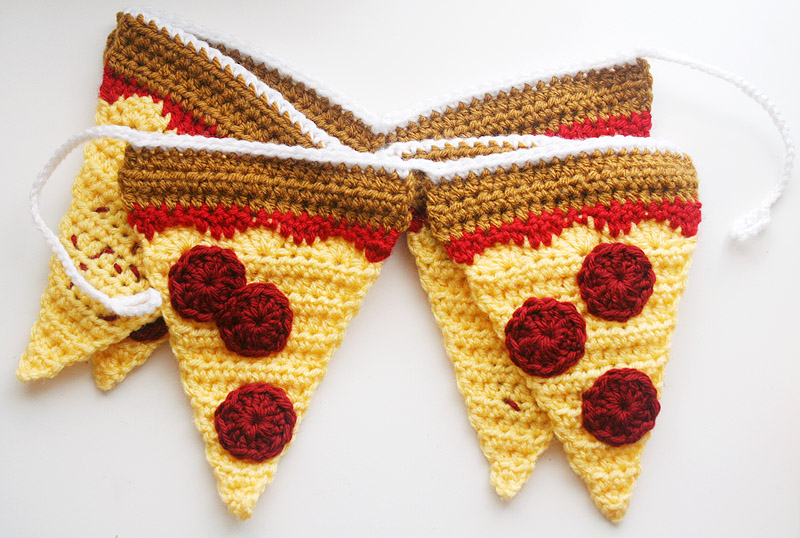
2. With White (or what ever color you choose to string your Pizza Slices), ch 10 tightly and sl st to 1st ch to form a loop for hanging the garland. Then ch 30 tightly. Pick up a Pizza Slice and work 20 sc across the top of the slice with the Pepperonis facing you. Ch 3 tightly. (See Photo 3) [Pick up the next Pizza slice and work 20 sc across the top with the Pepperonis facing you. Ch 3 tightly] repeat until you run out of Pizza Slices. Then ch 30 tightly again. Continue to ch 10 more, then sk 9 chs and sl st into 10th ch to form another loop and break off. Weave in all ends.