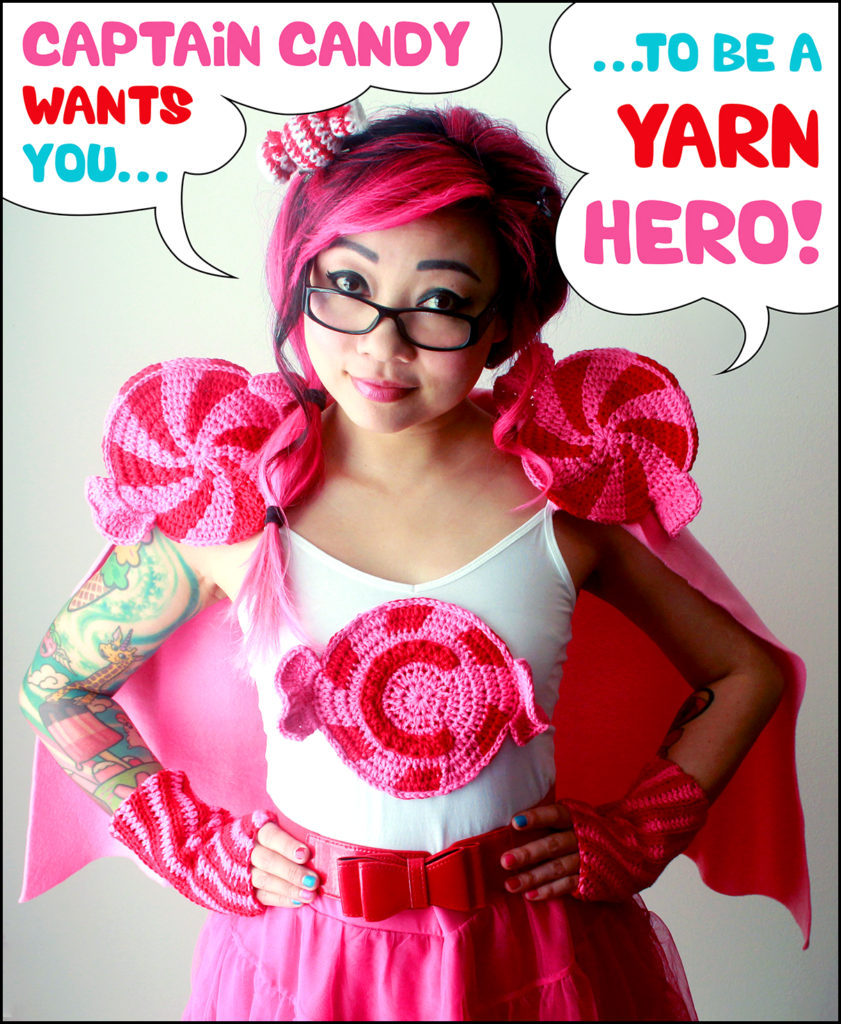
This holiday season, Lion Brand Yarn and an awesome team of crochet/knit/yarn bloggers are combining their super powers to form the Yarn Heroes and encourage all of you to craft for your favorite charitable causes!
My Yarn Hero name is Captain Candy! I use my crochet powers to bring sweetness, color, and light to the world. As you may know, I have my Tissue Box Bakery site with free patterns and a small shop to help benefit one of my local charities called Food Runners. For this Yarn Heroes campaign, LB is helping me introduce you guys to two more amazing organizations: Mittens for Detroit and Bow Dazzling.
LB challenged the Yarn Heroes to create fun super-hero outfits and characters using fairly basic patterns to share with all of you, so that you can create your very own super-hero characters and also use the patterns to help out your favorite charities.
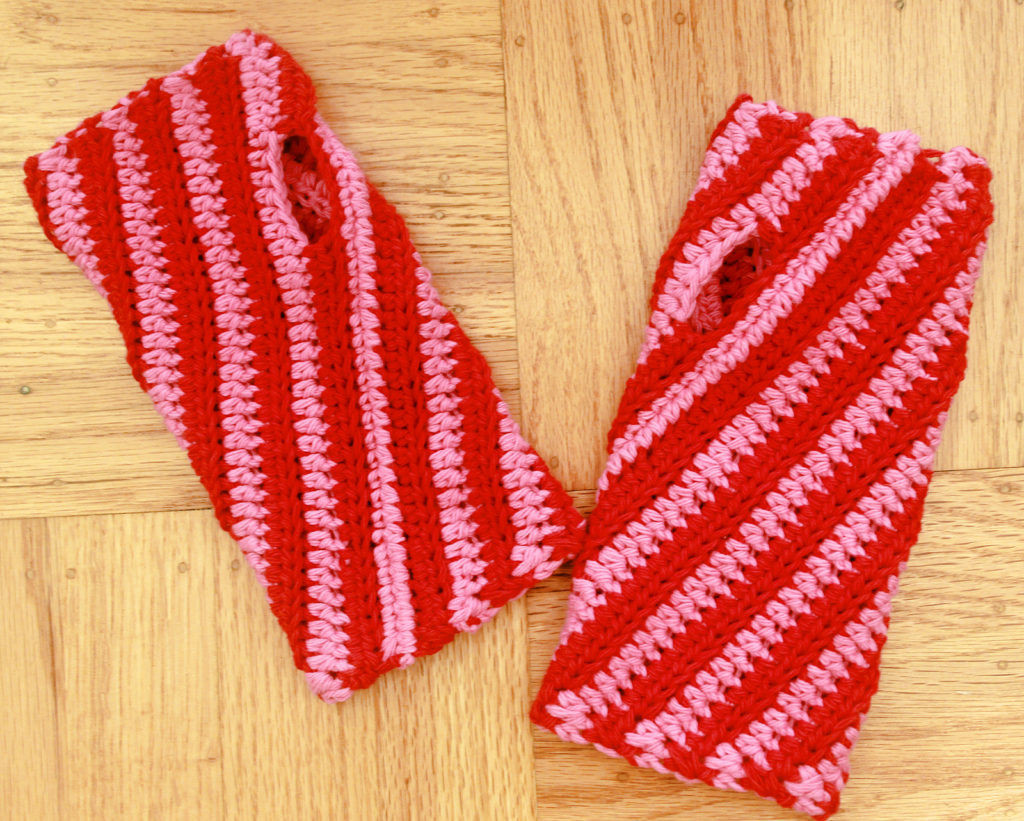
People have asked me for the Candy Cane Wrist Warmer pattern for years, and I felt like this was the perfect opportunity to give it to you. There are so many deliciously cute color combos you could use and so much warmth and color you could spread to your friends, family, and hopefully a cause such as Mittens for Detroit.
Don’t forget to tag #YarnHeroes on your social media if you make my project or any charitable project for the season. AAALLLLSOOOOOOOO, Lion Brand is offering $5 off every purchase at or above $20 of yarn for your charitable projects using the code YARNHEROES2016 in their online store from November 15 – December 15. Show me photos of your Candy Cane Wrist Warmers, and I’ll make a blog post with a cool collage!
Coming soon: I’ll post some cute patterns for crocheted bows AAAAANNNNDDDDD………….. LB and I are teaming up to bring you a cool giveaway. Stay tuned! EDIT: Here’s the link to the crocheted bows pattern and giveaway!
Pattern for wrist warmers below!
Candy Cane Wrist Warmers
For my Captain Candy outfit, I used Lion Brand Kitchen Cotton for the bright colors, even though I might not usually use Kitchen Cotton for a pair of fingerless mitts. Feel free to sub in any of your favorite worsted weight yarns, too, like Lion Brand Vanna’s Choice!
What You’ll Need:
- 1 ball worsted weight yarn in Color A, such as Lion Brand Kitchen Cotton in Hot Pepper – approx. 80 yards
- 1 ball worsted weight yarn in Color B, such as Lion Brand Kitchen Cotton in Bubblegum – approx. 80 yards.
- H8/5.00mm crochet hook
- scissors
- tapestry needle
Gauge:
I worked fairly tightly while using Kitchen Cotton, and if I were using Vanna’s Choice, I probably would have relaxed more :P. If you find the mitts too tight or too loose, it’s very easy to just remove or add more rows, which will either tighten or loosen the width or the project.
16 sc x 17 rows = 4 in. x 4 in.
Abbreviations in U.S. Terms:
BLO: back loop only
ch(s): chain(s)
hdc: half double crochet
hdc2tog: half double crochet 2 together (decrease)
sc: single crochet
sc2tog: single crochet 2 together (decrease)
sk: skip
sts: stitch(es)
Special Stitches:
hdc2tog: half double crochet 2 together (decrease) – Yarn over, insert hook into desired stitch, yarn over and pull through 1 loop. Yarn over, insert hook into next stitch, yarn over and pull through 1 loop. Yarn over and pull through all 5 loops on hook.
sc2tog: single crochet 2 together (decrease) – Insert hook into desired stitch, yarn over and pull through 1 loop. Insert hook into next stitch, yarn over and pull through 1 loop. Yarn over and pull through all 3 loops on hook.
Notes:
- You will alternate Color A and Color B for each row, and you will carry the color you are not using along with the color you are working. Be careful that the yarn being carried is not carried too tightly, or it will warp your piece and make the piece curl or fit too tightly. What I do is, after every row, before changing the color and turning, I gently stretch out the piece in order to make sure it’s shaped normally and that the carried yarn is not causing any deformity or tightness. However, if you stretch too much, or if the carried yarn is too loosely, you can see the carried yarn looping out between stitches, which doesn’t look good, either. Just be mindful before switching colors!
- Just to underline what will be happening in the pattern, your project will begin to look like a parallelogram and NOT a regular rectangle. This is due to all the increases placed on one side of the project and all the decreases placed on the other side. When you sew the wrist warmer together, you’ll see how the parallelogram creates the diagonal orientation for the stripes.
- Most of the stitches are worked in BLO to create a nice texture and make the stripes really pop, but all the increases and decreases are worked in both loops of each stitch. I find this provides more sturdiness around the open ends of the wrist warmers, but this method is also optional and you can play with it.
Wrist Warmer (make 2): You use the same pattern for both wrist warmers. Easy!
– With Color A, ch 34
Row 1: Sk 1st 2 chs, work 2 hdc in 3rd ch. 29 hdc evenly down the chain. In the last 2 chs, work hdc2tog. Drop Color A. Join Color B. Carry Color A along. – 32 sts
Row 2: With Color B, ch 2, turn. Hdc2tog through both loops of each st, work 29 hdc in BLO, then 2 hdc in the last st through both loops. Drop Color B. Pick up Color A. Carry Color B along. – 32 sts
Row 3: With Color A, ch 2, turn. 2 hdc in first st through both loops, work 29 hdc in BLO, then hdc2tog in both loops of last 2 sts. Drop Color A. Pick up Color B. Carry Color A along. – 32 sts
Rows 4-14: Keep repeating Rows 2 and 3. Break off Color B at the end of Row 14. Pick up Color A.
Row 15: With Color A, ch 1, turn. 2 hdc in first st through both loops and work 5 hdc in BLO. Work one more hdc but in both loops (to make the edges of your thumbhole more sturdy). Ch 7 and sk 7 hdc to create the thumbhole, then work 1 hdc through both loops in the next hdc. 15 hdc in BLO until 2 sts remain. Hdc2tog through both loops. Break off Color A. Join Color B. – 32 sts
Row 16: With Color B, ch 1, turn. (Sc2tog) through both loops, then work 29 sc in BLO, then 2 sc in the last st through both loops. Break off Color B leaving at least an arm length of yarn for sewing (sometimes I run out and have to tie off and get a new piece of yarn…try to avoid this! It’s more work!).
Finishing:
To create a tube, sew Row 16 to the bottom of Row 1 (the foundation ch) using double whip stitches. I think that the v’s this creates mimics crochet more and looks less like sewing.
Due to working in BLO, you’ll notice that the inside and the outside of the tube look slightly different as far as the colors. On one side, Color A will look stronger, and on the other side, Color B will look stronger. Which side you have showing is entirely up to you! But you should decide before weaving in your ends, so you can make sure that any messy weaving-in is hidden on the inside of the wrist warmer.
Tie off, and weave in all ends.
***


