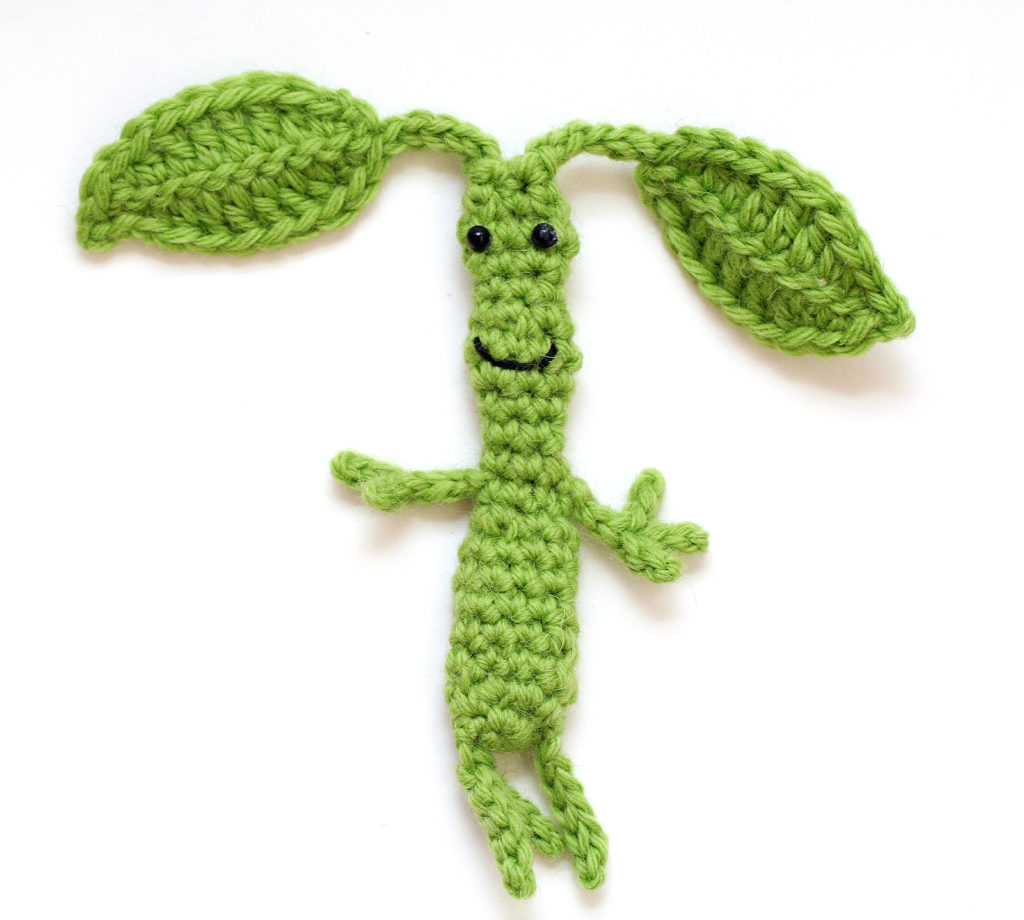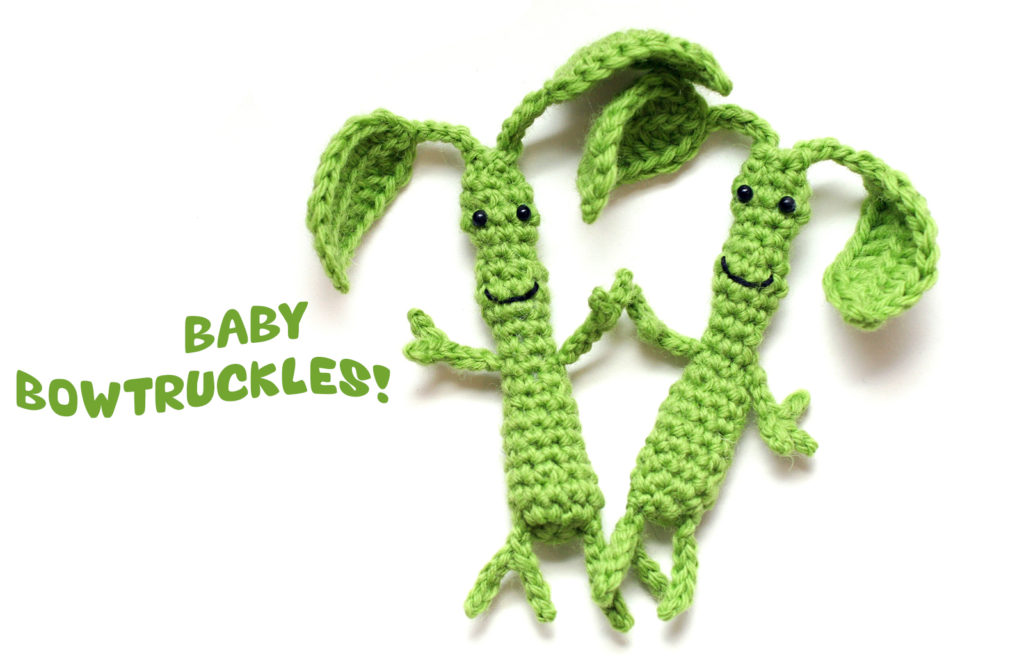
I don’t know what it is I like so much about anthropomorphic plants from movies (baby Groot, anyone?), but after I saw Fantastic Beasts, I definitely wanted my own Bowtruckle, which is described on Pottermore as a “small, twig-like creature that guards wand-wood trees.”
In my first attempt to crochet him, I tried to stay very true to Pickett in the movie images, and I wanted his long, thin limbs to be posable with wiring. However, he kept looking kind of weird and creepy to me while I was crocheting him, so I decided to shorten his body and limbs and make him cute, stumpy, and little! (Here’s an animated gif of my rough sketches.)
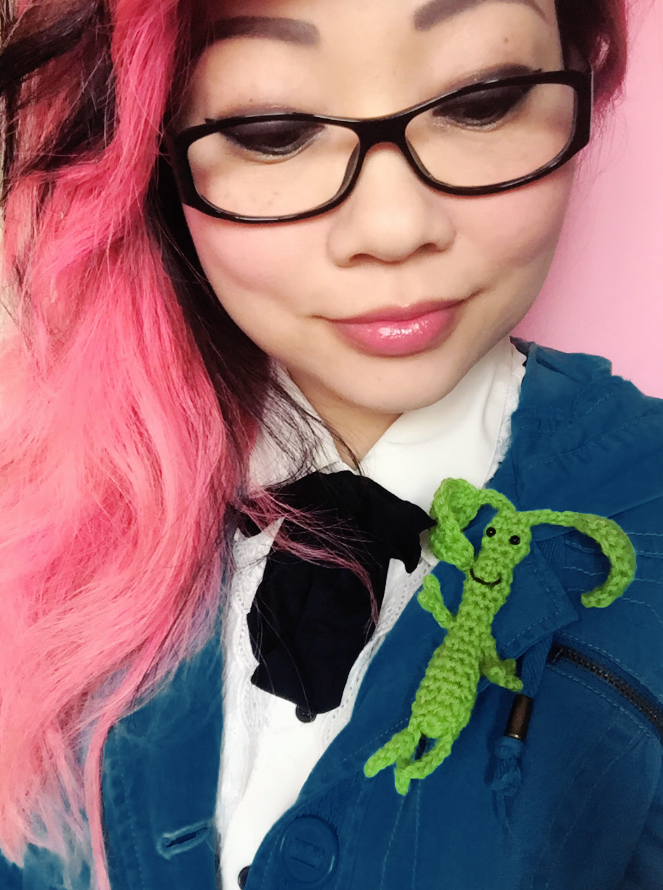
I hope you enjoy making your lil plant babies! He’s also a good size for a brooch, so you can easily keep him on your coat for all your adventures!
What You’ll Need
- Light Worsted Weight Yarn in Green, such as Cascade 220 in Primavera – approx. 15 yards
- G6/4.00mm hook
- scissors
- tapestry needle
- stitch markers or small piece of scrap yarn
- 2 small black beads and black or green thread to sew the beads on, or, tiny 4mm half-round flat back eyes and super glue
- small amount of black yarn or embroidery thread to sew the mouth
- optional: floral wire
- optional: polyester stuffing and a pencil or small wooden stick to help with stuffing
Gauge
Gauge is not super important since your Bowtruckle doesn’t have to be the exact same size as mine, but here is the gauge I worked with:
Cascade 220 and a G hook: 21 sc x 25 rows = 4 in. x 4 in.
Finished size
Body: approx. 3 ½ inches tall
Abbreviations
ch (s) – chain(s)
FLO – front loop only
invdec – invisible decrease
lp(s): loop(s)
rnd(s) – round(s)
RS – right side
sc – single crochet
sk – skip
sl st – slip stitch
st(s) – stitch(es)
YO – yarn over
( ) – work everything inside the parentheses into the next stitch
[ ] – repeat everything inside the bracket as many times as indicated
Special Stitches
invdec – invisible decrease – Although I don’t consider this a special stitch, I thought I would go over the decrease again in case you wanted a refresher. Insert hook into FLO of desired st, then insert hook into FLO of next st. YO, pull through 2 lps, YO, pull through 2 lps.
Notes
– The RS of your work should appear on the outside of the project.
– When working with sl st, you’ll sometimes work in one loop (usually the back loop) of the ch, and sometimes you’ll work in 2 loops (I work in the back loop and the “butt”). Each of these methods creates a slightly different look for the sl st. 1 loop: a flatter, more 2-dimensional piece. 2 loops: a rounder, denser, more 3-dimensional piece. I work in 2 loops in this project for arms and legs and bases of leaves, but I prefer working in 1 loop if I’m going to be working in those sl sts again, because it’s easier for me to get my hook in there. You can experiment and see how both ways work!
– You can decide whether or not you want to stuff the Bowtruckle’s body. I’ve tried both ways and both are cute! His head might start looking weird if you stuff it, but you can try that, too. I left the head on mine unstuffed.
Body
-Starting at the bottom of his body, make magic ring, or ch 3 and sl st to 1st ch to form ring.
Rnd 1: 6 sc into ring. Don’t join rnds. – 6 sts
Rnd 2: (2 sc) 6 times. – 12 sts
Rnd 3: Work sc evenly. – 12 sts
Rnd 4: [invdec, 2 sc] 3 times. – 9 sts
Rnds 5 – 8: Work sc evenly. – 9 sts
– If you want to stuff your Bowtruckle’s body, do so now lightly.
Rnd 9: [invdec, sc] 3 times. – 6 sts
Rnds 10 – 13: Work sc evenly. – 6 sts
Rnd 14: [(2 sc), sc] 3 times. – 9 sts
Rnd 15: Work sc evenly. – 9 sts
Rnd 16: [invdec, sc] 3 times. – 6 sts
Rnd 17: Work sc evenly. – 6 sts.
Rnds 18 – 21: Repeat Rnds 14 – 17.
– Sl st to next st to join.
– This is the top of his head. Now you’ll work on his leaves.
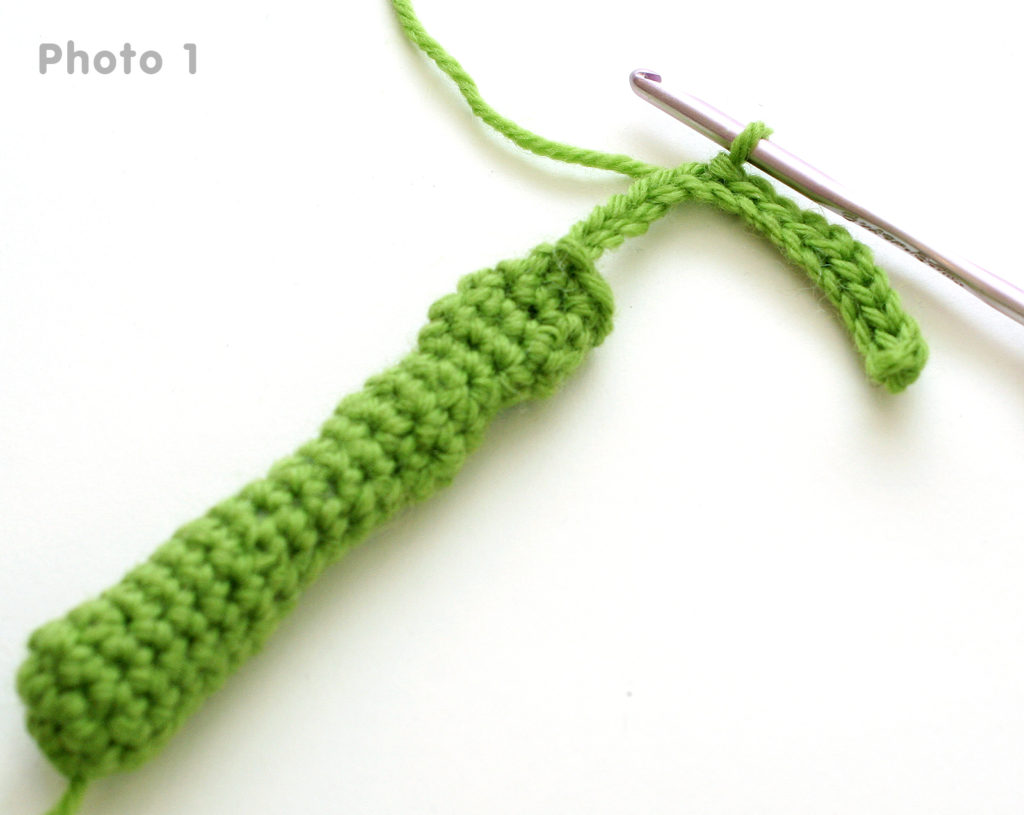
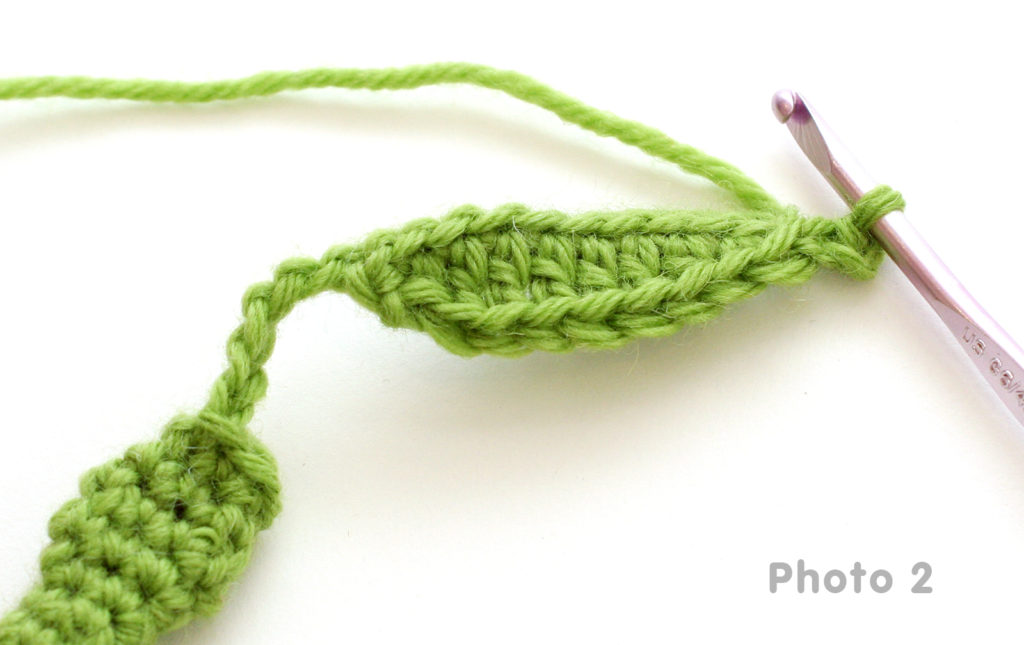
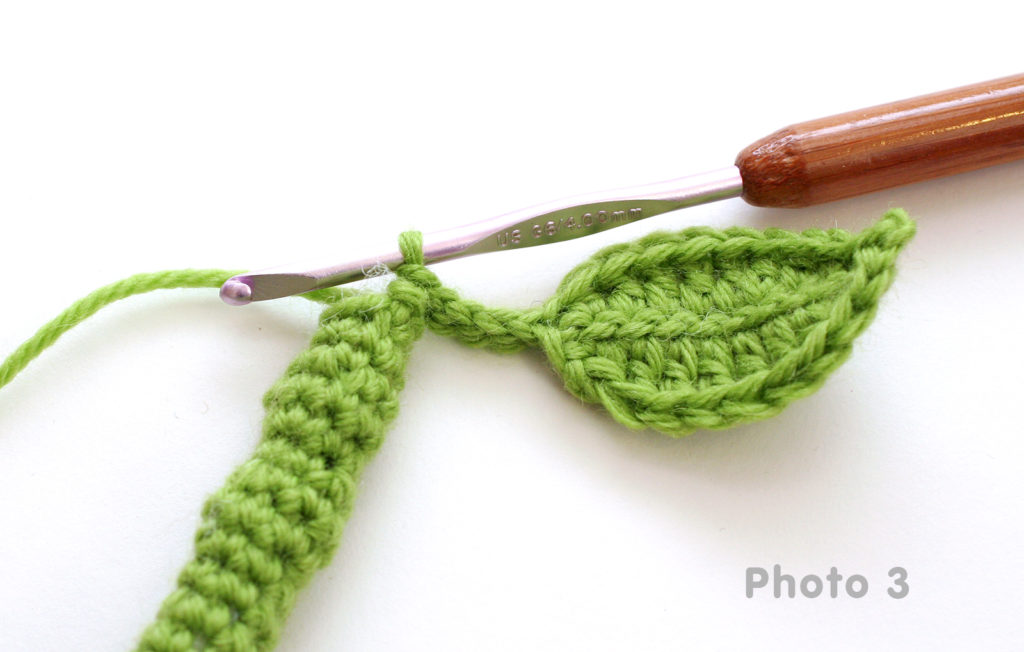
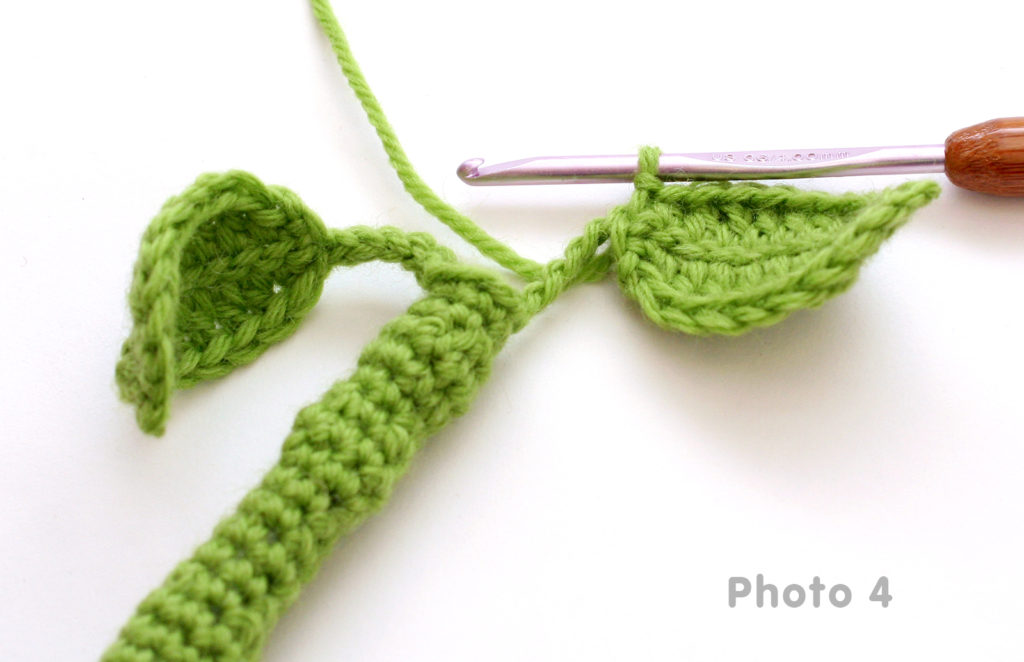
Rnd 22: [Ch 16, sk 1st ch, 10 sl st (in one loop of the ch only and not too tightly) and leave remaining chs unworked for now, Photo 1. Ch 1, turn. Sk 1st st, hdc, 5 dc, hdc, sc, sl st. At the tip of the leaf, work a picot, which is ch 2, sk 1st ch from hook, then sl st in 2nd ch, Photo 2. Now working in other side of 10 sl sts, sl st, sc, hdc, 5 dc, hdc, sl st in last sl st. Now working in foundation ch, sl st in 2 loops of each remaining 5 chs. Your leaf is finished, Photo 3. Work 3 sl st back on his head, in Rnd 21.] 2 times. Photo 4.
– Break off leaving about 12 inches of yarn.
– With tapestry needle, weave through any opening that remains at the top of the head, tie off, and break off. Weave in end.
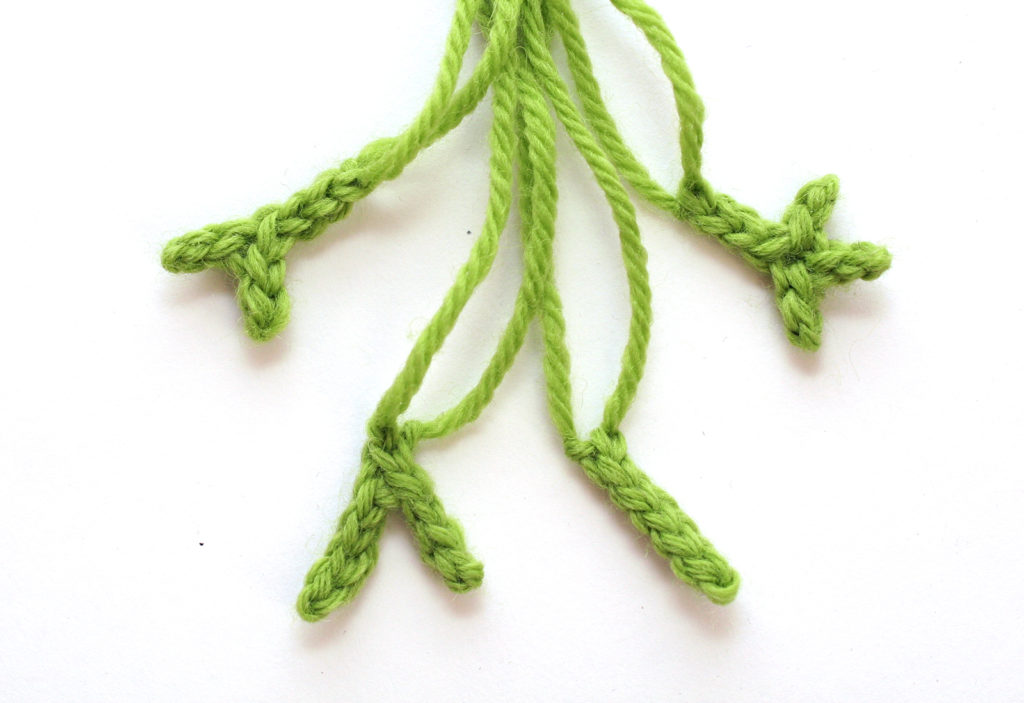
Arm with 2 Branches
– Work all sl sts in 2 loops of each ch. Making sure you begin with an 8 inch yarn-tail for sewing later, ch 6.
Row 1: Sk 1st ch, 2 sl st, leaving remaining chs unworked for now. Ch 3, sk 1st ch from hook, 2 sl st. Now working in original foundation ch, 3 sl st.
– Break off leaving about 8 inches of yarn for sewing later.
Arm with 3 Branches
– Work all sl sts in 2 loops of each ch. Making sure you begin with an 8 inch yarn-tail for sewing later, ch 6.
Row 1: Sk 1st ch, 2 sl st, leaving remaining chs unworked for now. [Ch 3, sk 1st ch from hook, 2 sl st] 2 times. Now working in original foundation ch, 3 sl st.
– Break off leaving about 8 inches of yarn for sewing later.
Leg
– Work all sl sts in 2 loops of each ch. Making sure you begin with an 8 inch yarn-tail for sewing later, ch 6.
Row 1: Sk 1st ch, 5 sl st.
– Break off leaving about 8 inches of yarn for sewing later.
Leg with 2 Branches
– Work all sl sts in 2 loops of each ch. Making sure you begin with an 8 inch yarn-tail for sewing later, ch 6.
Row 1: Sk 1st ch, 4 sl st leaving remaining chs unworked for now. Ch 5, sk 1st ch from hook, 4 sl st. Now working in original foundation ch, sl st.
– Break off leaving about 8 inches of yarn for sewing later.
Assembly
- Sew Arms and Legs to Body.
- Attach eyes.
- Embroider mouth.
- Optionally, wire leaves to make them posable. I haven’t actually tried this yet, but it seems like a good idea…
- Be together forever!

