(Previously posted at Michaels.com)
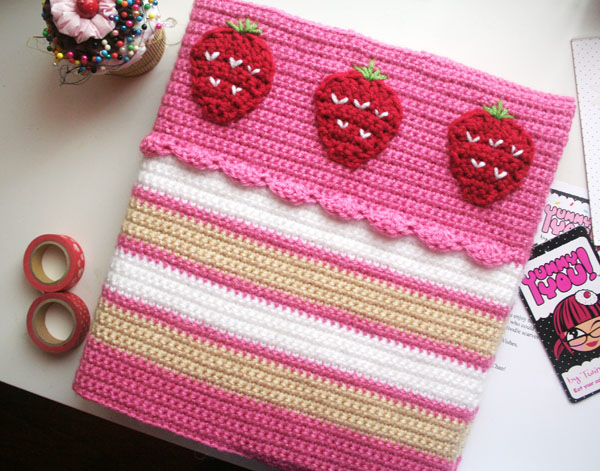
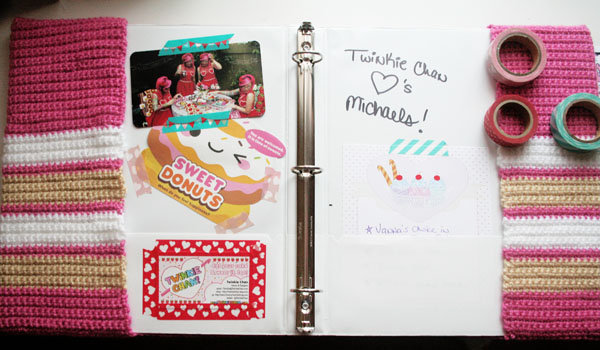
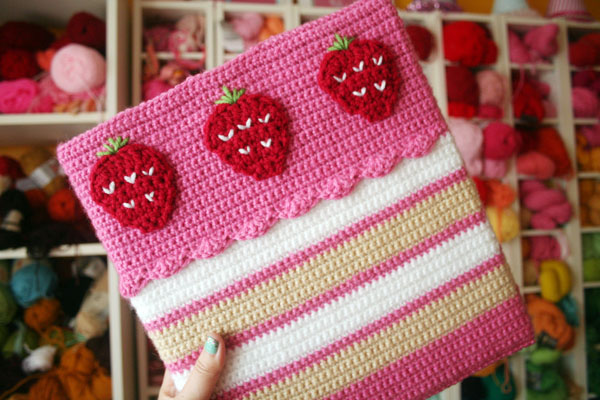 Some of my favorite back-to-school memories involve decorating and organizing my binders. Now you can take your old, beat-up binders and give them a creative, colorful makeover with this crocheted Strawberry Cake Binder Cozy. I used my favorite color: pink! But you can choose your own favorite colors and flavors, too. The binder I cover in this project is 1 inch thick, but you can easily add extra stitches to your rows for thicker binders. The cozy is removable as well, so you can wash it!
Materials List
- Crochet Hook, size H/5.0mm or size needed to obtain gauge
- Lion Brand® Vanna’s Choice Baby®: Pink Poodle (2 balls)
- Lion Brand® Vanna’s Choice®: White (1 ball), Beige (1 ball), Fern (small amount)
- Loops & Threads™ Impeccable™ Yarn – Solids: Cherry (small amount)
- 1 hardcover O-ring binder – 1” thickness preferred, but pattern can be easily altered for other thicknesses
- scissors or yarn cutter
- tapestry needle for weaving in ends
- 6 straight pins
Gauge
Gauge is only important for Vanna’s Choice® and Vanna’s Choice Baby® in order to get the correct measurements to fit your binder. I crochet more tightly than the gauge noted on the yarn label to make the project more sturdy and dense.
Vanna’s Choice®: 13 sc x 15 rows = 3 in. x 3 in.
However, you can also create your own swatch in a gauge you like: calculate how many stitches per inch you worked, and then multiply that stitch number by the width in inches of your open binder (plus 10 more inches if you want pockets) to figure out how many stitches total you need to work.
Abbreviations:
Ch(s): chain(s)
Dc: double crochet
Prev: previous
Rnd(s): round(s)
Sc: Single crochet
Sk: skip
Sl st: slip stitch
St(s): stitch(es)
[ ]: Repeat what is inside the brackets the number of times indicated.
Tips
– This pattern includes pockets to slide your cozy onto your binder to keep the cozy removable and washable. However, if you want to leave out the pockets and don’t mind just spot-cleaning your cover, you can subtract the 10 extra inches of width noted in the pattern and make a cozy that is the exact same size as your binder. After sewing on all the decorations, you can then use a strong glue like E6000 to adhere your whole cozy to the outside of the binder.
Cake
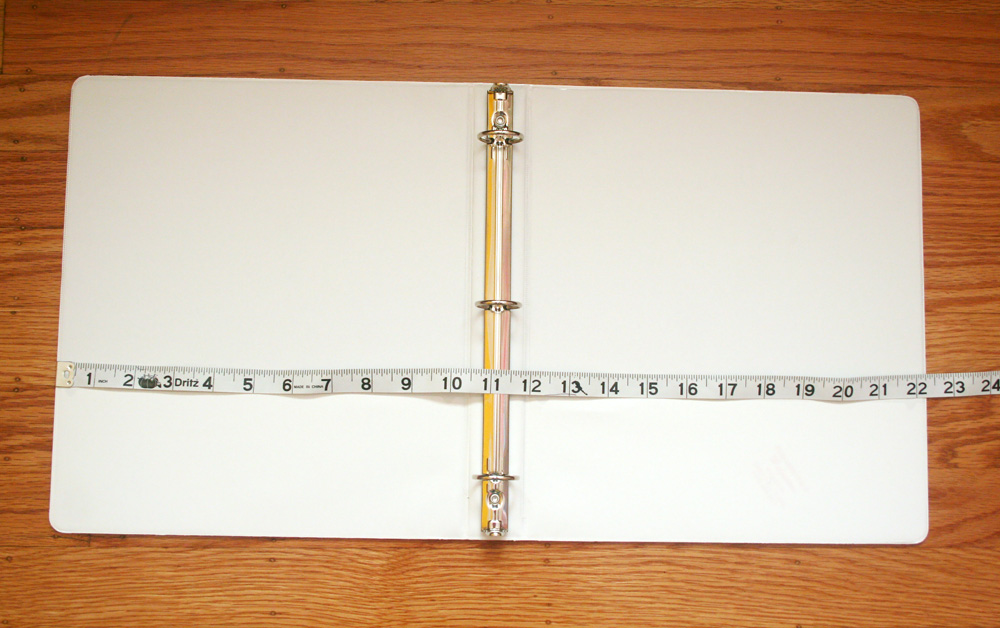
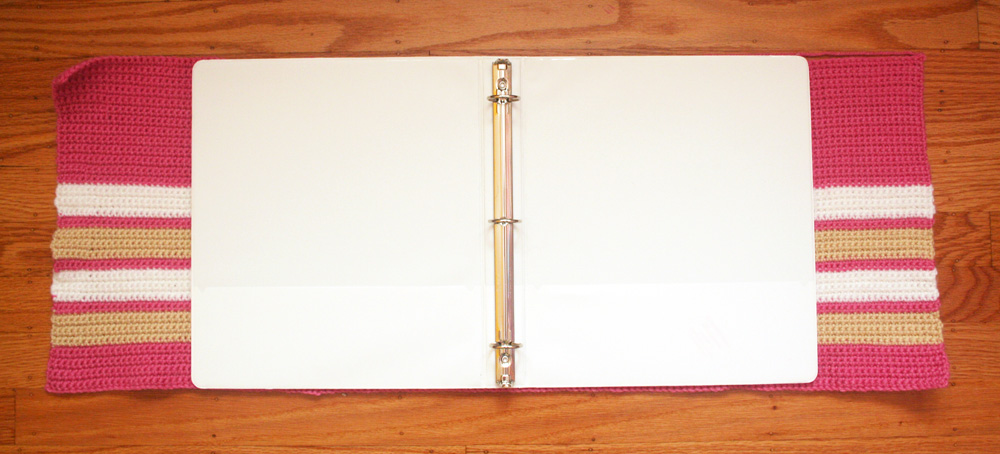
Open your binder and lay it flat. Measure the entire width. (Photo #1) Mine is about 22 1/2 inches. It’s better to round up than round down. Add 10 inches to this measurement. This will give you the necessary width to create pockets for your cozy. I will aim for 32 ½ inches total cozy width.
With Pink, unravel about 18 inches of yarn to use for sewing later, then ch 143 to equal 32 ½ inches width. Remember not to chain too tightly or your cozy will be narrow on the bottom.
Row 1: Sk 1st ch and sc evenly across. (142)
Rows 2-8: Ch 1, turn. Sc evenly across. (142) Break off Pink, join Beige.
Rows 9-14: Ch 1, turn. Sc evenly across. (142) Break off Beige, join Pink.
Rows 15-16: Ch 1, turn. Sc evenly across. (142) Break off Pink, join White.
Rows 17-22: Ch 1, turn. Sc evenly across. (142) Break off White, join Pink.
Rows 23-24: Ch 1, turn. Sc evenly across. (142) Break off Pink, join Beige.
Rows 25-30: Ch 1, turn. Sc evenly across. (142) Break off Beige, join Pink.
Rows 31-32: Ch 1, turn. Sc evenly across. (142) Break off Pink, join White.
Rows 33-38: Ch 1, turn. Sc evenly across. (142) Break off White, join Pink.
Rows 39-62: Ch 1, turn. Sc evenly cross. (142) You should have enough rows now to equal the height of your binder. My binder is 11 ¾ in. tall, so I have worked 11 ¾ in. of rows. You can easily add or subtract the number of final Pink rows to fit your binder. Break off Pink. Weave in ends.
Strawberries (make 3)
With Cherry, ch 4.
Row 1: Sk 1st ch, 3 sc evenly across. (3)
Row 2: Ch 1, turn. 2 sc in first st, then 1 sc, then 2 sc in last st. (5)
Row 3: Ch 1, turn. 2 sc in first st, then 3 sc evenly, then 2 sc in last st. (7)
Rows 4-5: Ch 1, turn. Sc evenly across. (7)
Row 6: Ch 1, turn. 2 sc in first st, then 5 sc evenly, then 2 sc in last st. (9)
Row 7: Ch 1, turn. Sc evenly across. (9)
Row 8: Ch 1, turn. Sk 2 sts, 2 dc in 3rd st, then 3 dc evenly, 2 dc in next st, sk 1 st, and sl st in last st. (8) Break off leaving about 18 inches of yarn for sewing.
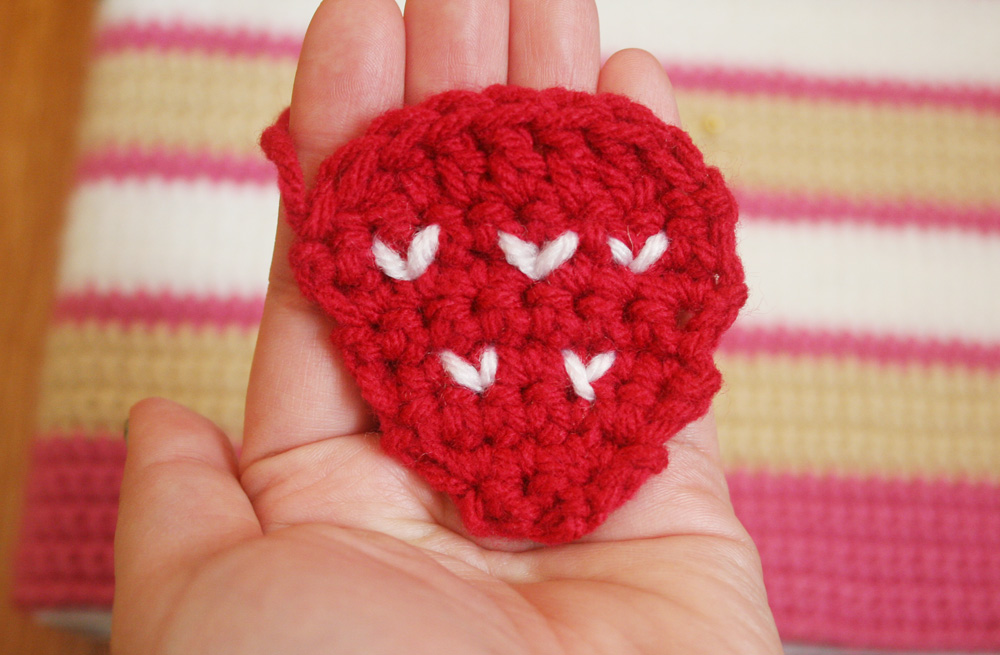
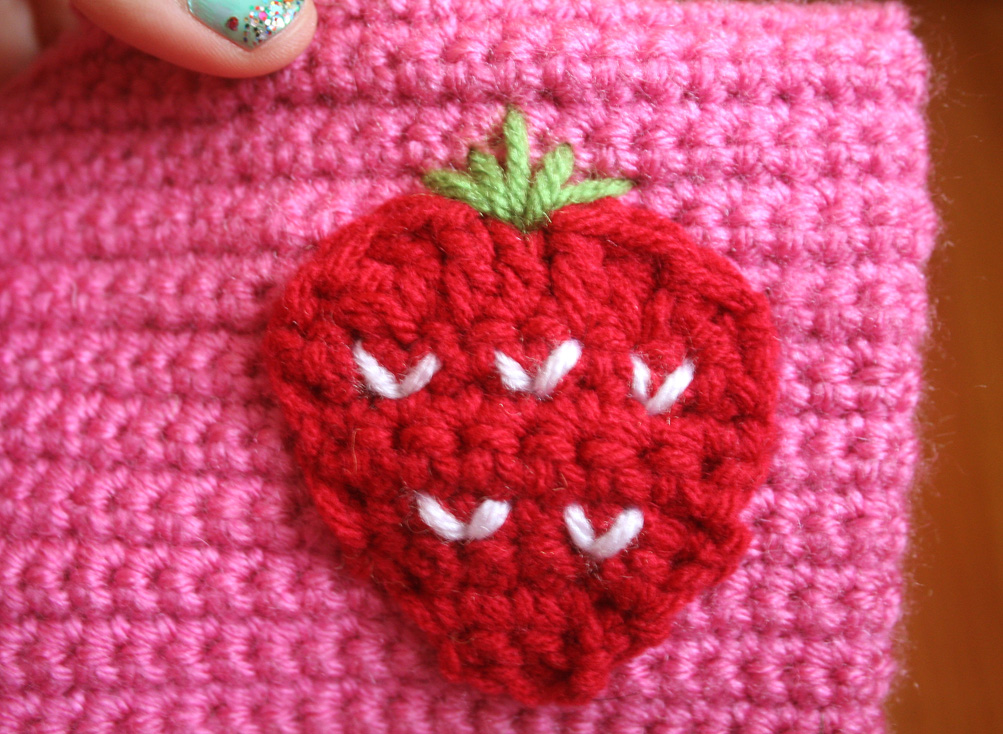
Thread about 18 inches of White yarn on a tapestry needle and stitch little v’s to create strawberry seeds on each strawberry. (Photo #2) You will stitch the leaves directly onto the cozy later.
Assembly
– Open your binder and center it on top of your Cake. (Photo #3)
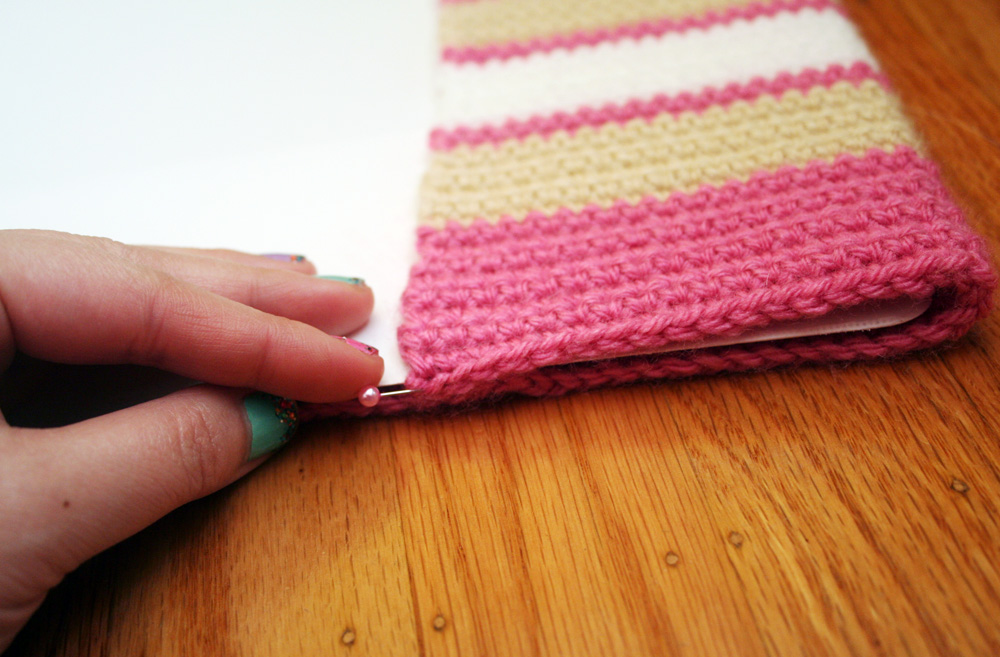
– Fold the Cake edges over and pin them at the tops and bottoms. (Photo #4) Close your binder and check how the Cake fits all around. Tighten or loosen pins as you see fit.
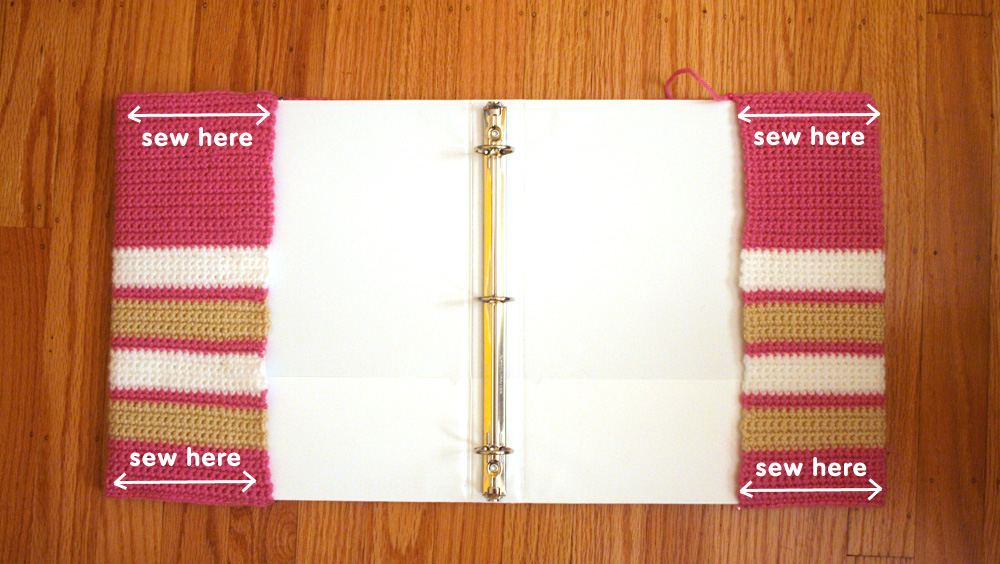
– Using Pink yarn, sew down the Cake edges that form the pockets for your cozy. (Photo #5)
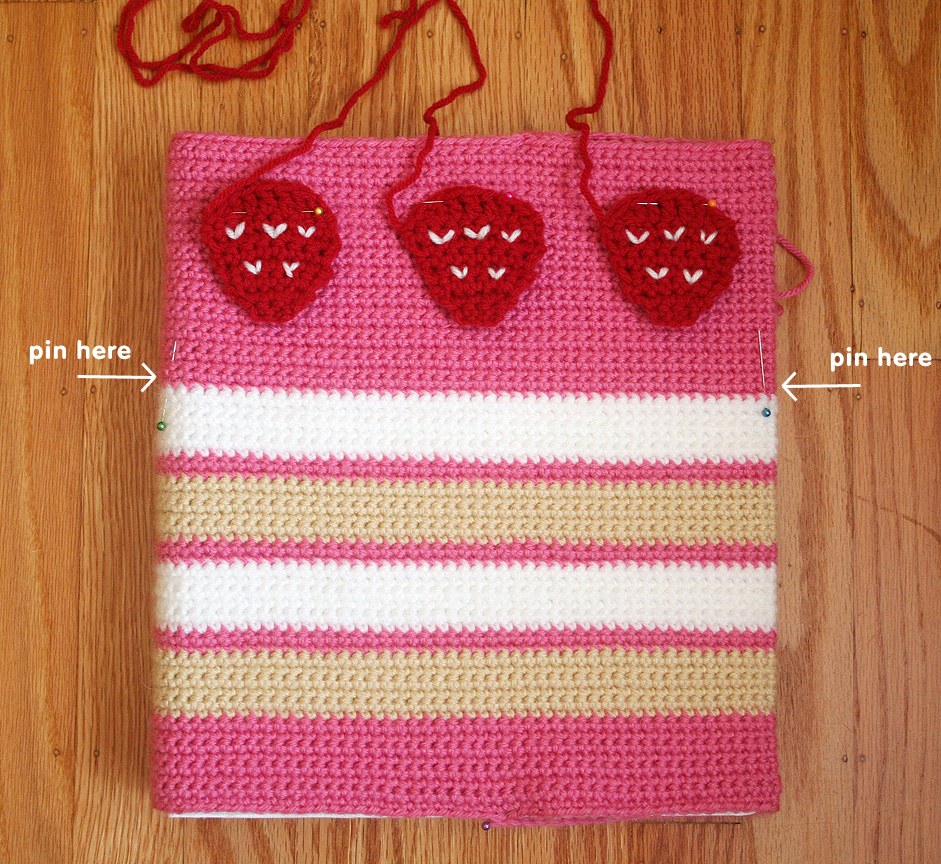
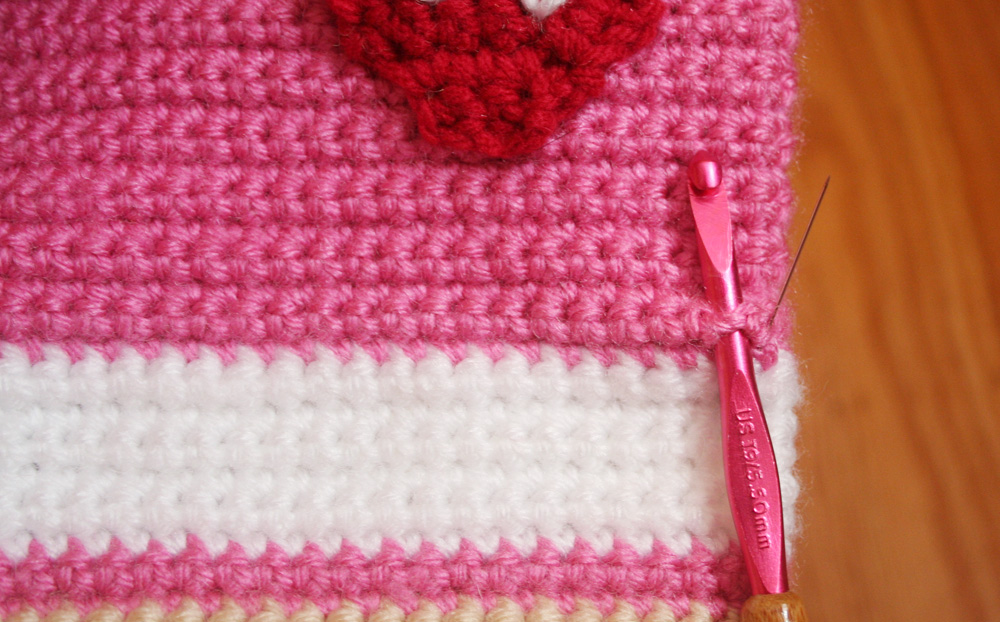
– On the front of your binder, with the cozy on, arrange your strawberries and pin them in place. With pins, mark the left and right edges of the binder between Rows 39 and 40 (the first two rows of your last Pink section). (Photo #6)
– Remove the cozy. An easy way to get the cozy on and off your binder without stretching it out is to open your binder and fold it all the way back. The cozy will slide off easily.
– Sew down your strawberries.
– Thread about 18 inches of Fern on a tapestry needle and stitch on the strawberry leaves. (Photo #7)
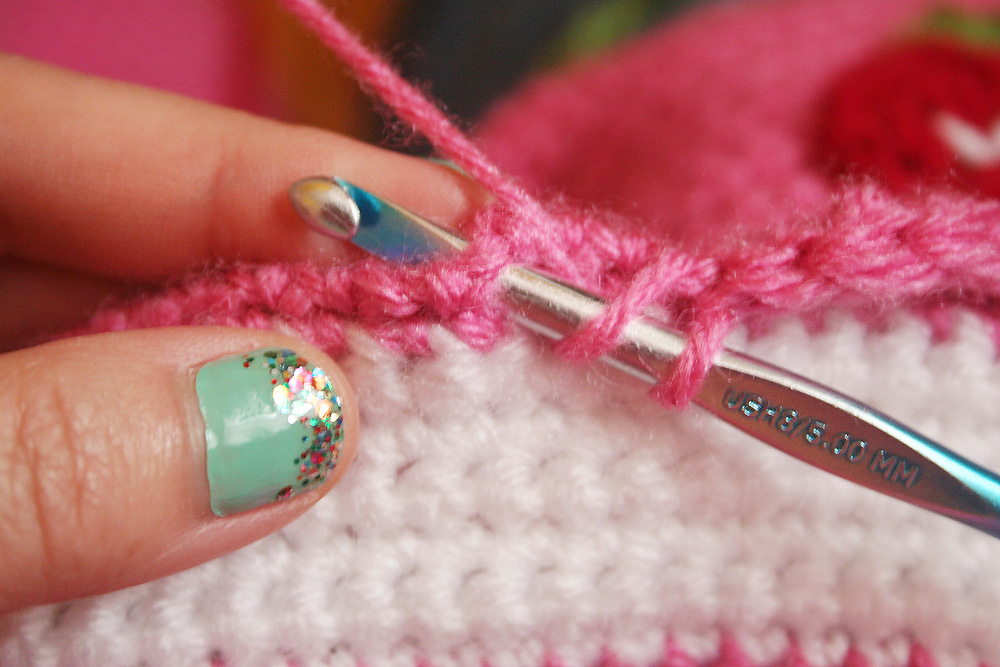
– Finally, create a cute frosting accent on the front with some surface crochet scallops. Insert your crochet hook next to the pin on the right and join Pink yarn. (Photo #8)
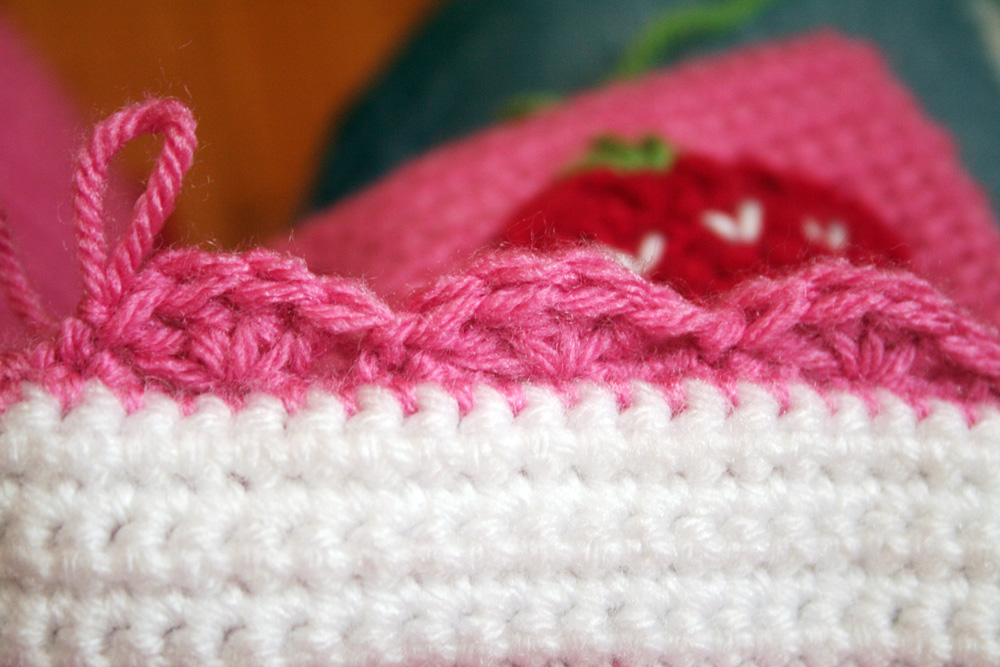
– [Sk 2 stitch spaces, then work 4 dc into the 3rd space from your hook. (Photo #9) Sk 2 more stitch spaces and then sl st.] Repeat this scallop until you reach the pin you placed on the left of the binder. (Photo #10) I had to work a little past my pin but it’s not a big deal. After your last sl st, break off and weave in ends.
– Fold your binder back again to easily slide the cozy back on. Have fun! xo

